

Starting January 31, 2026, Marketo has announced that its REST API will no longer accept access tokens for authentication and authorization via the access_token query parameter.
The Qualified integration with Marketo does not use this query parameter and therefore is unaffected by this change. Marketo functionality should continue uninterrupted.
By syncing Marketo with Qualified, you give your sales team and Piper the AI SDR a massive advantage. You can pull rich lead data directly from Marketo to populate the Visitor 360, create powerful segments from your static and smart lists, and have more intelligent, targeted conversations with your website visitors.
Prerequisites: Configuring Marketo for API Access
Before you can establish the connection, you'll need to configure a few items within your Marketo account to allow secure API access. We recommend working closely with your Marketo administrator to complete these prerequisite steps.
Here's an overview of what you'll need to set up in Marketo:
-
An API Role: Create a new role with a name like "Qualified API Role" (Marketo documentation: Create an API Only User Role). This role must have the following Access API permissions enabled:
-
Read-Only Assets -
Read-Write Activity -
Read-Write Activity Metadata -
Read-Write Person
-
-
An API-Only User: Create a new user (e.g., "Qualified API User") and assign it the new "Qualified API Role" you just created. Ensure the API Only box is checked for this user (Marketo documentation: Create an API Only User).
-
A Custom LaunchPoint Service: Create a new custom service (e.g., "Qualified API"). In the service settings, select the new API Only User you created in the previous step (Marketo documentation: Create a Custom Service for Use with ReST API).
Once this configuration is complete, you will be able to gather the three credentials required to connect to Qualified.
A Note on API Usage: We understand that API calls are a valuable resource. If you need to manage your usage, please reach out to your Qualified Success Architect. They can help set a daily API call limit or adjust settings to prevent calls for anonymous visitors
Step 1: Gather Your Marketo API Credentials
After setting up the items above, locate and copy the following three values from your Marketo Admin panel. You'll need them for the final step.
-
Munchkin Account ID: Found in
Admin → Munchkin. -
Client ID: Found by clicking "View Details" on your new custom LaunchPoint service.
-
Client Secret: Found in the same "View Details" modal as the Client ID.
Step 2: Connect Your Accounts in Qualified
With your three API credentials in hand, you're ready to make the connection.
-
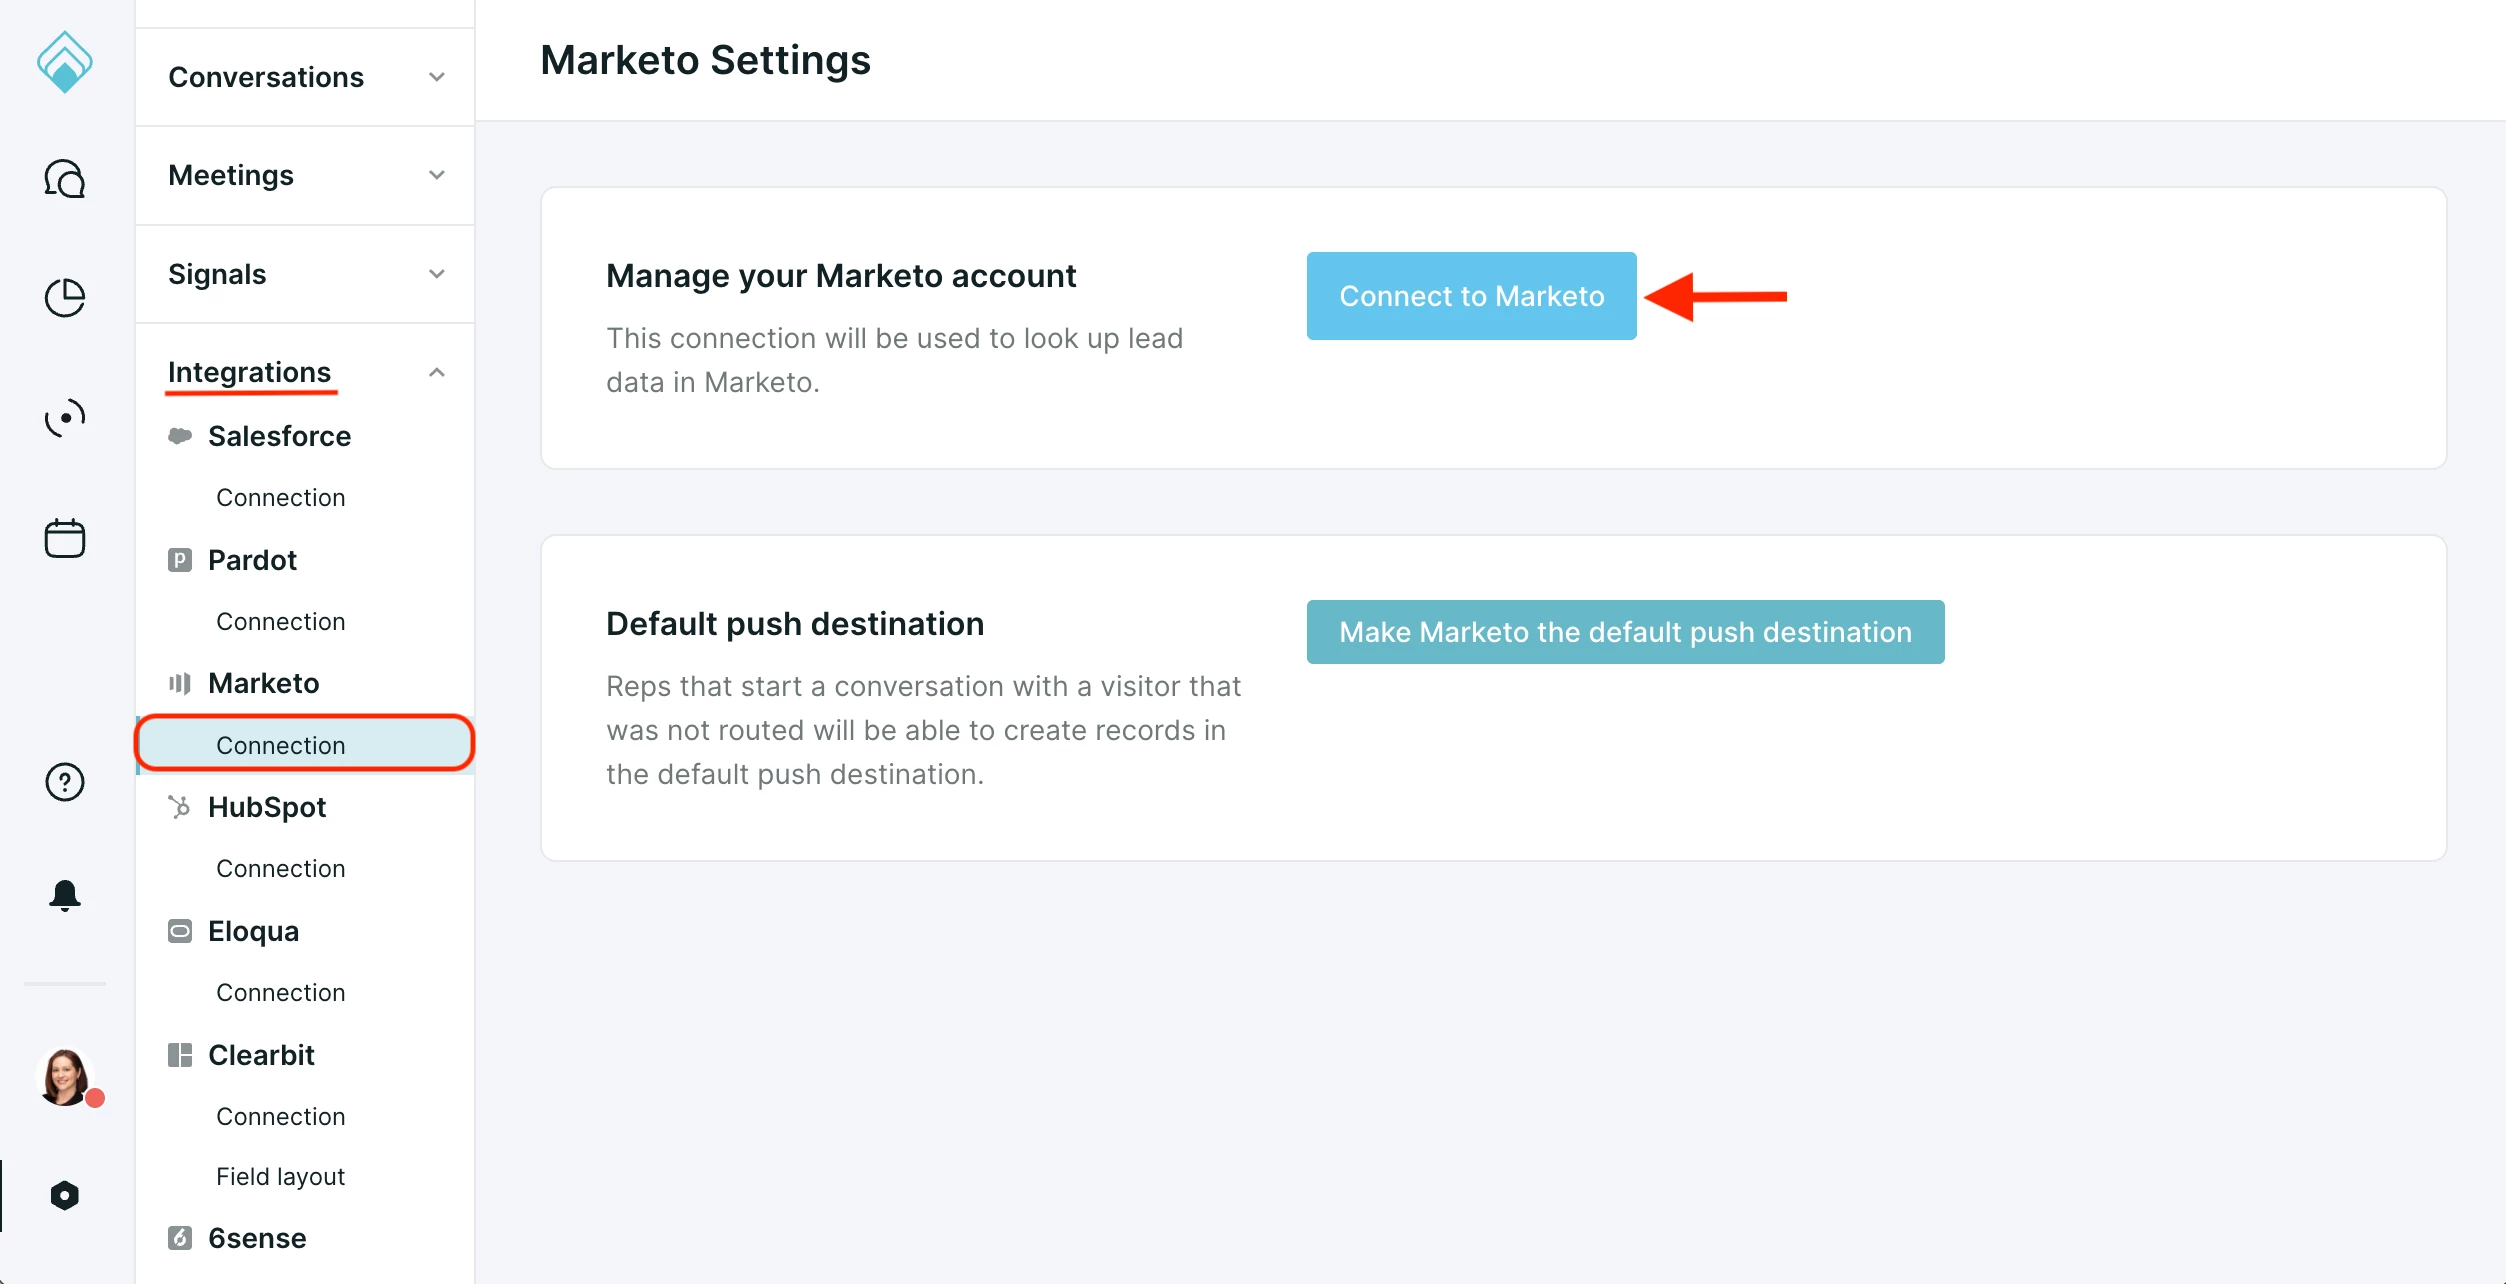
As a Qualified Admin, navigate to Settings → Integrations → Marketo → Connection, and click the Connect to Marketo button.
-
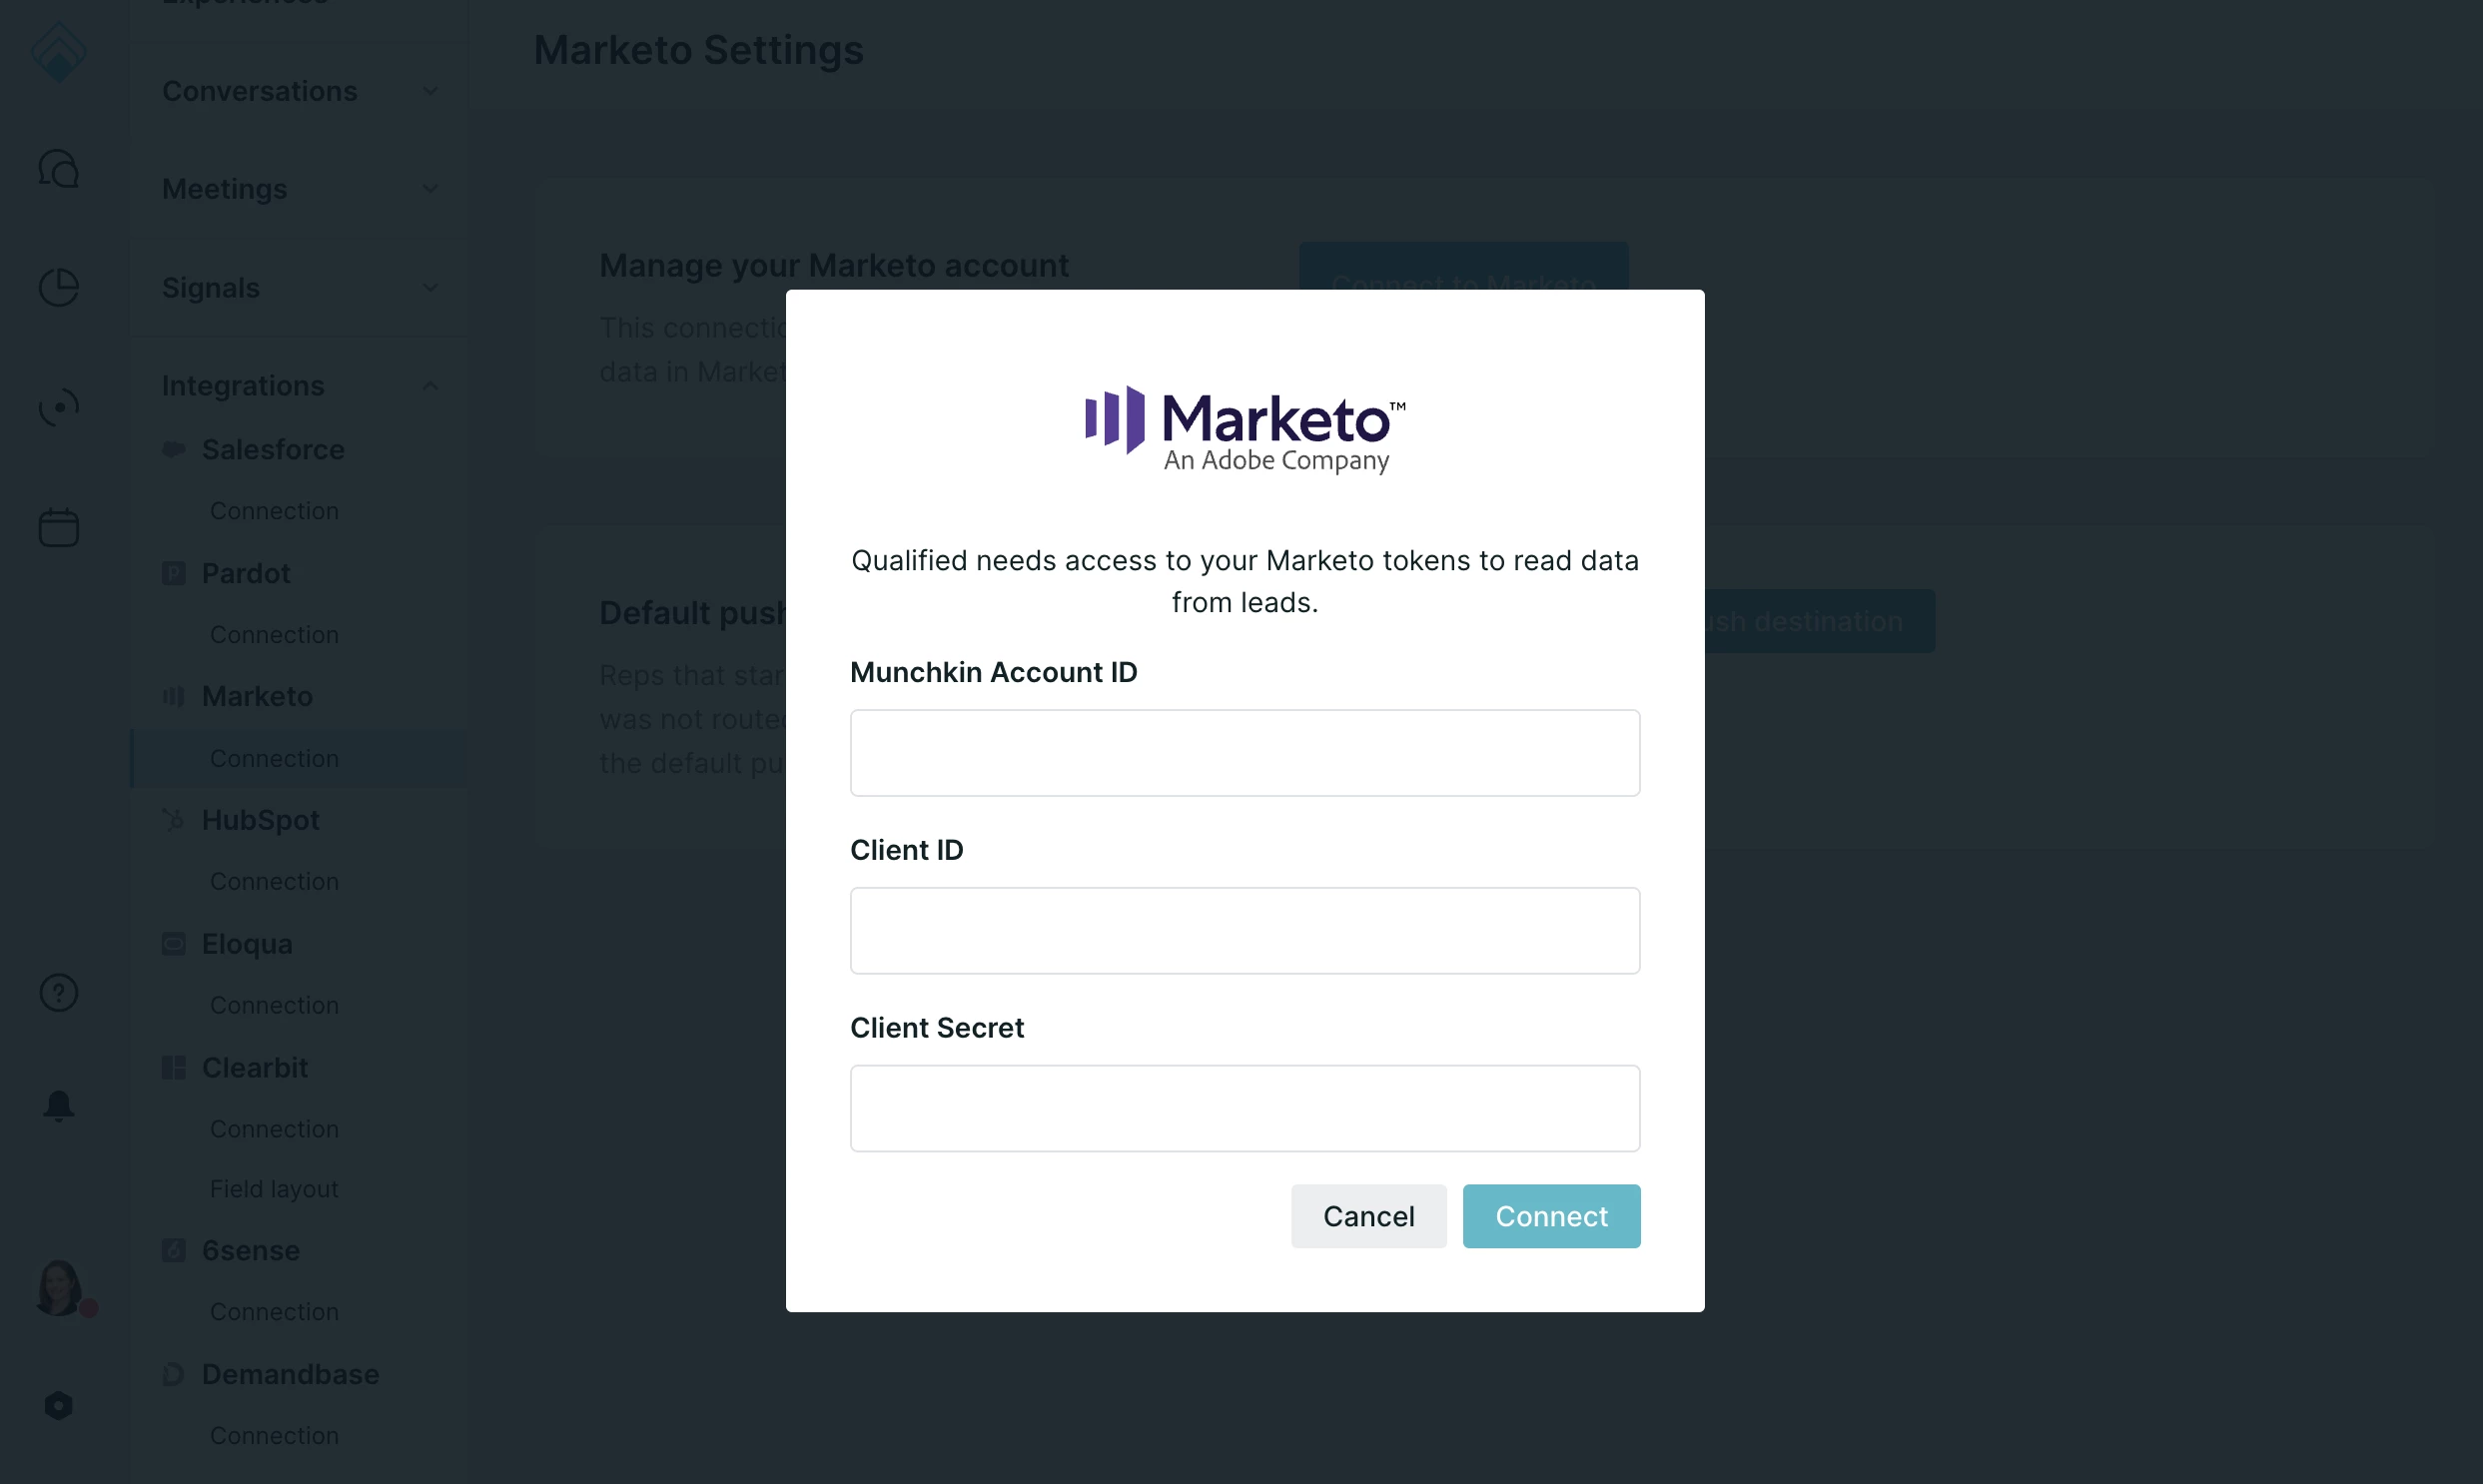
Carefully enter your Munchkin Account ID, Client ID, and Client Secret into the corresponding fields, then click Connect. (Be sure to check for any extra spaces, especially on the Munchkin ID!)
Step 3: Configure Your Integration Settings
Now that Marketo is connected, you can configure a few key settings to optimize how the two platforms work together.
Enable Activity Logging
This is a powerful feature that gives your entire team visibility into every website interaction.
-
Navigate to Settings → Integrations → Marketo → Connection.
-
Click the Enable pushing activities button.
This allows Qualified to automatically log conversations and booked meetings as activities on your lead records in Marketo. These activities include key details like the conversation subject, a link to the Playback URL, and the full chat transcript, giving your team a complete history of every engagement.
Important Notes:
-
There can be a short delay (up to 5 minutes) after you click the button for the change to be active in Marketo.
-
The Playback URL and Chat Transcript are incredibly valuable fields. If you don't see them appearing in your Marketo activities, please reach out to your Qualified Success Architect to have them enabled for your account.
-
Marketo displays the Playback URL as plain text. Simply copy and paste it into your browser to view the activity record in Qualified.
Configure Other Settings
-
Default Push Destination: Set Marketo as your default destination to ensure that when reps "pounce" on anonymous visitors, they can effortlessly create or update contacts in Marketo.
-
Marketo Fields: When you add or change contact fields in Marketo, click the Update fields button here to sync those changes into Qualified, making them available in the Visitor 360
And that's it! 🎉 Your Marketo instance is now connected, feeding valuable data into the Qualified platform to help you generate more pipeline.
Learn more about the Marketo integration


.svg)


