

Once you connect your calendar, Qualified helps visitors book meetings on your calendar. Update your personal calendar preferences so the meeting booker automatically schedules visitor meetings that fit your calendar availability.
Connect your calendar
To connect your calendar, follow these steps:
- Navigate to Settings → Profile.
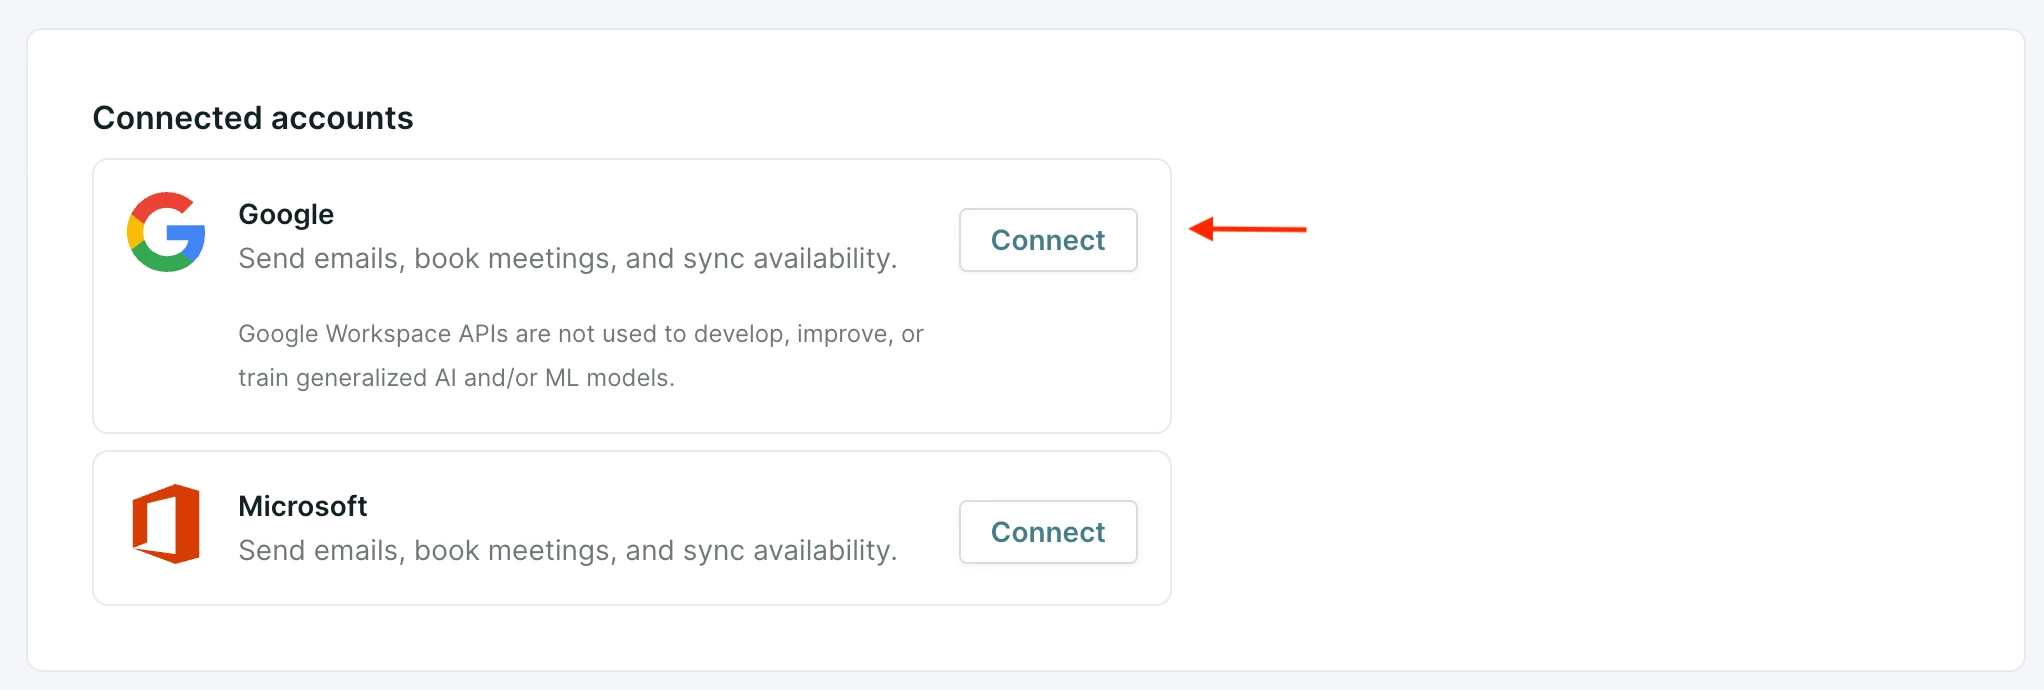
- Scroll to the Connected Accounts section.
- Depending on your calendar platform, follow the steps to connect your Google or Microsoft calendar.
Google Calendar:
- Click Connect next to Google:
- Select your Google account or enter your Google login details.
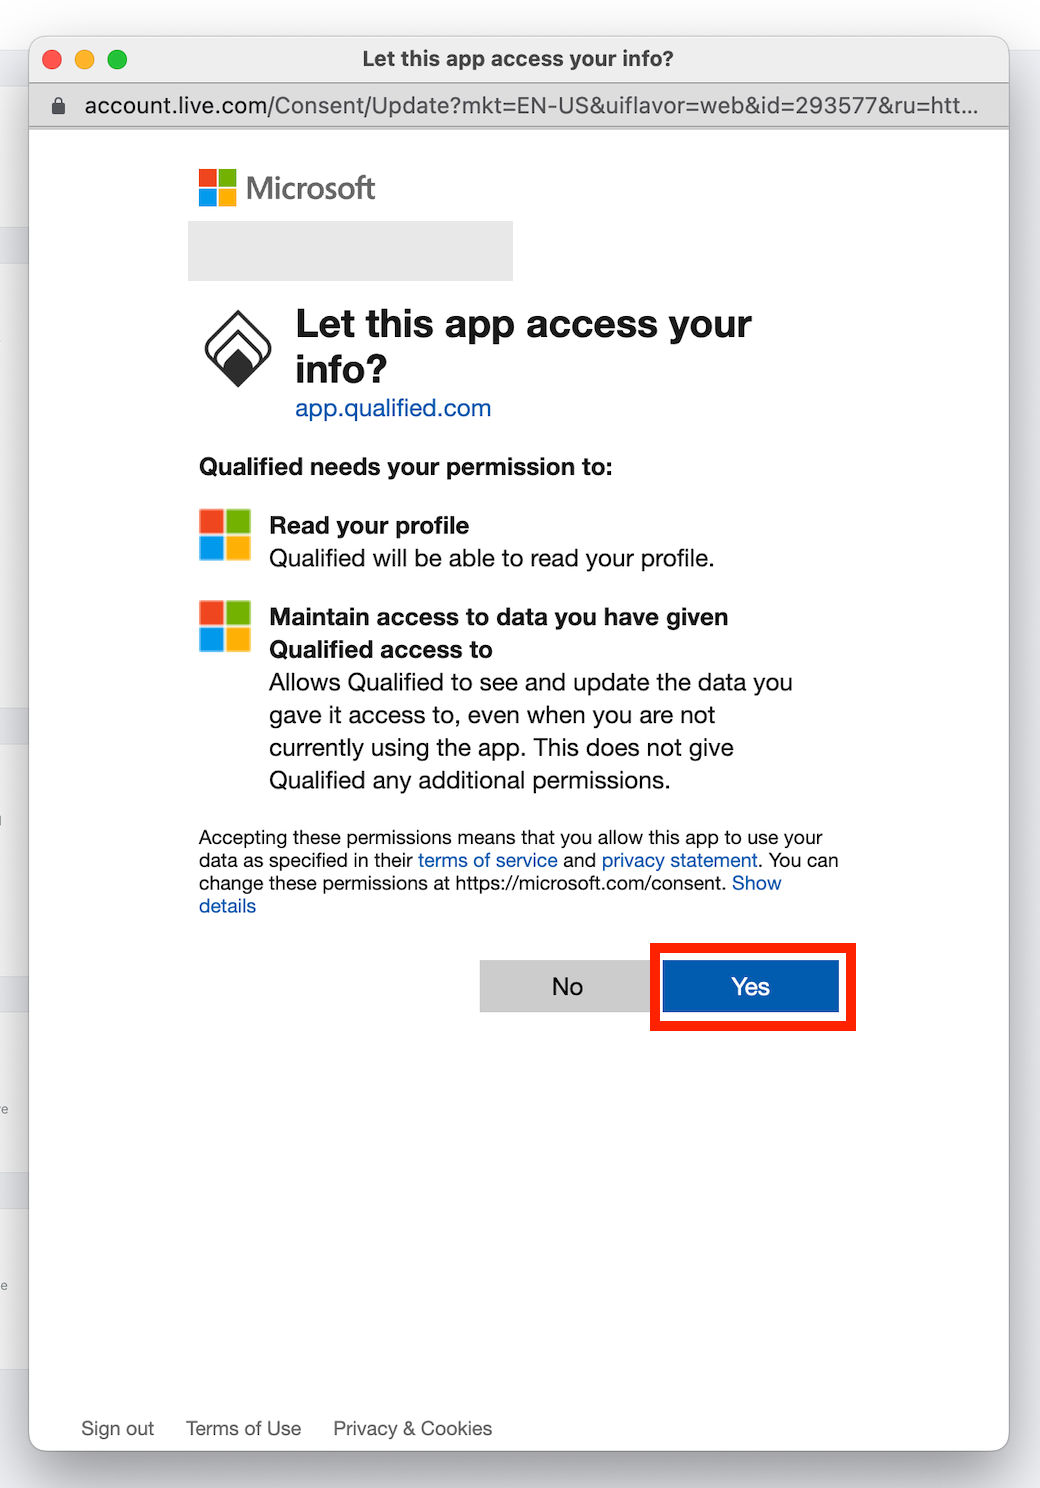
- If prompted, check all permission levels to grant Qualified access to your calendar and click Continue.
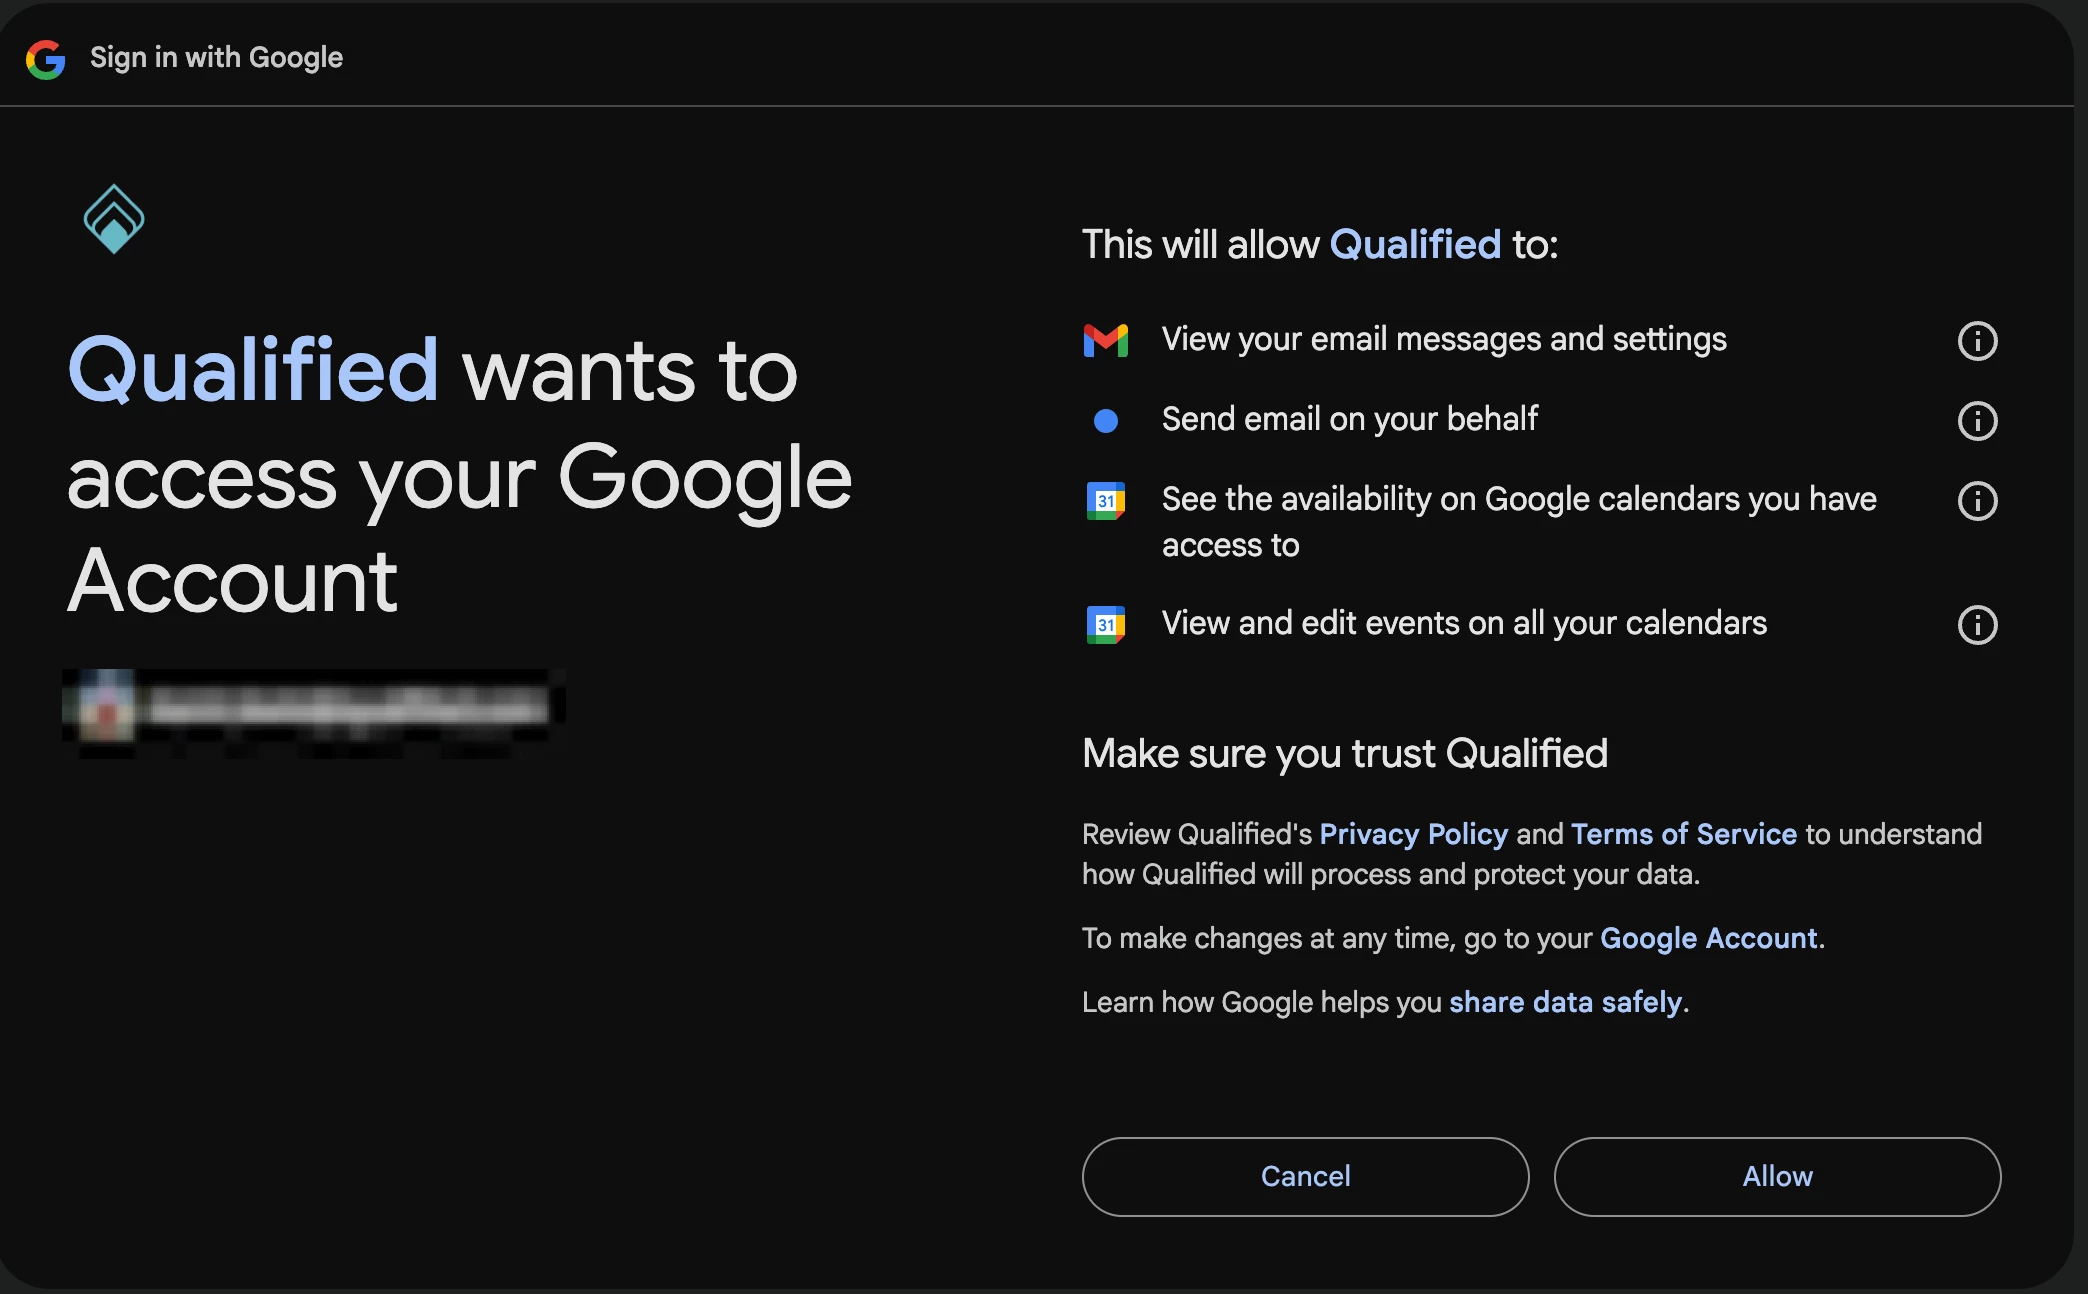
- Click Allow
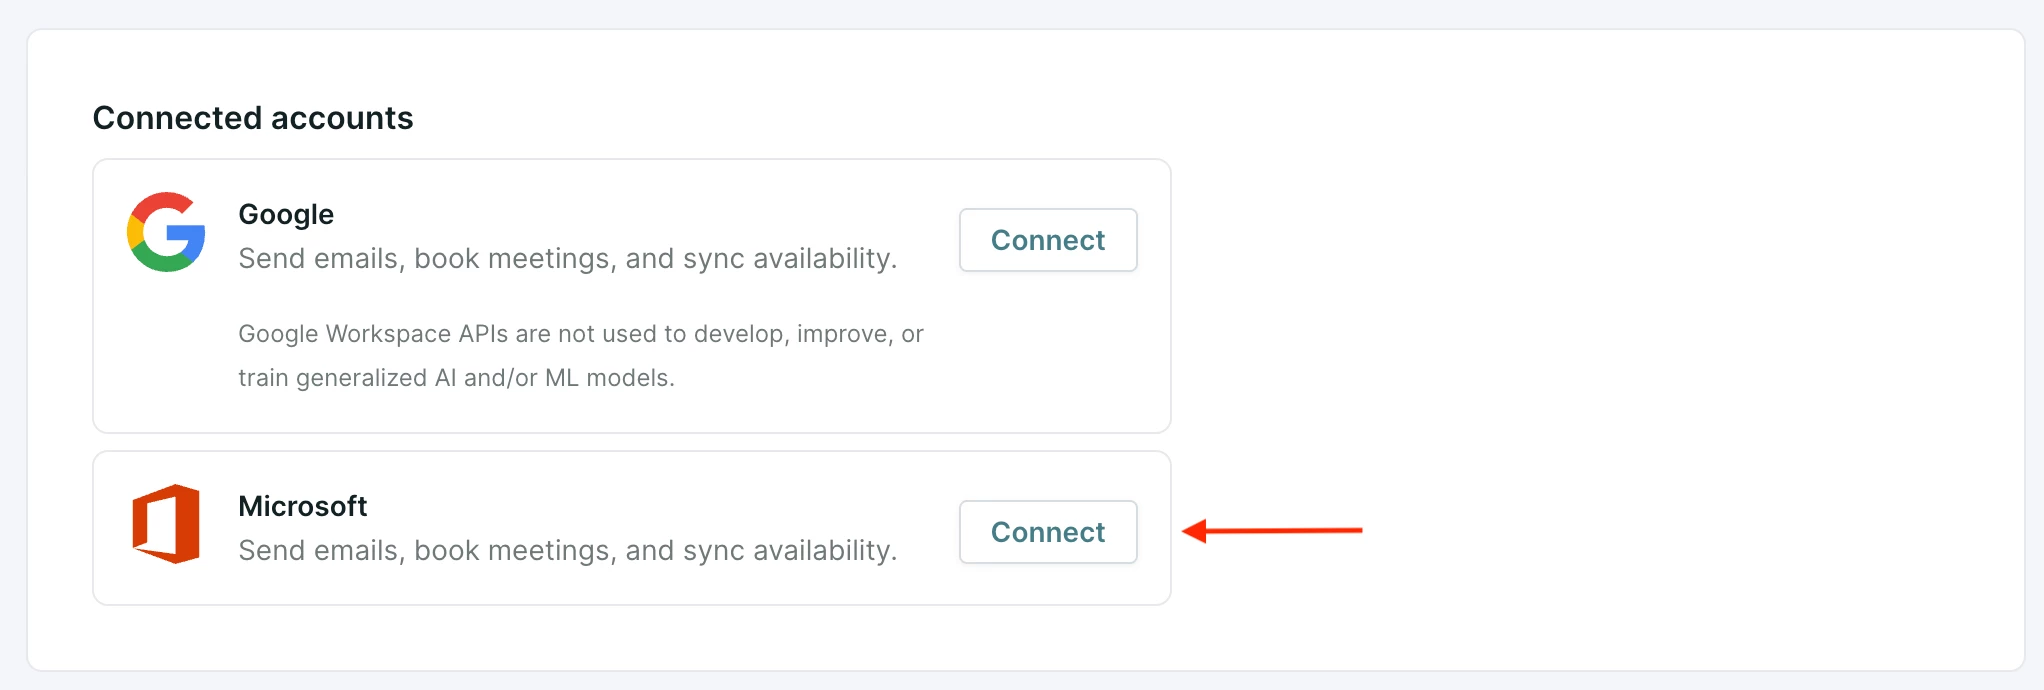
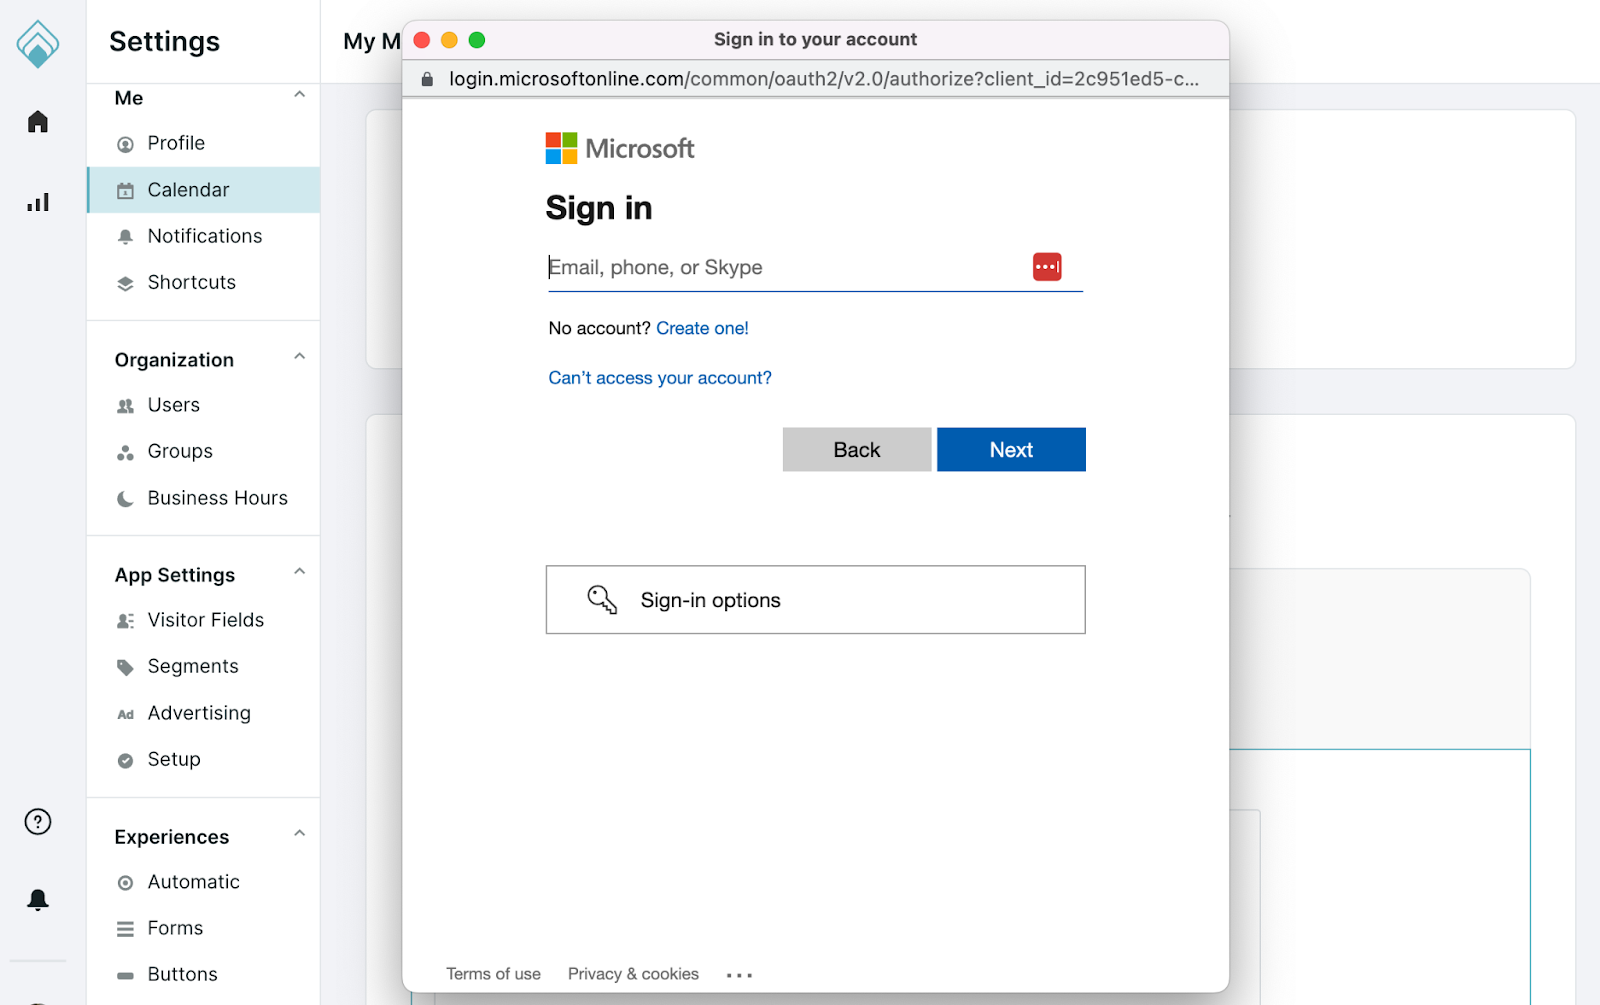
Microsoft Outlook Calendar
- Click Connect next to Microsoft:
- Select your Microsoft account or enter your Microsoft Outlook login details.
- Click Accept.
If you see a “Need admin approval” error, ask your Microsoft Azure admin to follow the steps here to approve our application's consent request. Minimally, we need the following permissions:
Calendars.ReadWrite
User.Read
offline_access
Mail.ReadWrite
Mail.Send
- To ensure meetings booked by Qualified appear in the correct time zone on your calendar, verify that the time zone in your Microsoft account is accurate, and un-check the Timezone option on your calendar events.
Qualified uses OAuth2 and the Microsoft Graph API to view and create events on your reps' calendars. This API works with most work, personal, and school Microsoft Outlook accounts.
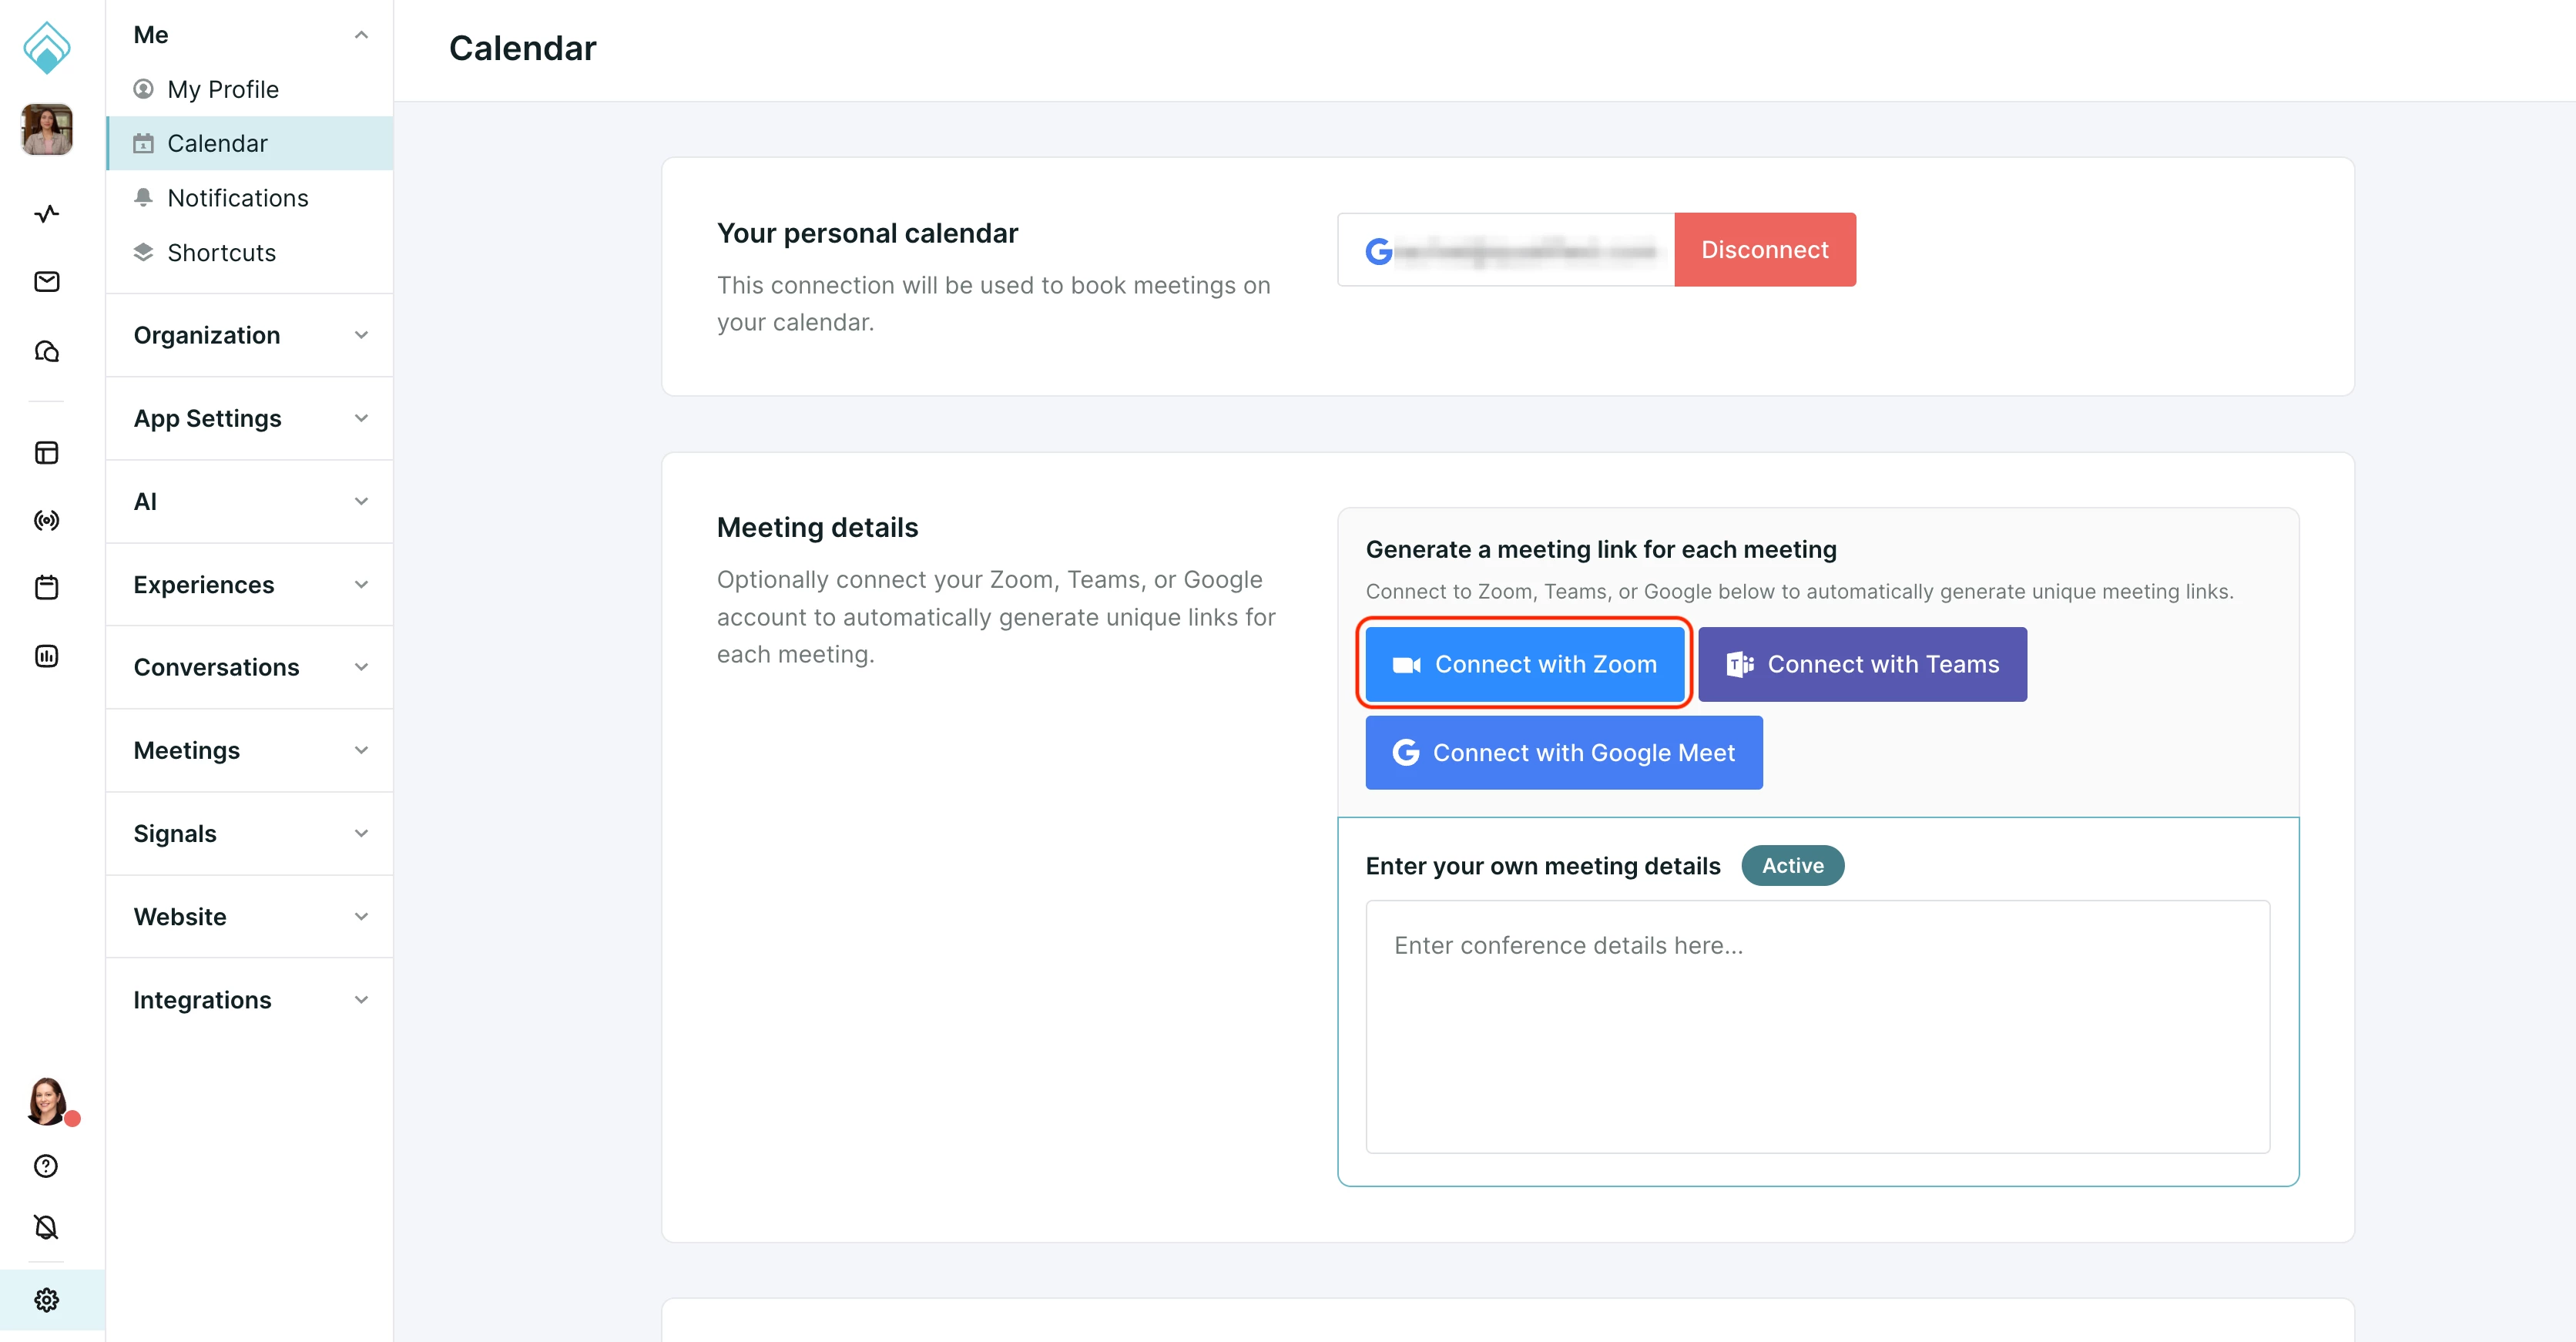
Configure meeting details
Connect with Zoom, Teams, or Google Meet to automatically generate a unique meeting link for each meeting book via Qualified. If you do not have access to Zoom, Teams, or Google Meet, you can enter your own meeting details such as a static personal meeting link and/or phone number that all meeting attendees will use to join.
To connect your meeting platform, navigate to Settings → Calendar. Depending on your platform, follow the instructions below.
Connect with Zoom
- Click Connect with Zoom to begin.
- Login to Zoom using your Zoom credentials. You may also be required to verify your identity by entering a code sent to your email.
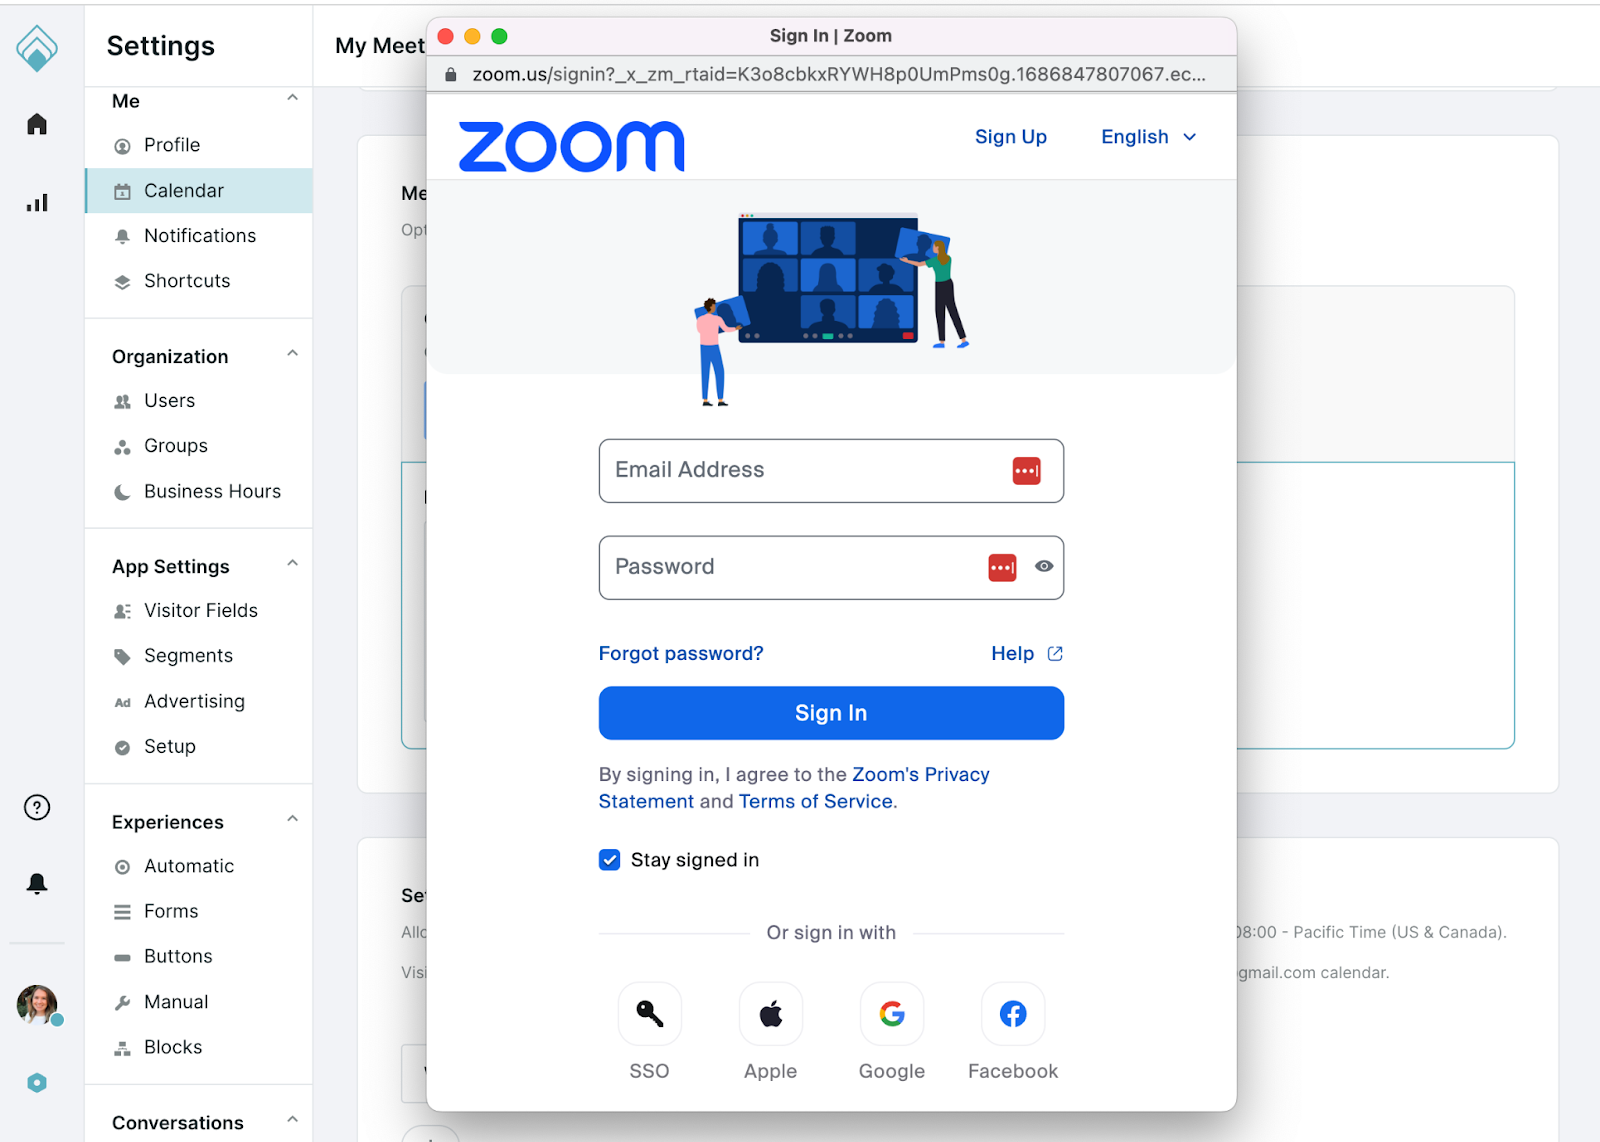
- Optionally, check the “Allow this app to use my shared access permissions” option. This checkbox does not affect the functionality of the Qualified app and can be left either checked or unchecked when authorizing the Zoom app. To proceed, click Allow.
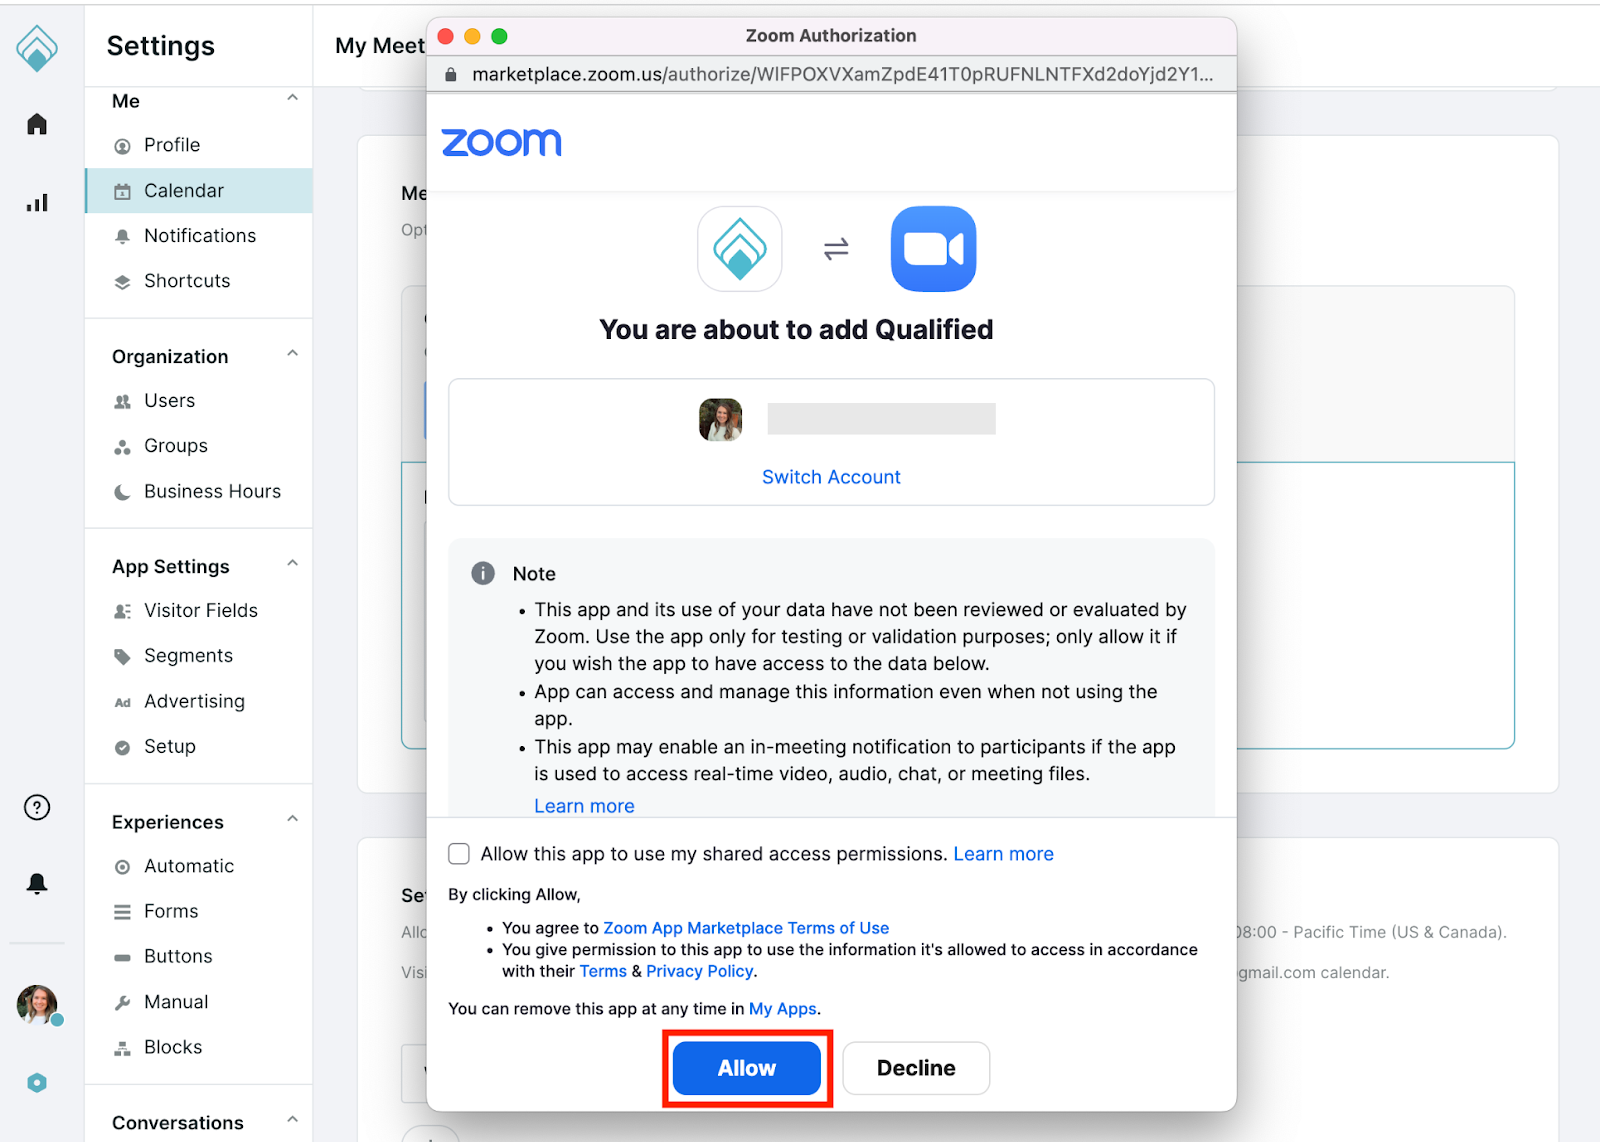
- Depending on your team's Zoom settings, you may see the option to Request Pre-approval. If so, approval for any new app is required by your Zoom admin. Once approved by your admin, you will be able to connect.
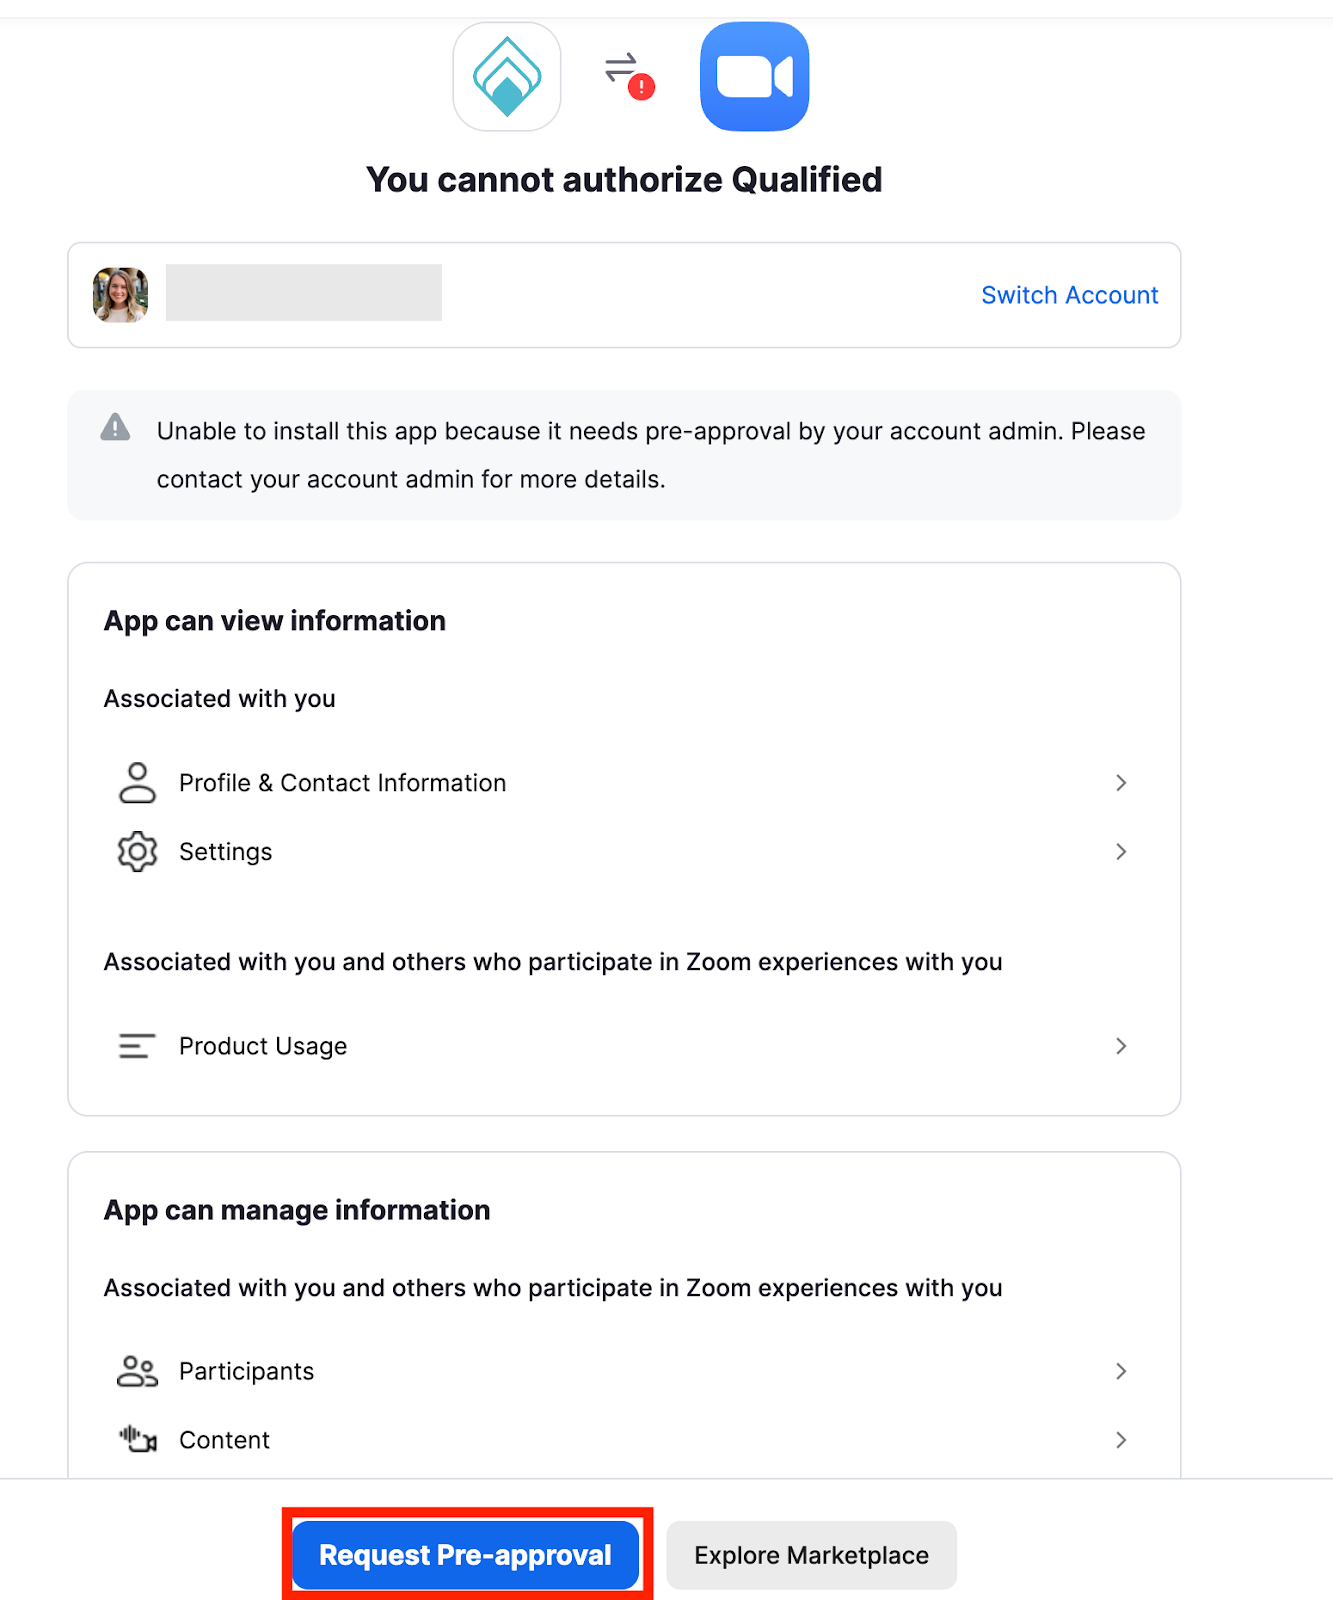
IMPORTANT! Admins can find our marketplace app listing, here, and will need to enable the “Approve use of this app” toggle in the “App permissions” section. Admins should then see Qualified listed in the “Apps on Account” list.
Connect with Teams
- Click Connect with Teams to begin.
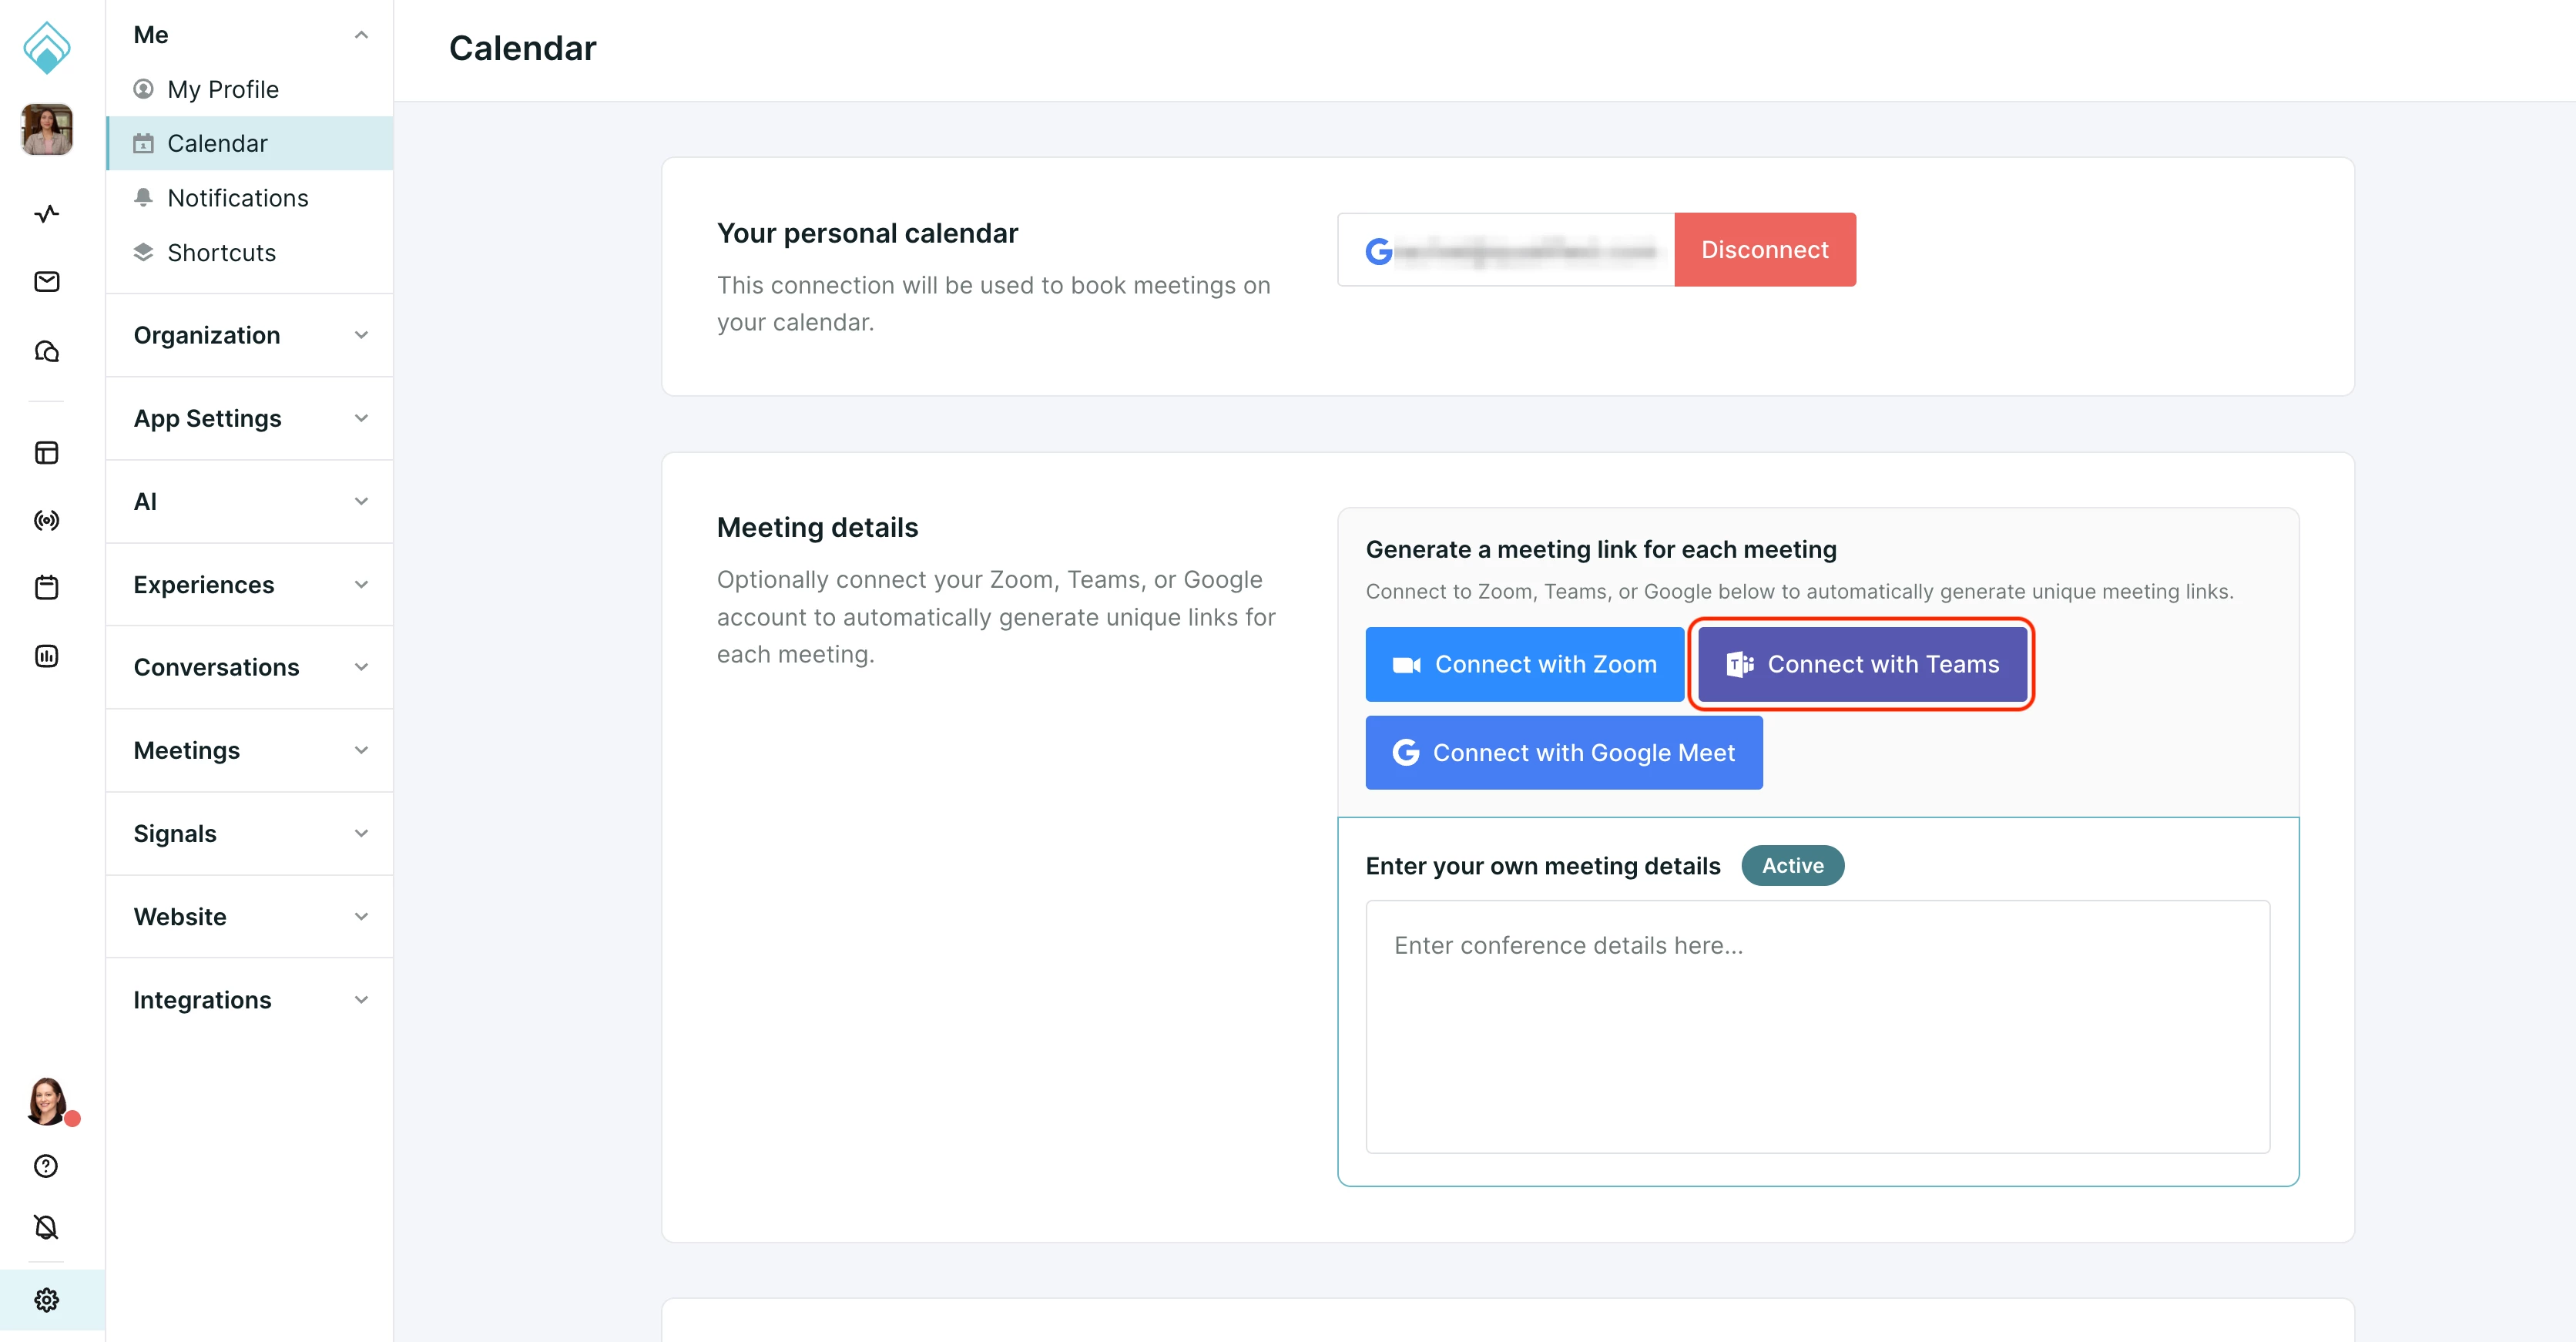
- Login to Teams using your Team credentials.
- When prompted, click Yes to allow app permissions.
Connect with Google Meet
- Click Connect with Google Meet to begin.
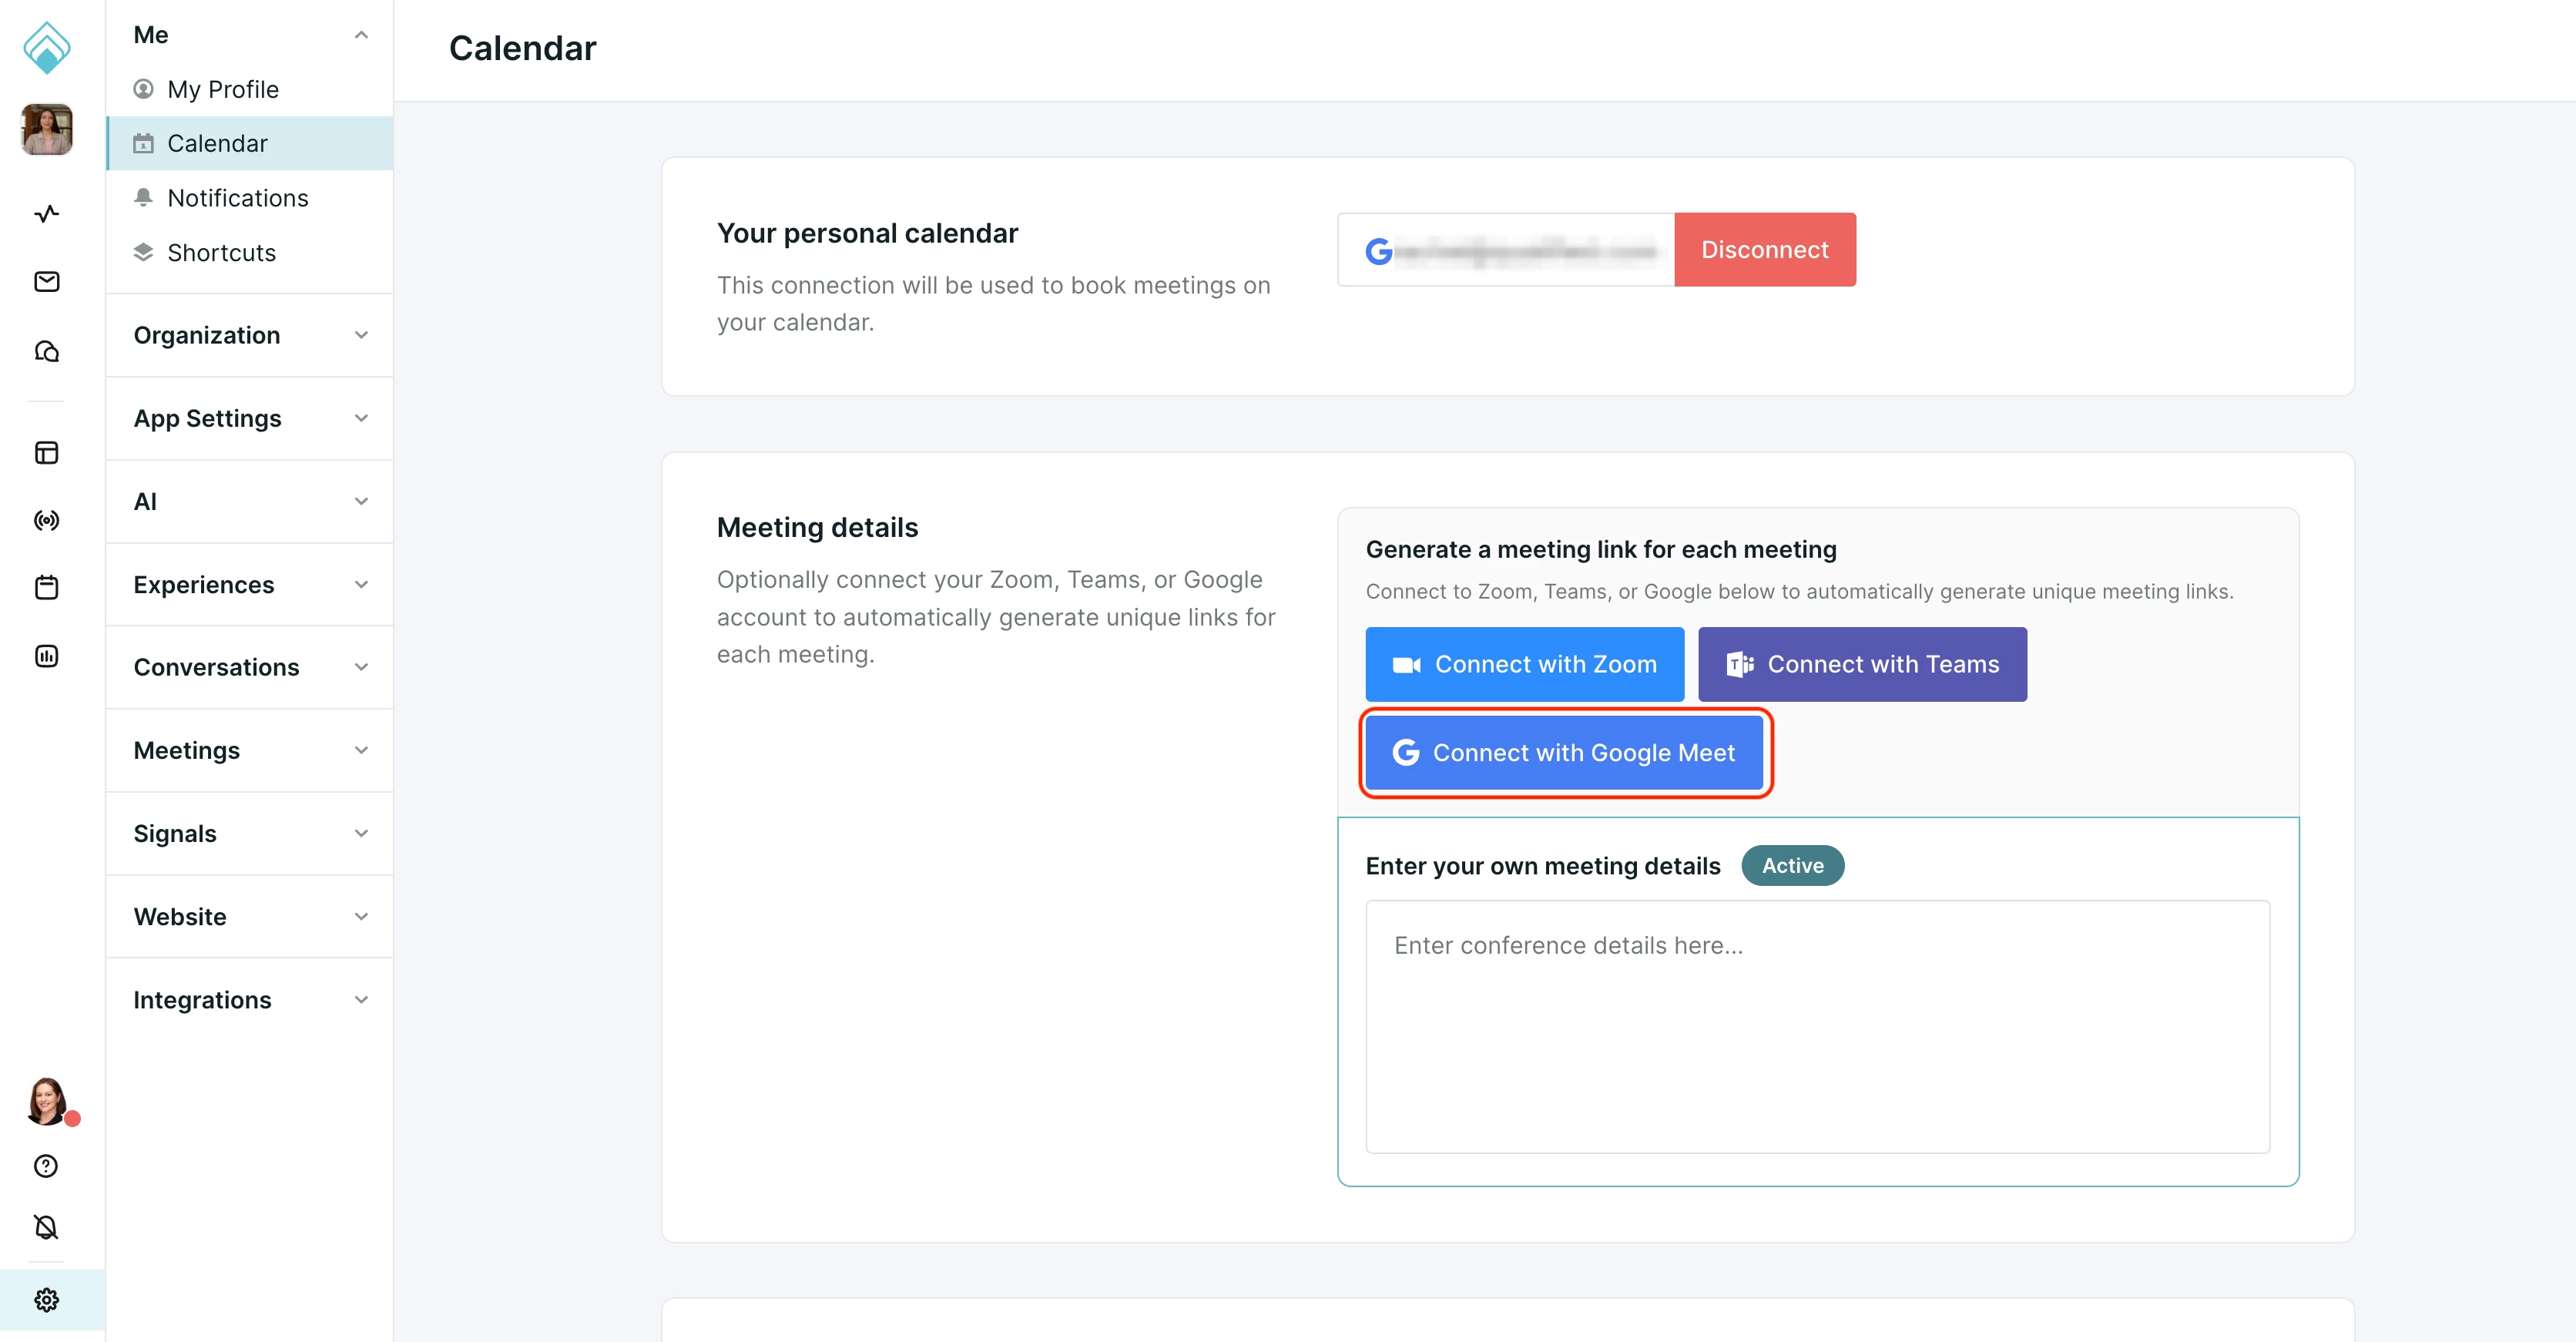
- Sign in with your google credentials.
- When prompted, click Yes to allow app permissions.
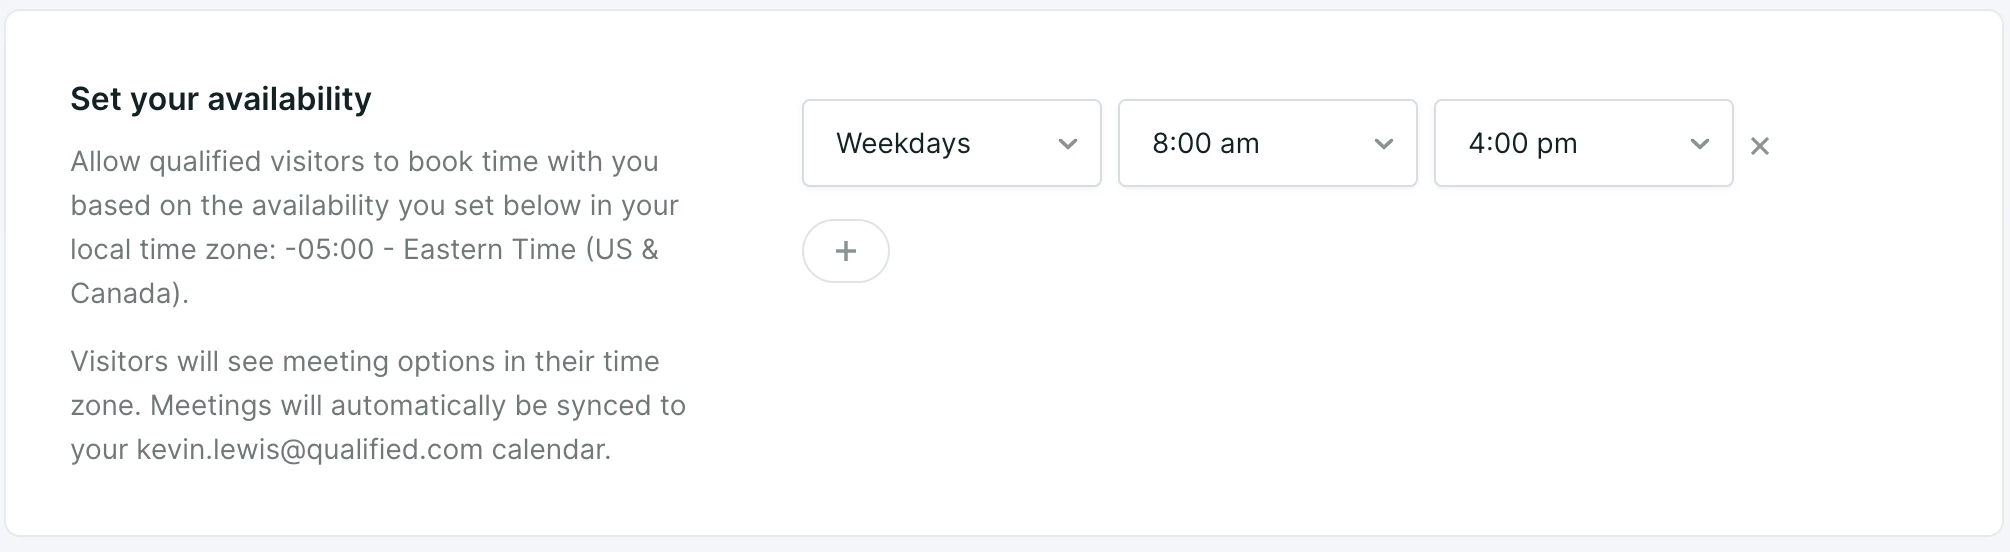
Customize meeting preferences
- Navigate to Settings → Calendar.
- Review and adjust these settings:
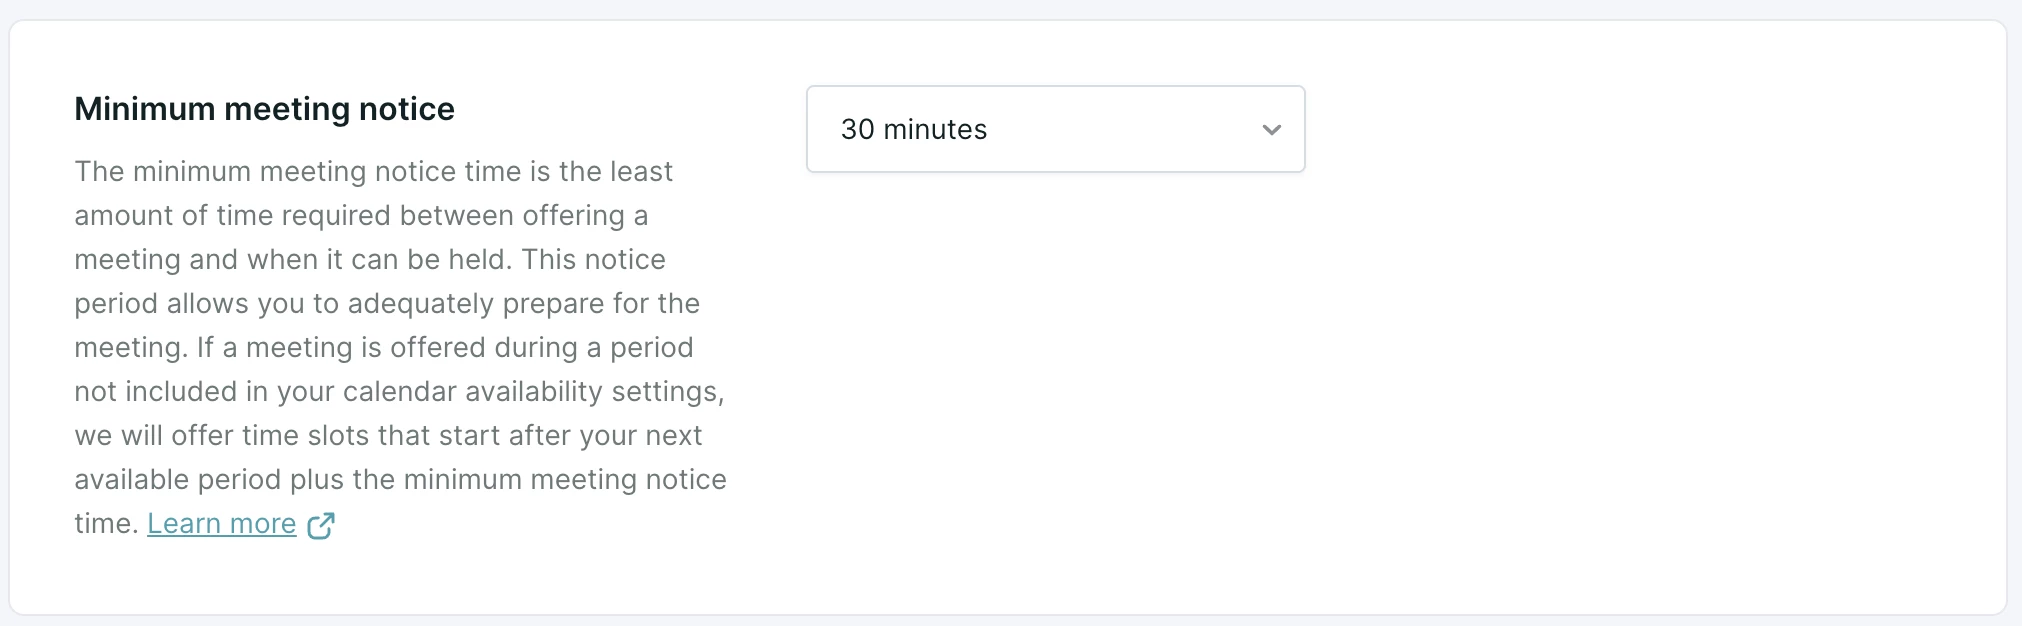
- Set your availability: The weekly time period that Qualified is allowed to schedule events, such as weekdays between 8:00 am-4:00 pm.
- Minimum meeting notice: The amount of time between when a website visitor requests a meeting and the first schedule opening offered. If a visitor is shown the meeting booker at 1:00 pm and the Minimum meeting notice is 30 minutes, for example, the next available meeting offered will be 1:30 pm.
- Buffer between meetings: The minimum time you want between back-to-back meetings. Grant yourself time for a quick break between calls to grab water or stretch.

- Click Save.
IMPORTANT! As you get started with Qualified, we recommend keeping the defaults as-is for Minimum meeting notice (30 minutes) and Buffer between meetings (5 minutes). With a wide-open calendar, it’s easier to book more prospect meetings.


.svg)


