


You can now assign a specific theme to an individual meeting type or meeting landing page, so each booking page can carry its own branding instead of always inheriting your org's default theme.
How custom meeting themes work
Previously, a booking page could only use your org's default theme. There was no way to give a specific meeting type or landing page its own look.
Now, you can create additional themes and assign one directly to a meeting type or a meeting landing page. That page will use its assigned theme's logo, colors, header, and welcome message instead of the default.
If a meeting type or landing page doesn't have a theme assigned, or if it's explicitly set to Default theme, it continues to use your org's default theme just as it always has.
Note: To enable custom meeting themes for your organization, contact your Qualified Success Architect (QSA).
Assigning a theme to a meeting type
- Go to Settings and open the meeting type you want to update.
- In that meeting type's Meeting settings, find the Meeting theme card.
- Choose the theme you want from the dropdown.

Assigning a theme to a meeting landing page
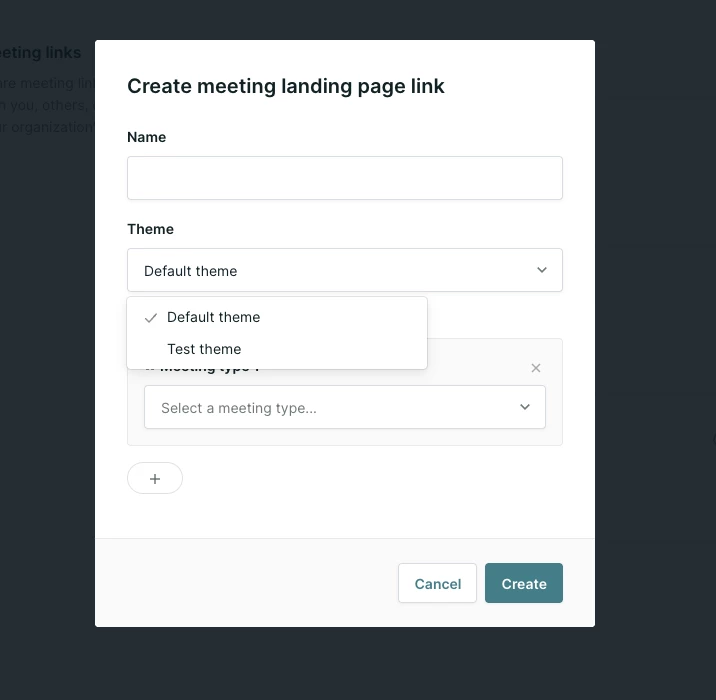
- Open the landing page's edit dialog.
- Use the Theme picker to select the theme you want for that page.
Things to know
Both the meeting type and landing page pickers show Default theme plus any custom themes your org has created. If your org hasn't created a custom theme yet, there's nothing else to choose from, so the picker won't appear until you create one.
If you delete a theme that's currently assigned to a meeting type or landing page, that booking page automatically falls back to your org's default theme. No error is shown to the visitor, so it's worth checking your booking pages after deleting a theme to confirm they still look the way you expect.


.svg)


