


Build Signals account lists to review your high-priority visitors in one place. For example, create a list for “Heating or Surging Accounts” or one for each of your account executives’ open opportunities.
Create new account lists
Admin and conversations users can create Signals account lists by following these steps:
- Click the Signals icon from the left panel.
- Next to Lists, click the + icon.
- Click Apply and Save As… from the upper-right corner.
- Enter your list’s title.
- (Optional) If you check Share with org, everyone will be able to access it under Org Lists.
- Click Save.
Customize which columns appear in your Signals account list report by following these steps:
- From the upper-right corner, click the Edit Columns icon.
- Select the Qualified Signals and Salesforce fields you want in individual columns. This customizes which columns appear in the Qualified app and your CSV exports.
Filter your account lists
Apply filters
All Intents and Trends are included in new account lists by default. To narrow down which accounts appear, click the filter icon and choose between In Salesforce and Not in Salesforce accounts:
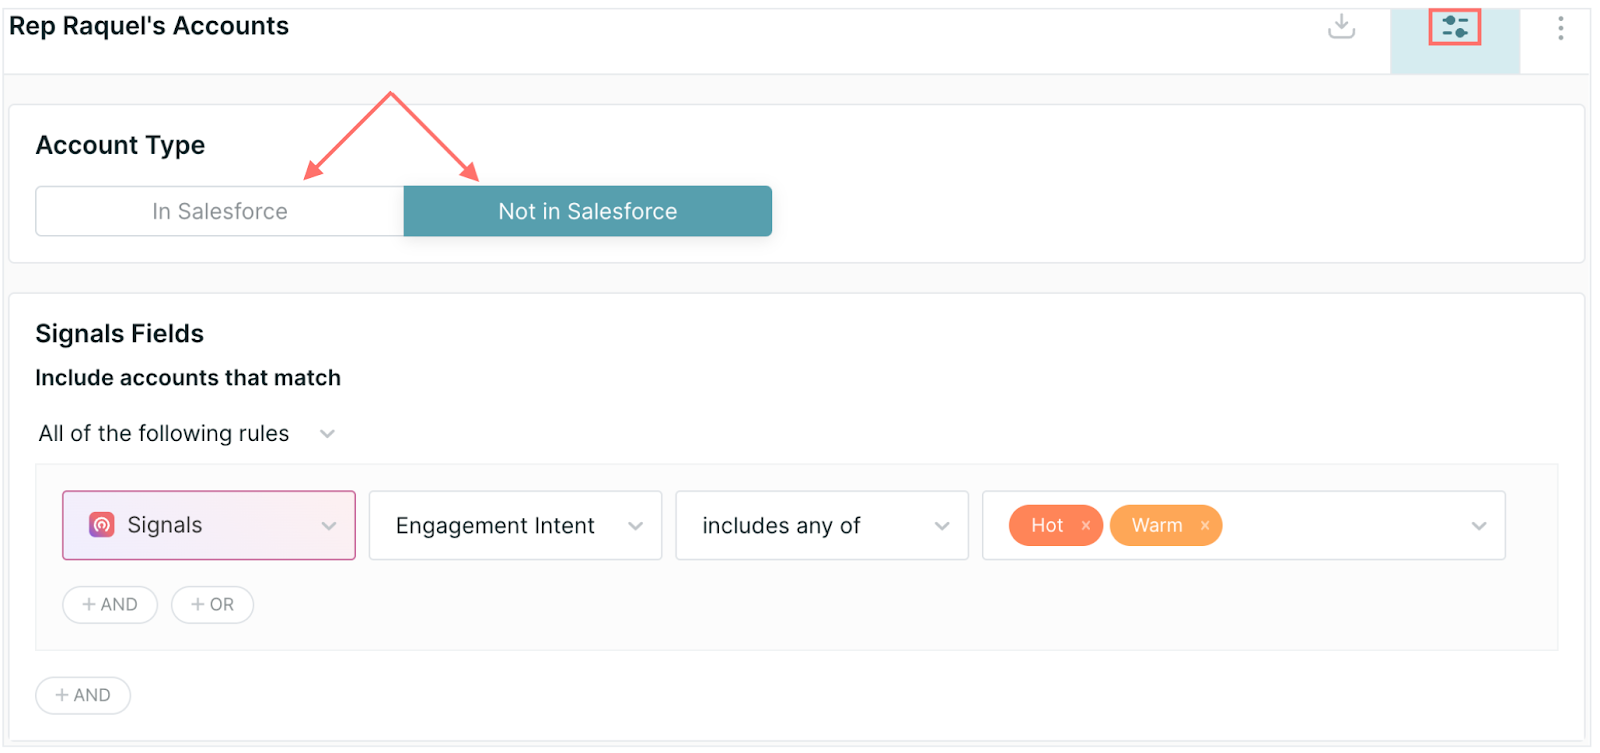
Click +Add Filter to create filters based on Signals data, like accounts with a Hot Engagement Intent or specific Salesforce account and opportunity fields. When your filters are ready, click Apply and Save.
Signals account list filters query your Salesforce database directly, rather than the Qualified database, so some Salesforce fields may be unavailable.
Create ideal customer profile filters
Learn how to build an ideal customer profile (ICP) to identify which visitors aren’t in your Salesforce instance yet but demonstrate buying intent.



.svg)


