


Within Qualified's settings, admins have the ability to manage permissions and users. This article covers the core concepts of User Profiles and the day-to-day tasks of provisioning, managing, and deactivating users.
User Profiles
User Profiles are the foundation of managing permissions and access for your team. You can use our default profiles for common roles or create custom profiles to grant granular access to specific features.
A Note for Existing Customers
User Profiles are our new and improved system for managing permissions, replacing the legacy "Roles" system. If you do not see a Profiles tab under Settings, your organization has not yet been migrated.
Please see our community post for full details on how to migrate.
Default Profiles
Qualified comes with three default profiles that cannot be edited. These cover the most common user types:
-
Admin: Provides full, unrestricted access to the Qualified platform, including all settings and configurations.
-
Chat: Designed for reps. Allows users to access their personal profile, connection settings, and all chat and meetings functionality (Live View, Live Conversations, Meeting Links, Live Booker, and Signals).
-
Meetings: The most limited profile. Restricts users to their personal profile, connection settings, meeting links, and the Live Booker.
Custom Profiles
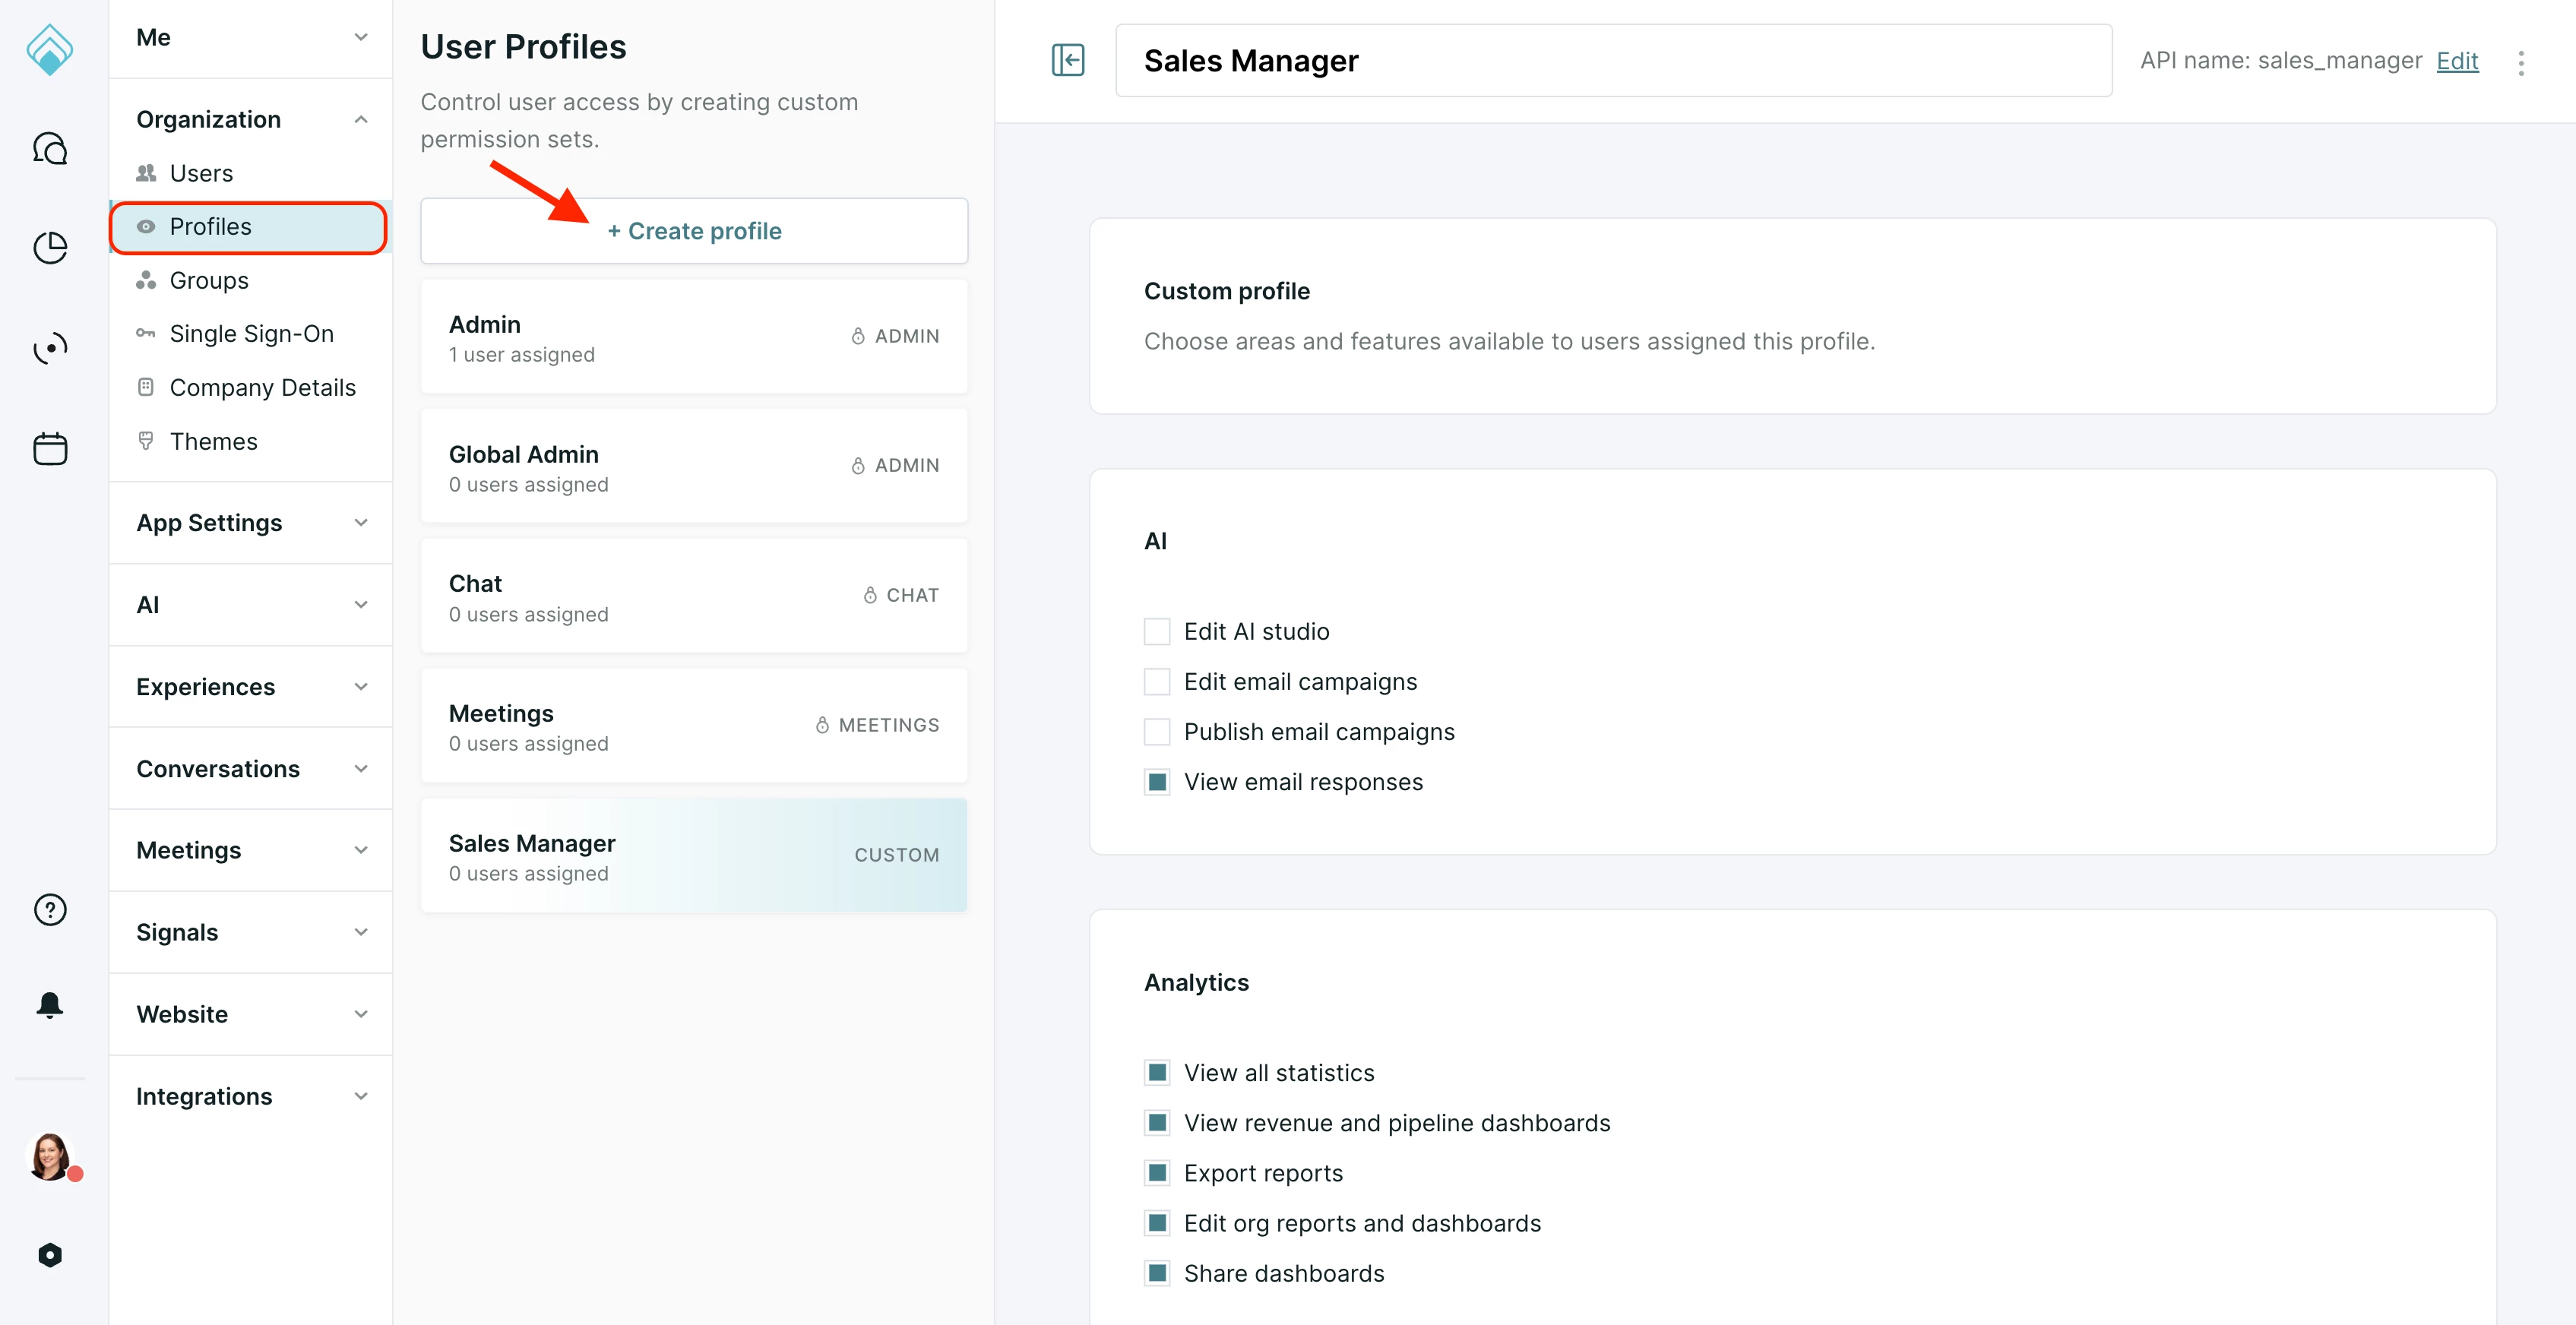
You can create custom profiles to give users a specific set of permissions. For example, you might create a "Sales Manager" profile for a user who needs to edit routing rules and add users, but should not be able to change app settings (like Experiences or Fields) or manage integrations.
To create a custom profile, navigate to Settings → Organization → Profiles, and click Create Profile. You can then toggle permissions across these categories: AI, Analytics, App settings, Conversations, Integrations, Meetings, and Organization.
Using Custom Profile API Names with SCIM SSO
For organizations using SCIM for automated user provisioning, the API Name is the critical link between your SSO provider (like Okta or Azure) and Qualified.
This unique identifier allows you to map users in your SSO system directly to a User Profile in Qualified. When your IT team provisions a new user, your SSO provider sends the API Name to Qualified, which automatically assigns the user to the correct profile with the correct permissions.
Note: While custom profile names are called out here, the standard Profiles can also be provisioned via SCIM using their default API names as well.
Here is the process:
-
In Qualified, navigate to Settings → Organization → Profiles, and create your custom profile.
-
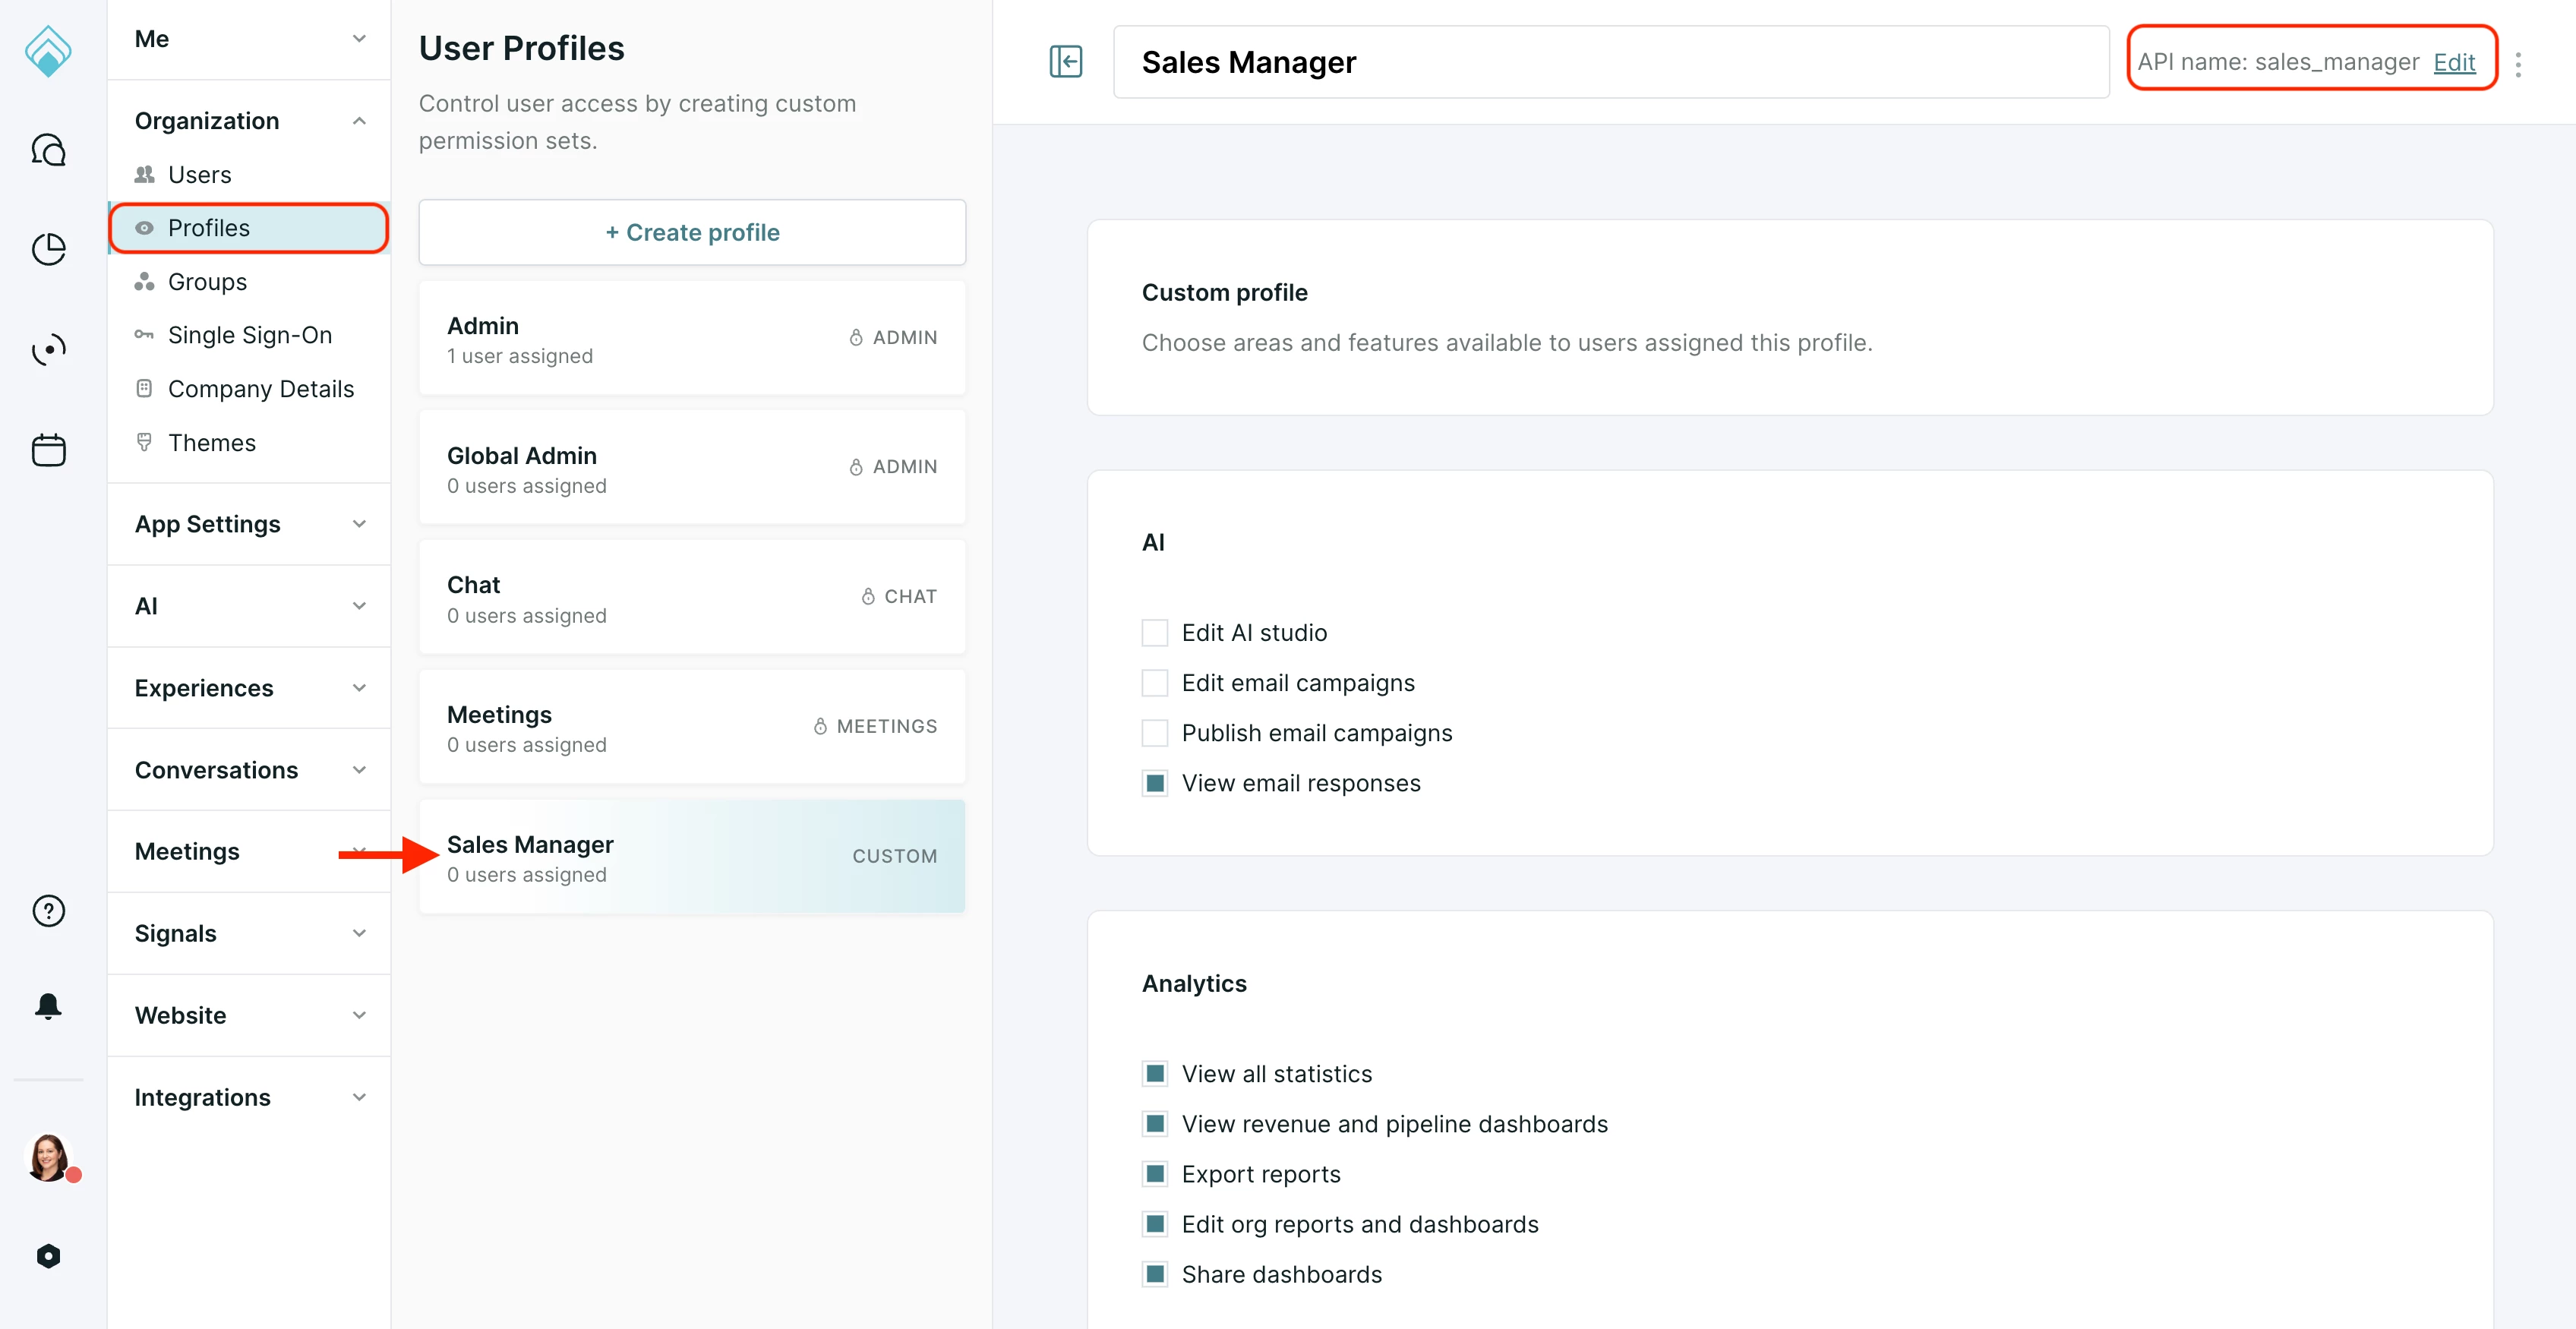
Click to open the profile and find the API Name in the top-right corner.
-
Important: The API Name must be all lowercase and contain no spaces (e.g.,
sales_managerormarketingops).
-
-
Copy the API Name.
-
In your SSO provider's console, work with your IT team to paste this API Name into the appropriate attribute field for the user group or role you are mapping. This field is often called "value" or "role".
By following this process, you can centralize user permission management within your IT systems, which helps streamline onboarding and ensures consistent access control for your team.
For more information on configuring Single Sign-On (SSO), check out the articles below
Managing users
Once your profiles are set up, you can manage your users from the user table.
-
Go to Settings → Organization → Users.
-
Use the filters at the top of the page to find specific users:
-
First, use the Profile dropdown to filter the list by a specific user profile.
-
Once a profile is selected, you can apply additional filters to view All, Active, or Pending users within that profile.
-
-
To view all Deactivated users, ensure no profile is selected from the dropdown, and then select the "Deactivated" filter.
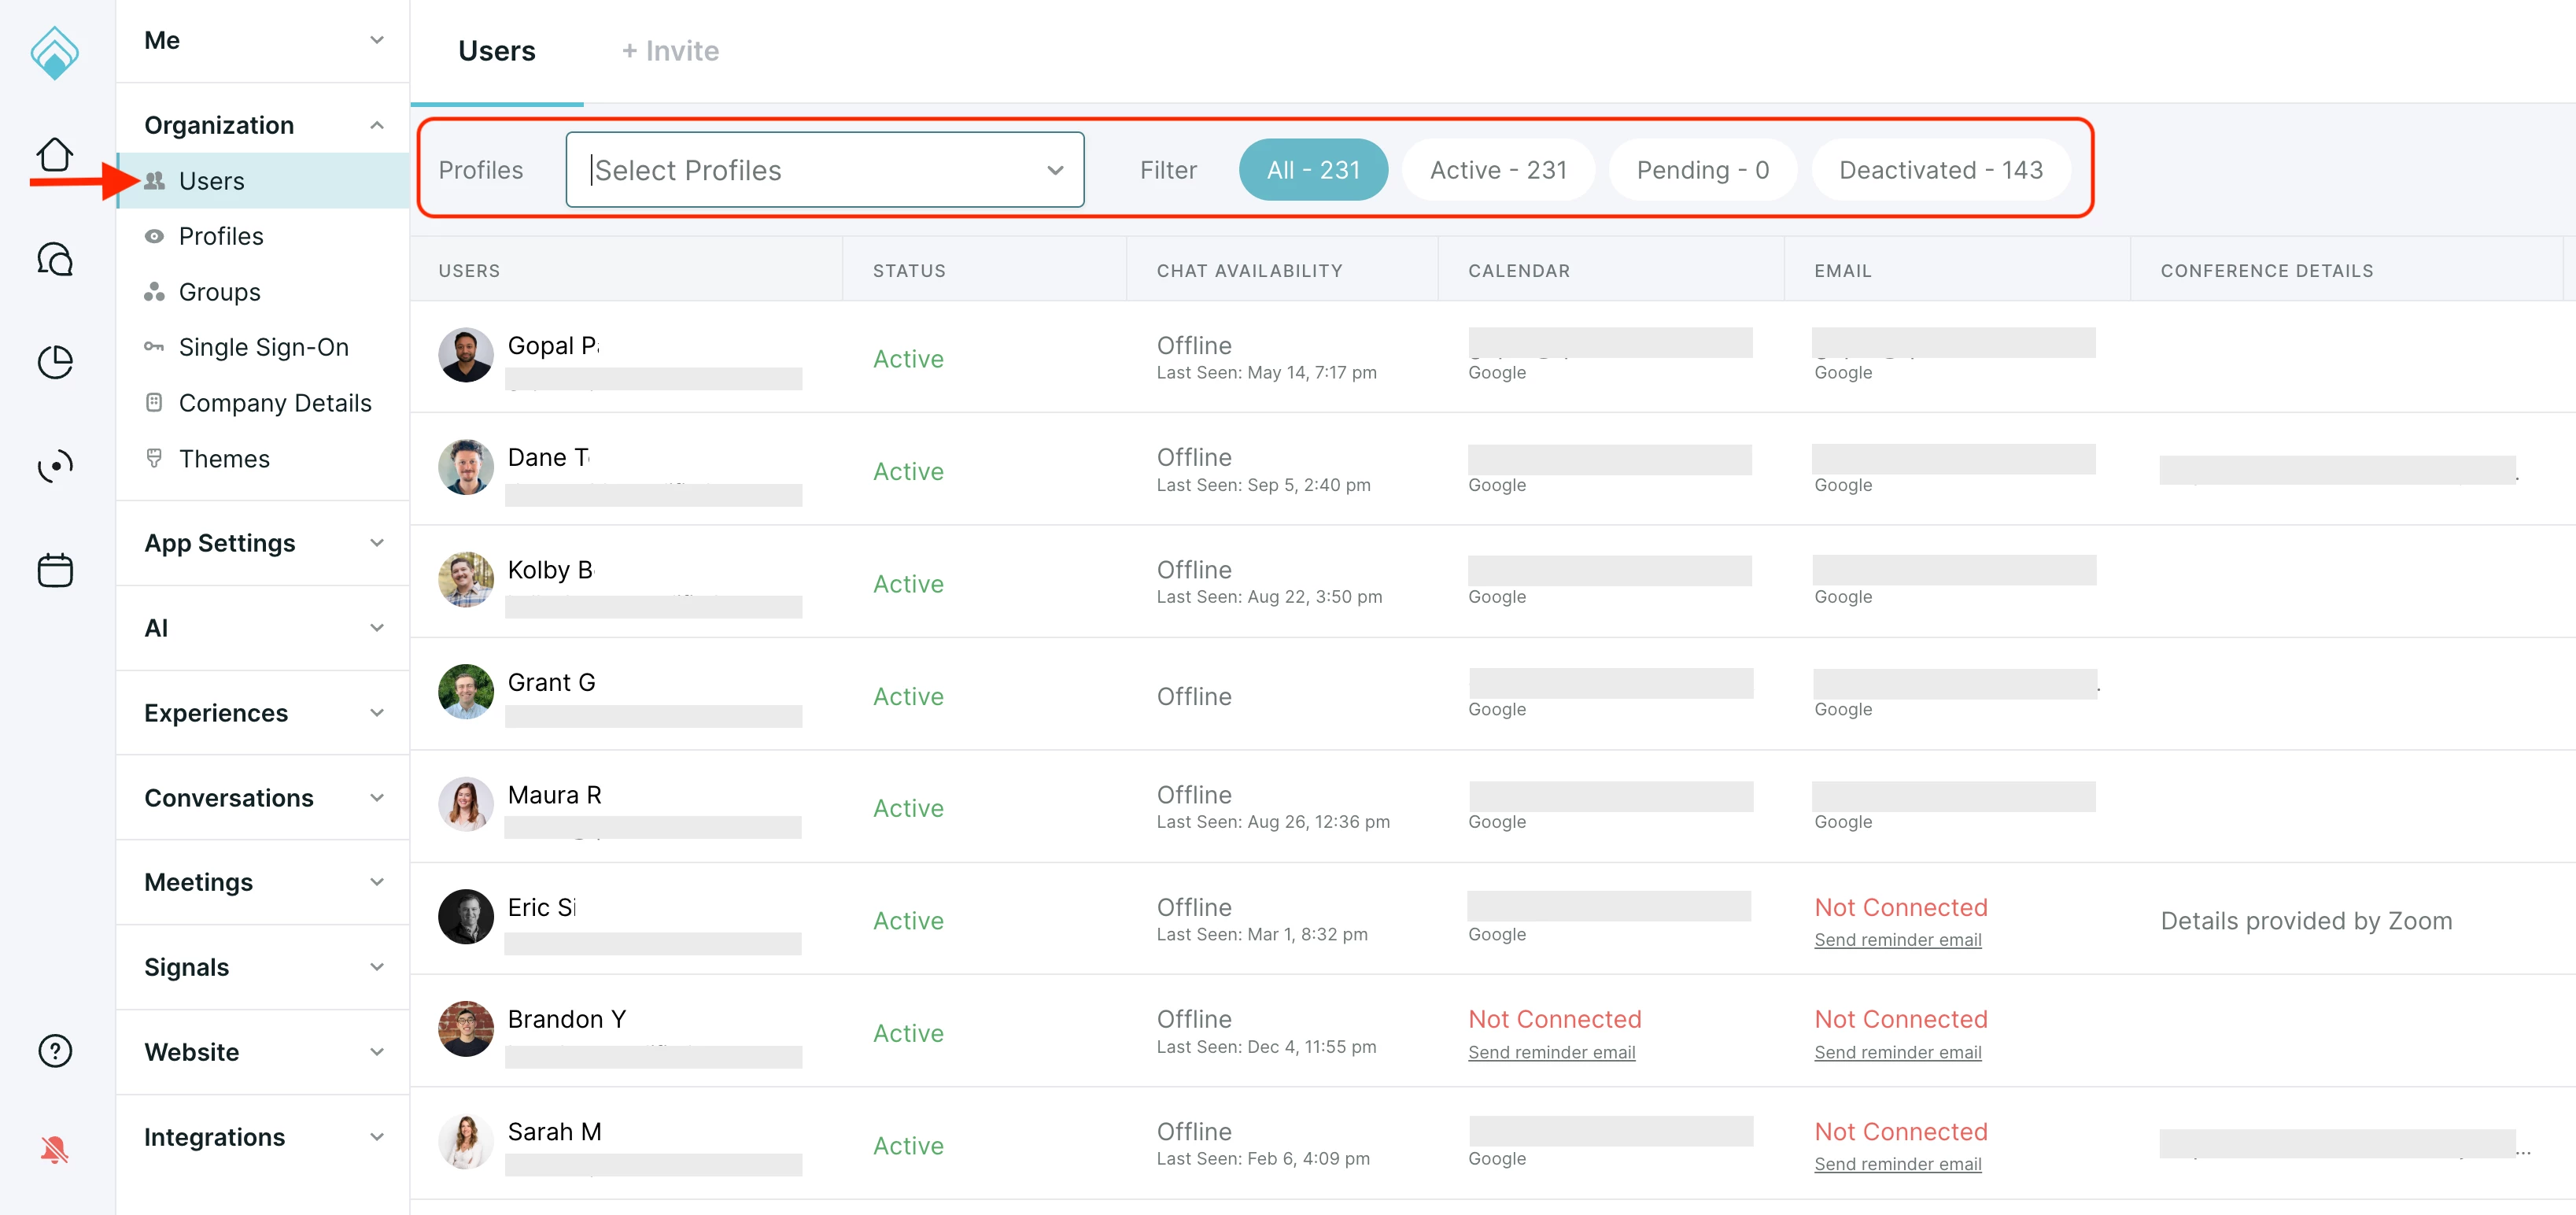
From this user list, you can scan the columns to see if users have completed their setup. While all users should have a profile photo and name, it's especially important that reps connect their calendar, email, conference details, and Salesforce account. These connections are critical for any user who will be live chatting, having meetings booked on their calendar, or having AI emails sent on their behalf.
Provisioning users
Heads up for SSO with SCIM users
If your organization uses SSO with SCIM for user provisioning, you will need to work with your IT team to add and manage users from your identity provider (like Okta, Azure, or OneLogin). New users should be provisioned from your SSO console, not by inviting them through the Qualified interface as described below.
-
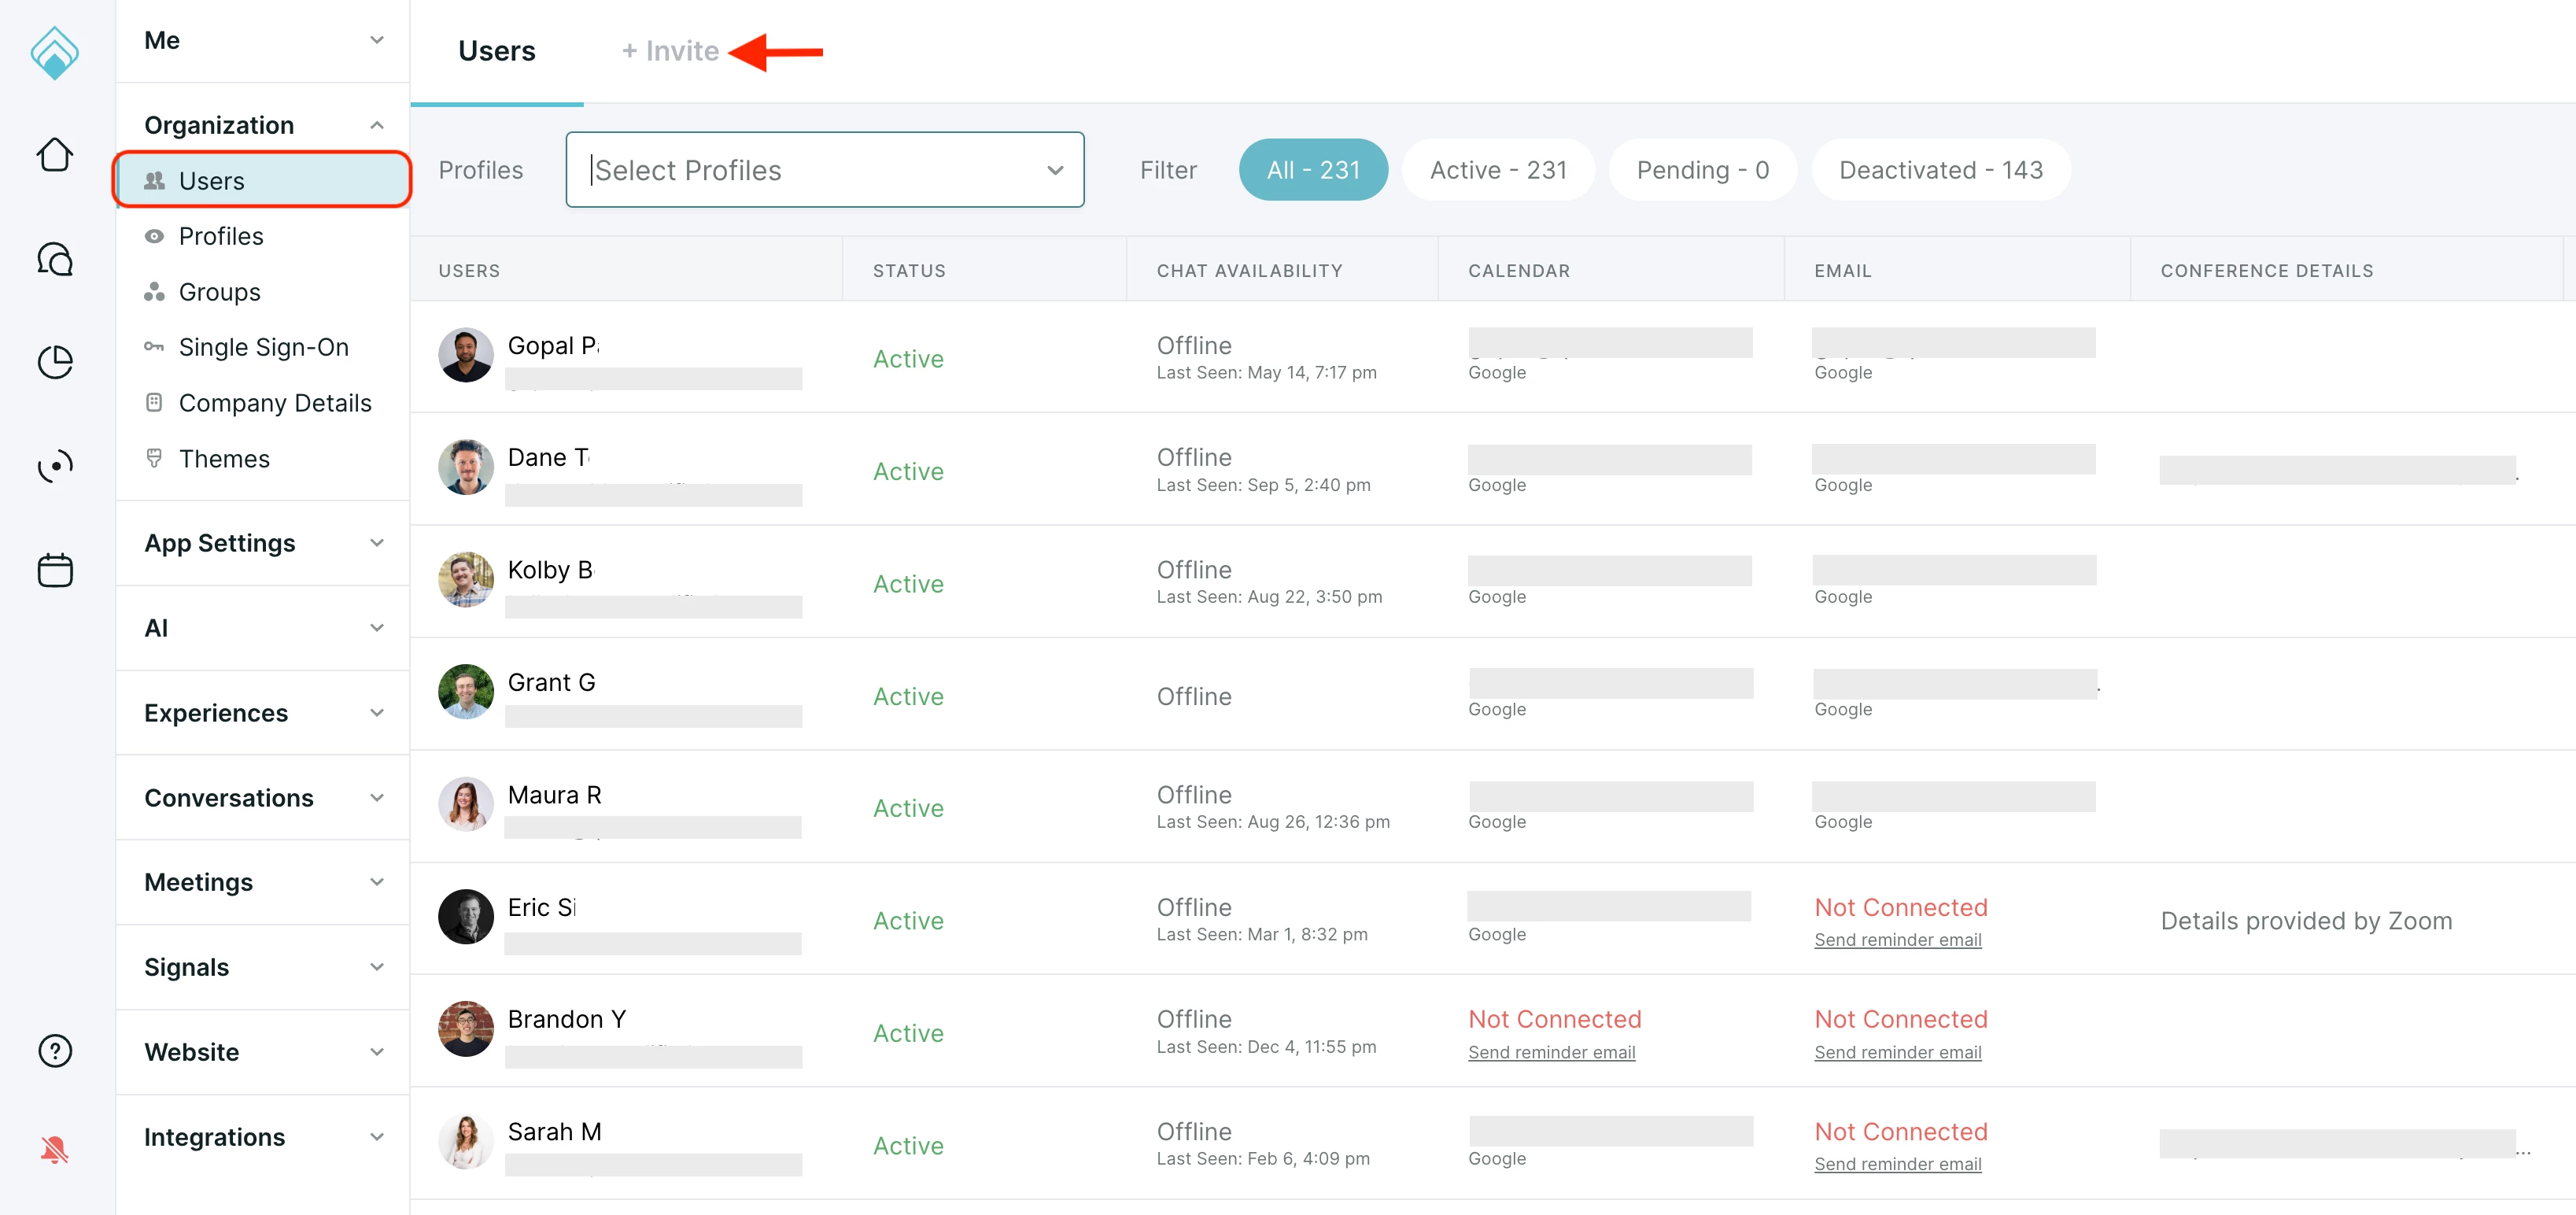
As a Qualified admin, go to Settings → Organization → Users.
-
Select the + Invite at the top of this page.
-
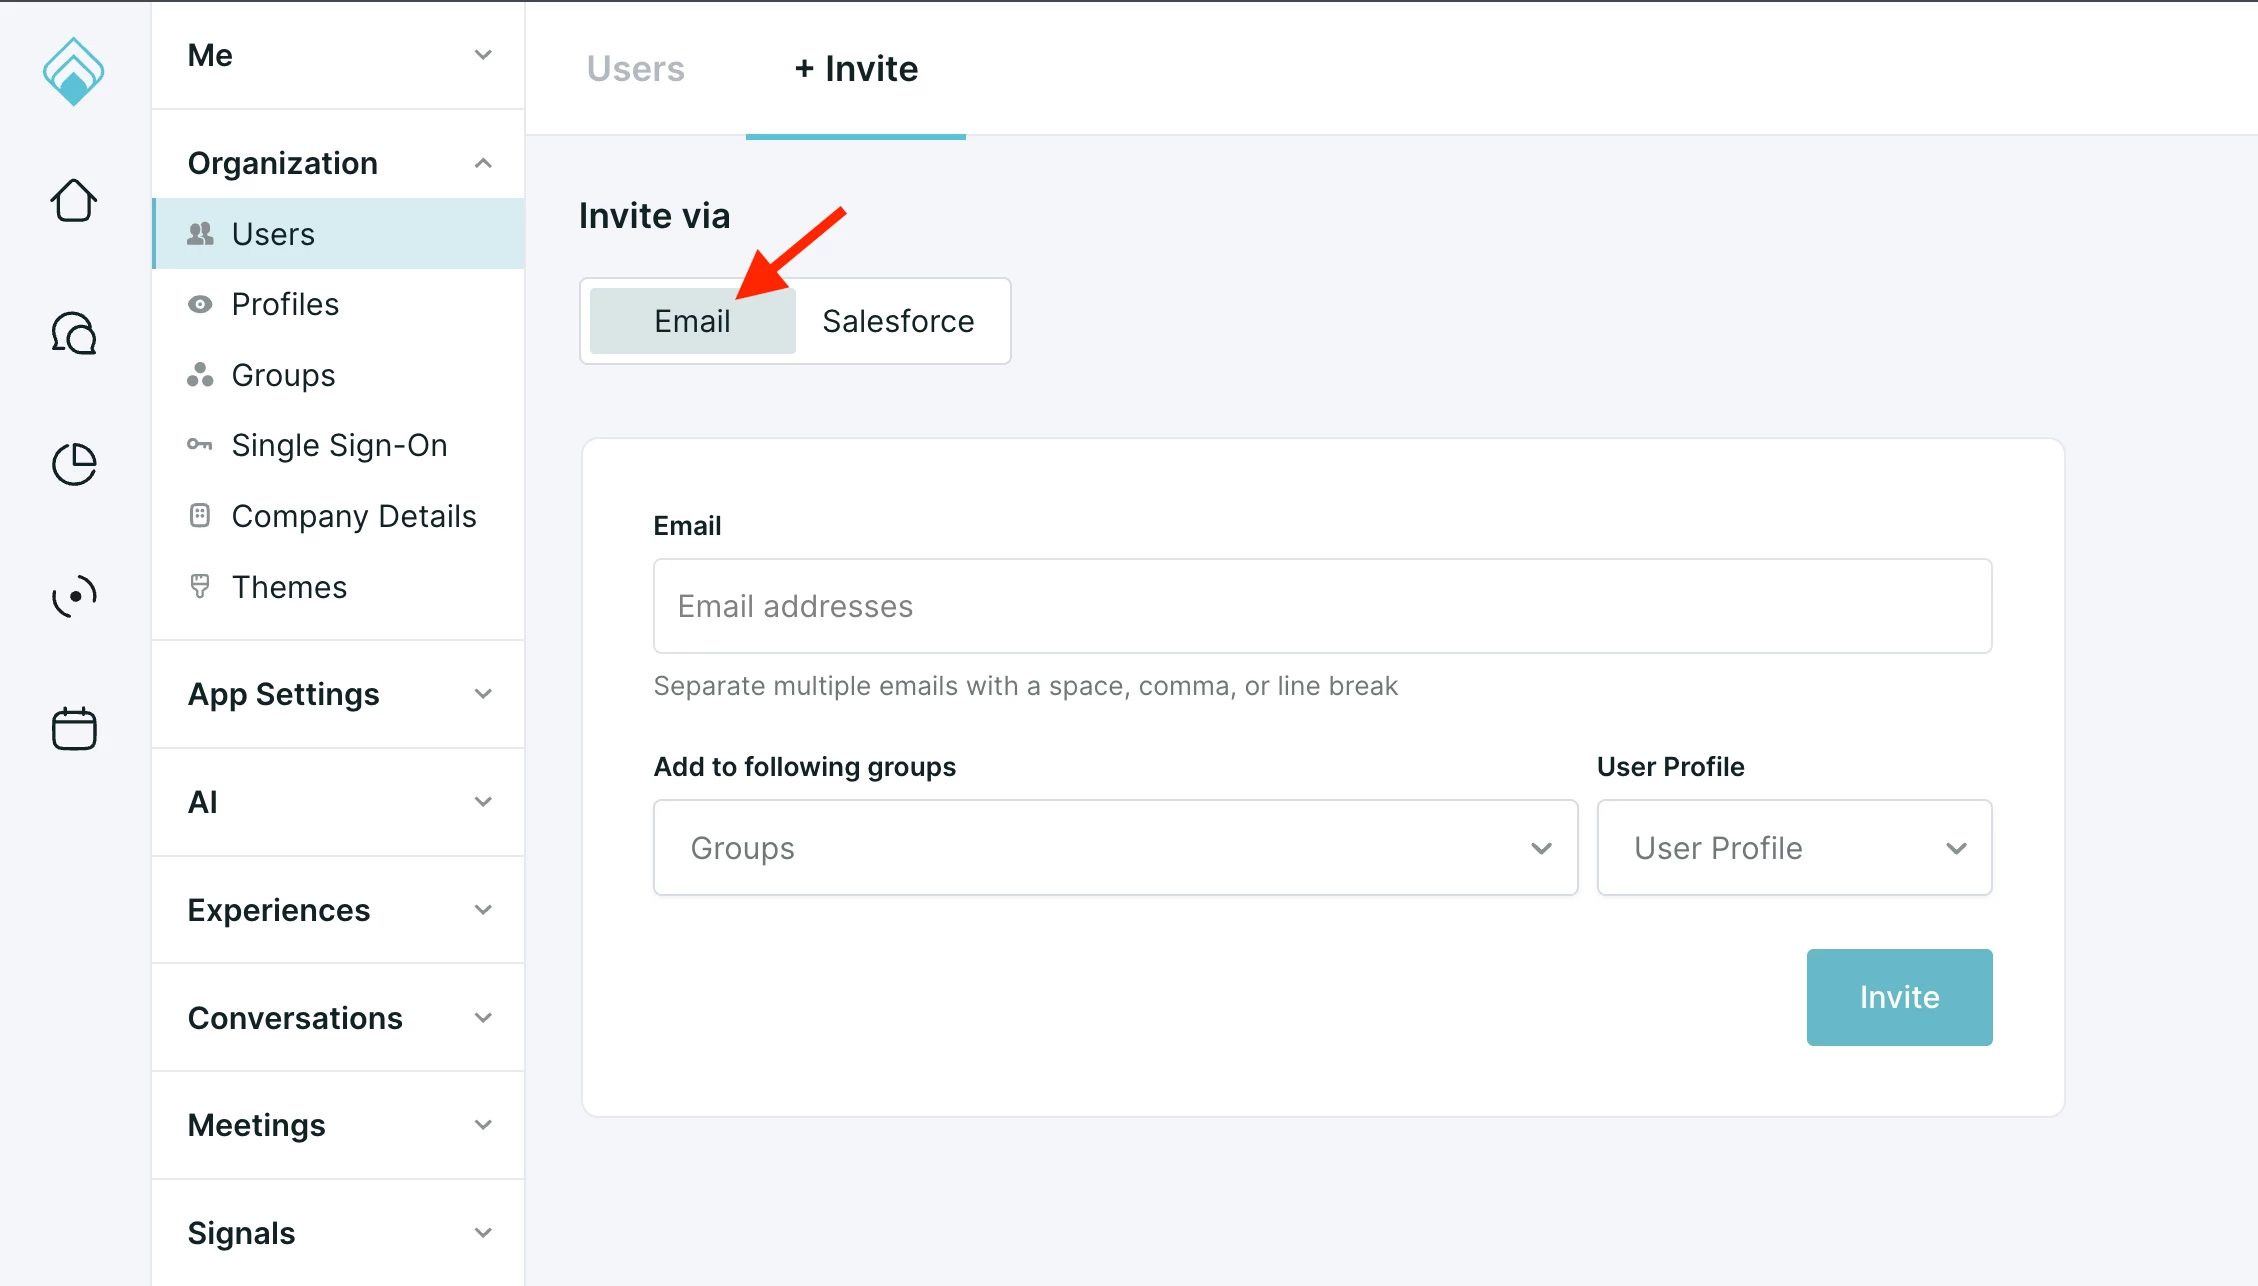
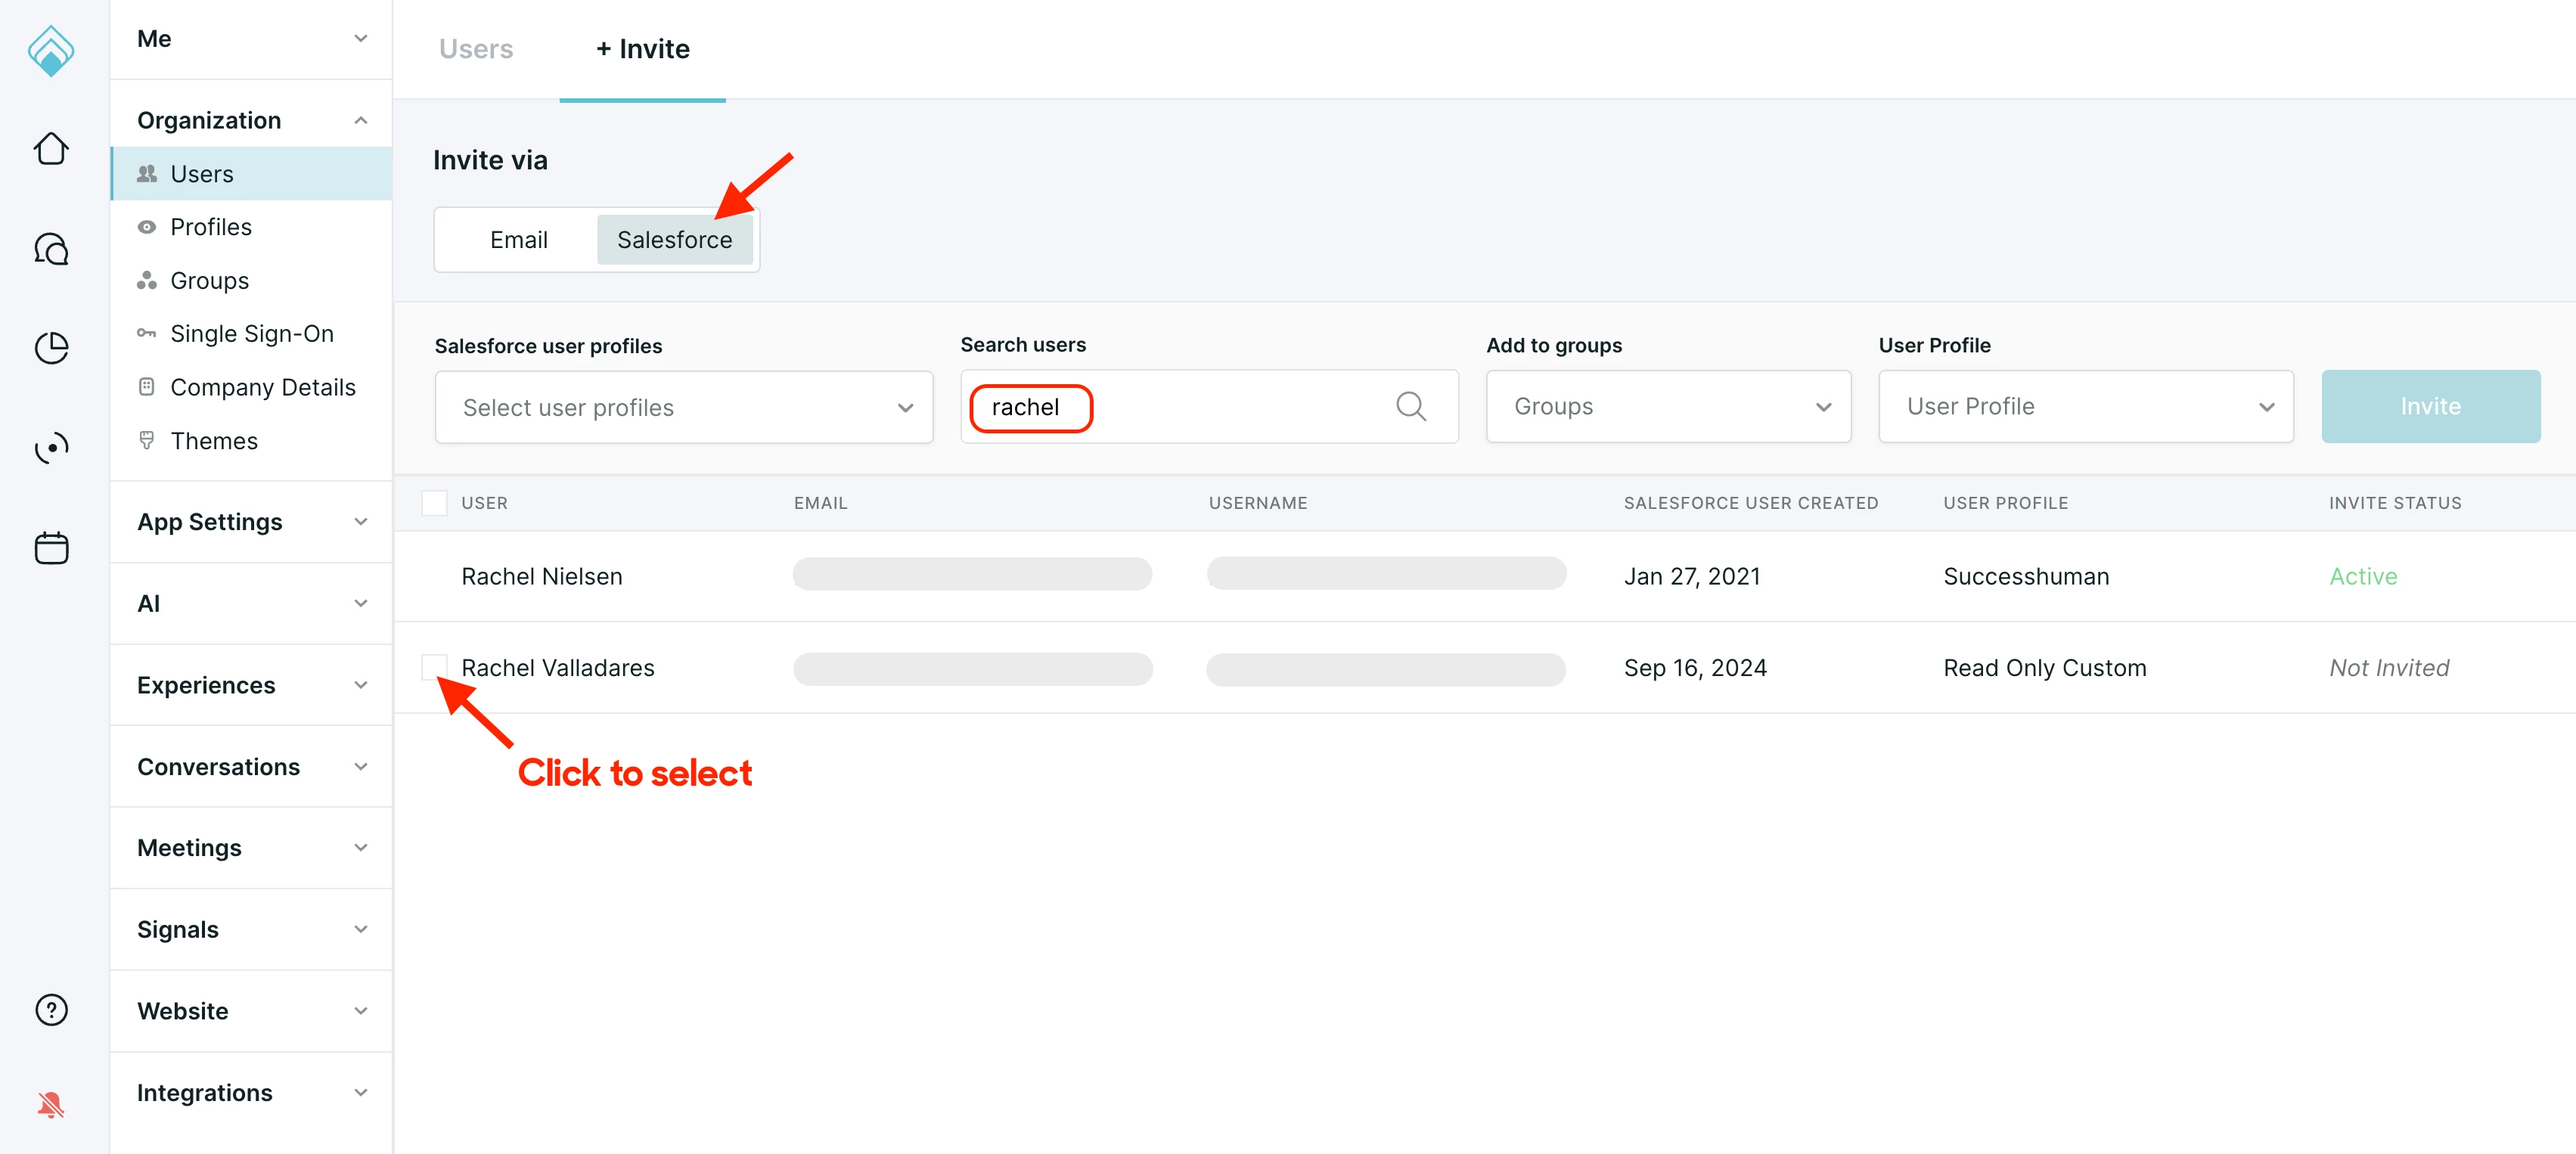
Select whether you'd like to invite a user via Email or Salesforce.
Pro Tip! When inviting Chat or Meetings users, we recommend inviting via Salesforce in order to automatically connect their Salesforce account to Qualified when they accept the invite.
-
Email - Add the user's email address in the "Email" box. You can add multiple users at the same time by separating their email addresses with a delimiter such as a space, comma, or line break. You must select a profile to assign to these users and, optionally, select to add them to a specific group.
-
Salesforce - Select "Salesforce" at the top. Then, filter the list of Salesforce users by user profiles or specific users. You must select a profile to assign to these users and, optionally, select to add them to a specific group.
-
-
Qualified will send an invitation email from
invite@qualified.comto the invited users. When received, users should click the “Join Now” button at the bottom of that email and follow the prompts to set up their profile.
Deactivating users
Deactivate users from your Qualified account when they no longer need a license. This will remove any connections they set up within Qualified, including their calendar and Salesforce, and immediately log them out of Qualified.
-
Go to Settings → Organization → Users.
-
Locate the user you want to deactivate and click the kebab icon on the far right side of their row.
-
Click “Deactivate” from the options that appear.


.svg)


