

Segments group your visitors into buckets according to your company’s predefined criteria. Use segments to power Live Streams and routing to enable your reps to easily engage with VIP visitors on your website.
Getting started
Segments ensure your most valuable visitors are displayed front and center. Before getting started, decide which types of website visitors are important to your team and consider the amount of traffic you receive to your website.
Once a segment is created in Qualified, it will be displayed in a Live Stream and can be used in your routing rules.
A few important segments to consider are:
- Visitors in your ideal customer profile.
- High-intent visitors (visitors on your legal or pricing pages; see Filtering by current page).
- Your existing customers.
- Paid advertising (Google, LinkedIn, Facebook).
- Open opportunities.
- Any of your ABM target accounts in Salesforce.
You might also want to segment visitors who your sales reps should disregard:
- Internal employees.
- Visitors who fall outside your ideal customer profile.
- Competitors.
Next, consider your website traffic. If you receive a lot of traffic to your site, you might wish to segment your visitors even further to cut out the noise for your sales team. Don’t get a lot of traffic? Keep your segments to a minimum and give your sales reps more visibility.
Creating segments
- Navigate to Settings → App Settings → Segments.
- Select the “+” icon to create a new Segment.
- Name the Segment.
- To save your changes, click “Save” in the top right corner of the screen.
At this step, you can create the segment based on the visitor data that’s revealed when they arrive on your site or as they interact with your Qualified experiences such as:
- Salesforce field information
- You can filter by our three core objects - Leads, Contacts and Accounts. Some Qualified plans also allow filtering by all fields of any object directly related to the three core objects.
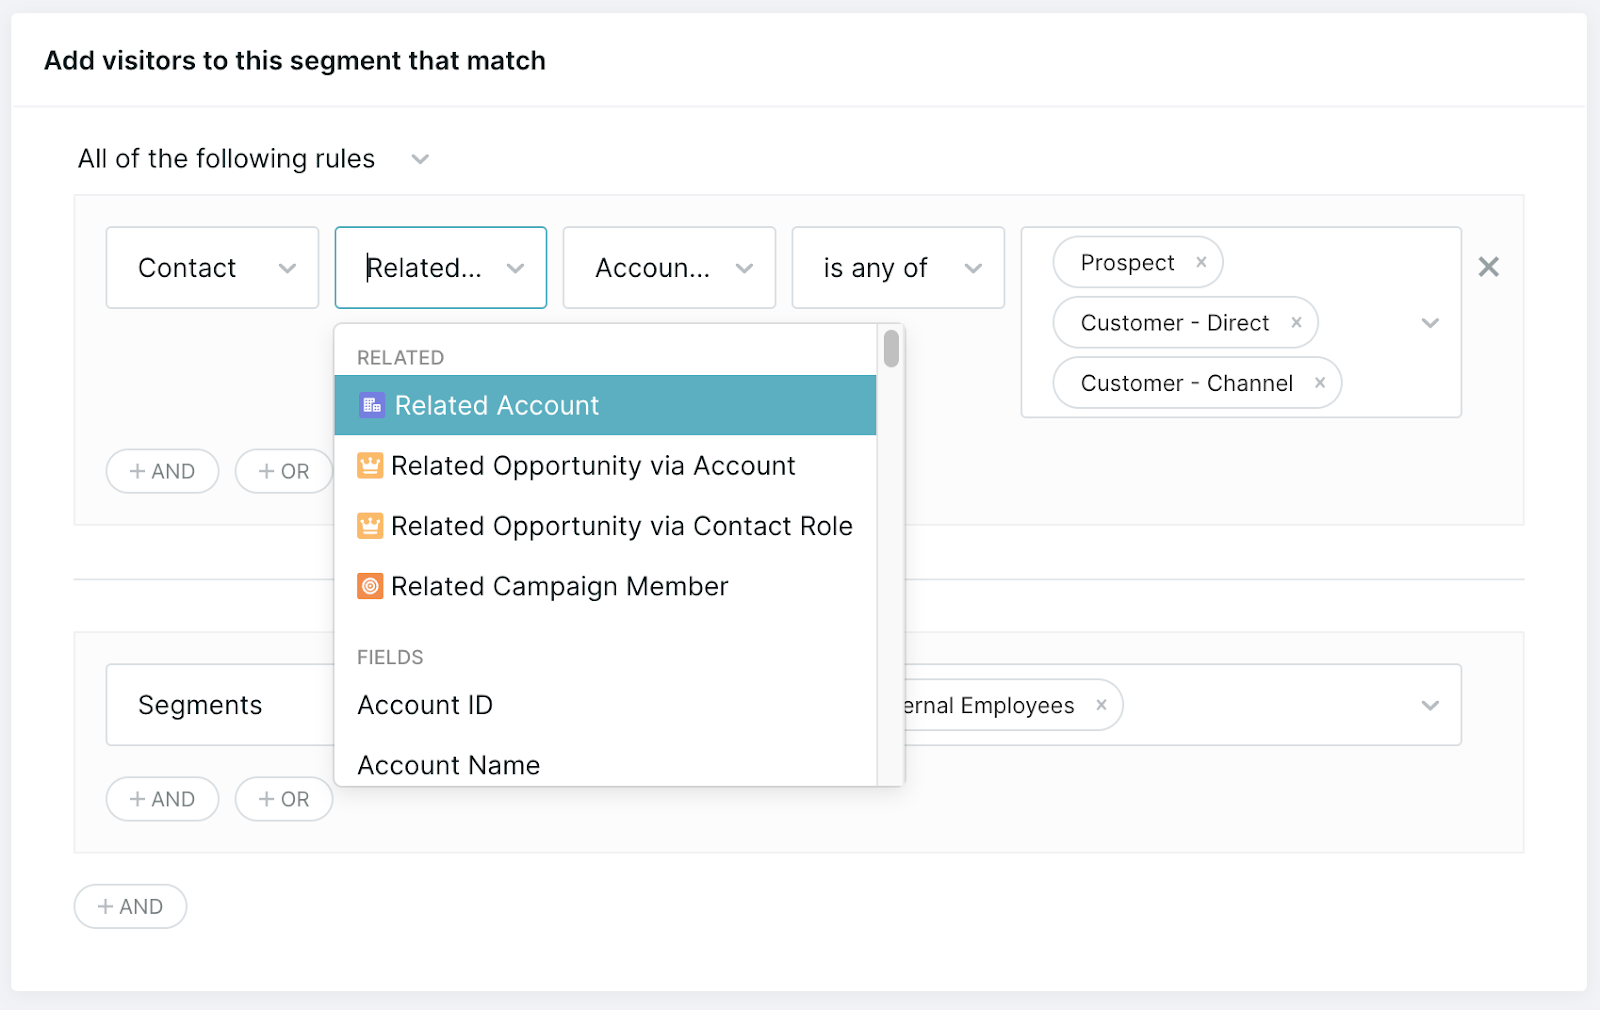
Note: Contact your Qualified Success Architect (QSA) if you are interested in related object filtering.
- Qualified visitor fields.
- Target account lists.
- Marketing automation fields (Pardot, Marketo or HubSpot).
- Note that this includes being able to sync Marketo Smart List, Static List and Program Members for use in segment criteria if enabled by your Qualified Success Architect.
- Visitor location.
- Data enrichment information.
- Other segments previously created.
Excluding other segments
When you exclude other segments from a segment, you choose between two operators:
- Excludes ALL of matches a visitor only if the visitor is in none of the listed segments. Use it to leave out visitors who match one or more of the listed segments.
- Excludes ANY of matches a visitor unless the visitor is in all of the listed segments. Use it to leave out visitors only when they match every listed segment.
For most segments, use Excludes ALL of. For example, to build an ideal customer profile segment that leaves out current customers and employees, use Excludes ALL of: Customers, Employees. A visitor who is in either segment does not match the ideal customer profile segment.
With Excludes ANY of: Customers, Employees, most visitors match. Most visitors are not in at least one of those two segments, so the filter removes very few visitors.
Tip: For logic that is easier to read, add each segment as its own exclusion line instead of listing several segments in one operator. One line for Customers and one for Employees gives the same result as Excludes ALL of: Customers, Employees.
Filtering by current page
Current Page is not available as a segment filter. Segments also feed analytics, and analytics look at past events, which Current Page cannot filter. To build a segment for visitors on a specific page, such as your pricing page, use a visitor field instead:
- Create a visitor field, such as Current Page View.
- At the top of each page-specific experience, set that visitor field to the page.
- Create your segment and filter it on that visitor field.
As a visitor moves from page to page and triggers new experiences, the field updates and the visitor’s segment can change with it.
Using segments
Now that you’ve created your segments, you can leverage them for routing rules and for the Live Stream.
Routing rules
Segments can also be used within your routing rules to quickly get visitors to the right sales reps. Just like blocks in the Experience Builder can be used to streamline steps across experiences, you can think of segments as blocks for your visitor groups!
- Navigate to Settings → Conversations → Routing for Conversations Routing or Settings → Meetings → Routing for Meetings Routing
- Create a new routing rule or edit an existing one.
- Within your routing rule, you’ll see your segments listed as a filter.
Live Stream
Add your segments to your Live Streams so that your sales reps can easily identify the visitors that mean the most to your business.
- Navigate to Settings → Conversations → Streams
- Find the Live Stream you’d like to edit or create a new one.
- Click “Select Segment”.
- Select the Segment you’ve just created to add it to the Live Stream.
Once you’re finished, you’ll see the Live Stream appear with your visitor segment.