


The Agent Profile tab in Agent Studio is the starting point for personalizing Piper the AI SDR Agent. This is where you define your agent's identity, customize its visual and vocal presence, and enable AI tools for your human reps. If your organization still uses AI Studio, see Configuring Piper in AI Studio (legacy) instead.
Defining general profile settings
The general sub-section of the Agent Profile tab is where you establish the core identity of your AI SDR profile.
- As an Admin, navigate to Settings → Agent Studio → Agent Profile.
- Locate the general sub-section.
- Enter a Profile Name. This is an internal name used to identify this specific configuration.
Managing multiple AI SDR profiles
If your organization manages multiple brands or distinct website domains, you can create separate AI SDR profiles to tailor the experience for different audiences.
- To create a new profile, click the current profile name at the top of the page and select Create AI profile.
- To switch profiles, click the profile name at the top and select the profile you want from the dropdown menu.
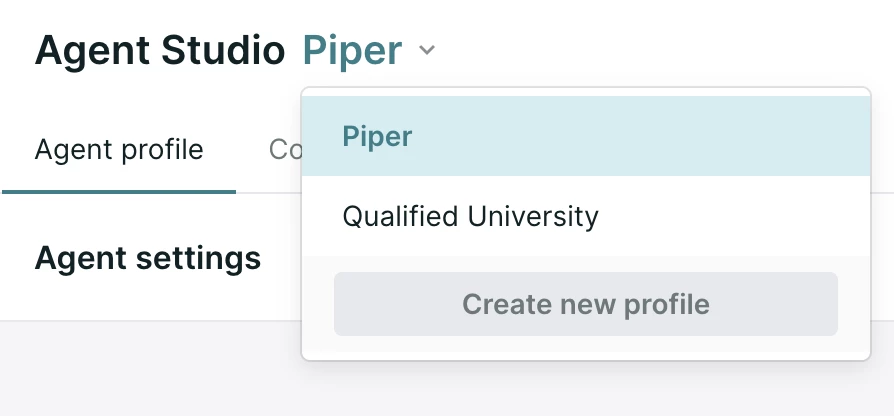
If you receive a message stating you have reached the maximum number of profiles, contact your Qualified Success Architect (QSA).
Deleting an AI profile is permanent and removes all associated settings, content, and goals. You must always have at least one active profile.
Creating a variant
Profiles created the way described above are independent of one another. Each carries its own settings, content and guides, and changing one has no effect on the others.
If you want several profiles that stay mostly identical and differ in a few specific places, create a variant instead. A variant inherits its configuration from a base profile, and you override only the parts that need to differ.
- In the Agent Studio header, open the profile selector and click Create new profile.
- Choose Variant, then select the base profile this variant should inherit from.
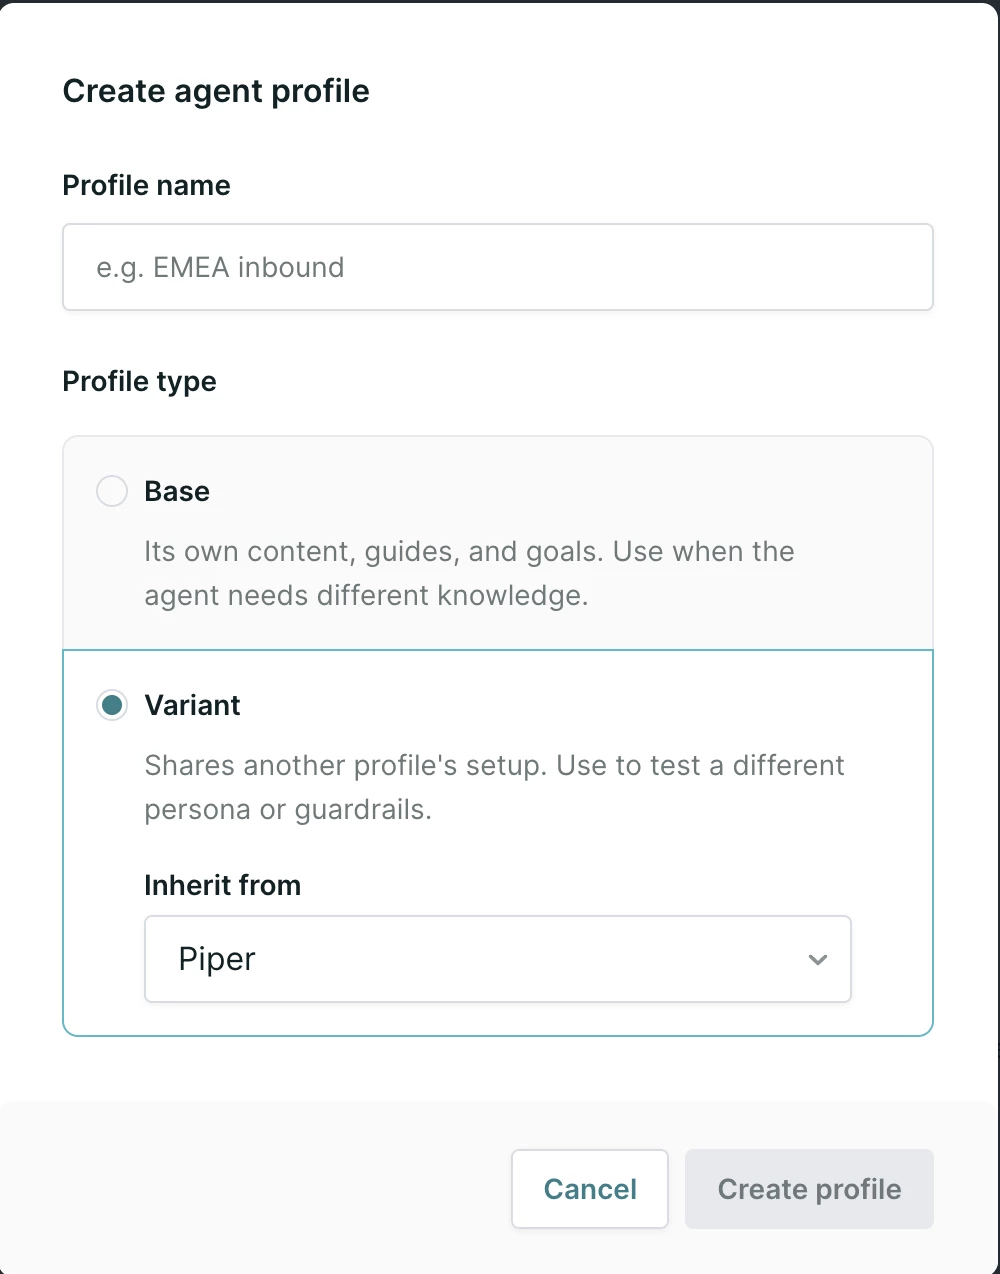
Note: To enable variants or learn more about availability for your organization, contact your Qualified Success Architect (QSA).
On a variant you can change how your agent is presented to leads, including its name, title, modality, and the persona or voice it uses. Connected mailboxes can also be set for the variant on its own. Everything else follows the base profile until you override it.
Variants count against your profile limit the same way base profiles do.
See Agent profile variants for what else a variant can override, how to use one in an experience or email campaign, and the limits to plan around.
Customizing the agent profile
The agent profile section is where you define how your AI SDR agent presents itself to visitors. This is where you bring Piper, or your own custom agent persona, to life with a name, a title and a multi-modal presence.
Establishing name and title
- Enter an AI SDR Name. This is the name visitors will see in the messenger.
- Provide a Job Title, for example "AI Sales Development Representative".
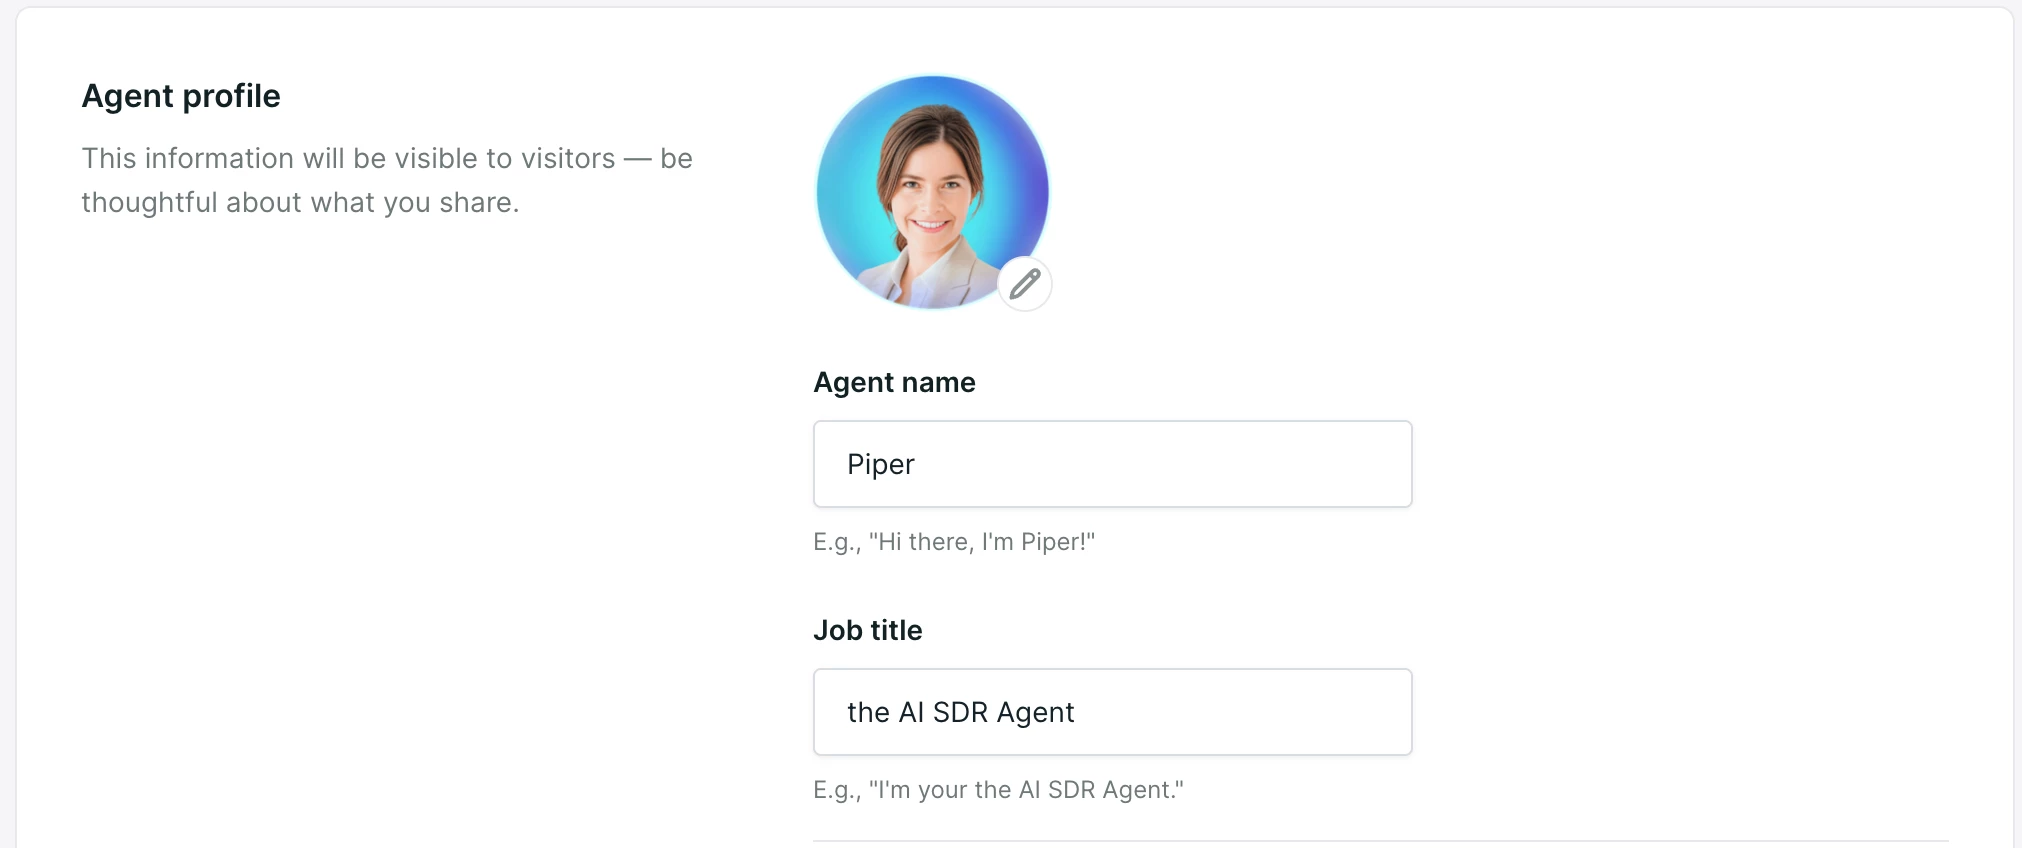
Choosing how your agent appears
Your agent can interact with visitors through a multi-modal experience including text, voice and video. The modality you set determines which appearance options you see.
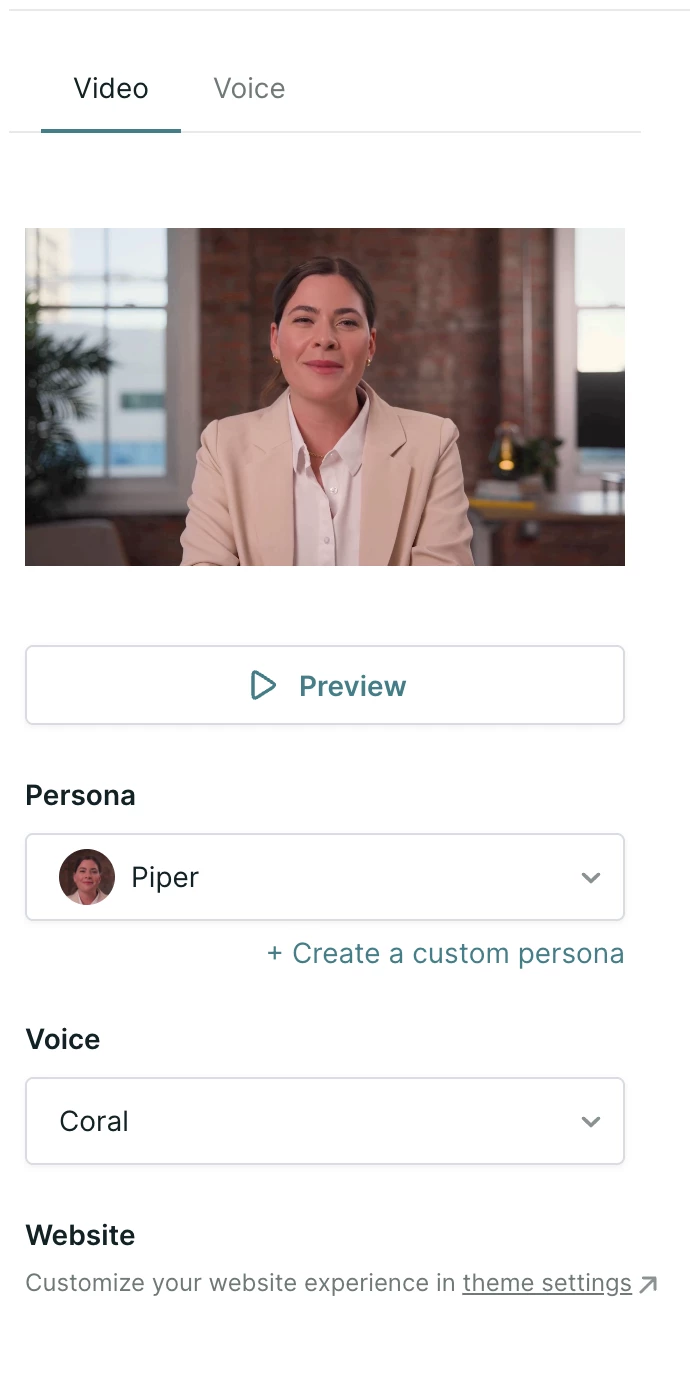
Video presents your agent with a face, using a persona you select. Voice presents it without a face, using an orb you style. Text is chat only.
Set the modality first. See Agent modality controls for choosing a default and overriding it for an individual experience.
Video
Choose from the list of available out-of-the-box personas, which give website visitors a human-like experience, or create a custom persona.
Voice
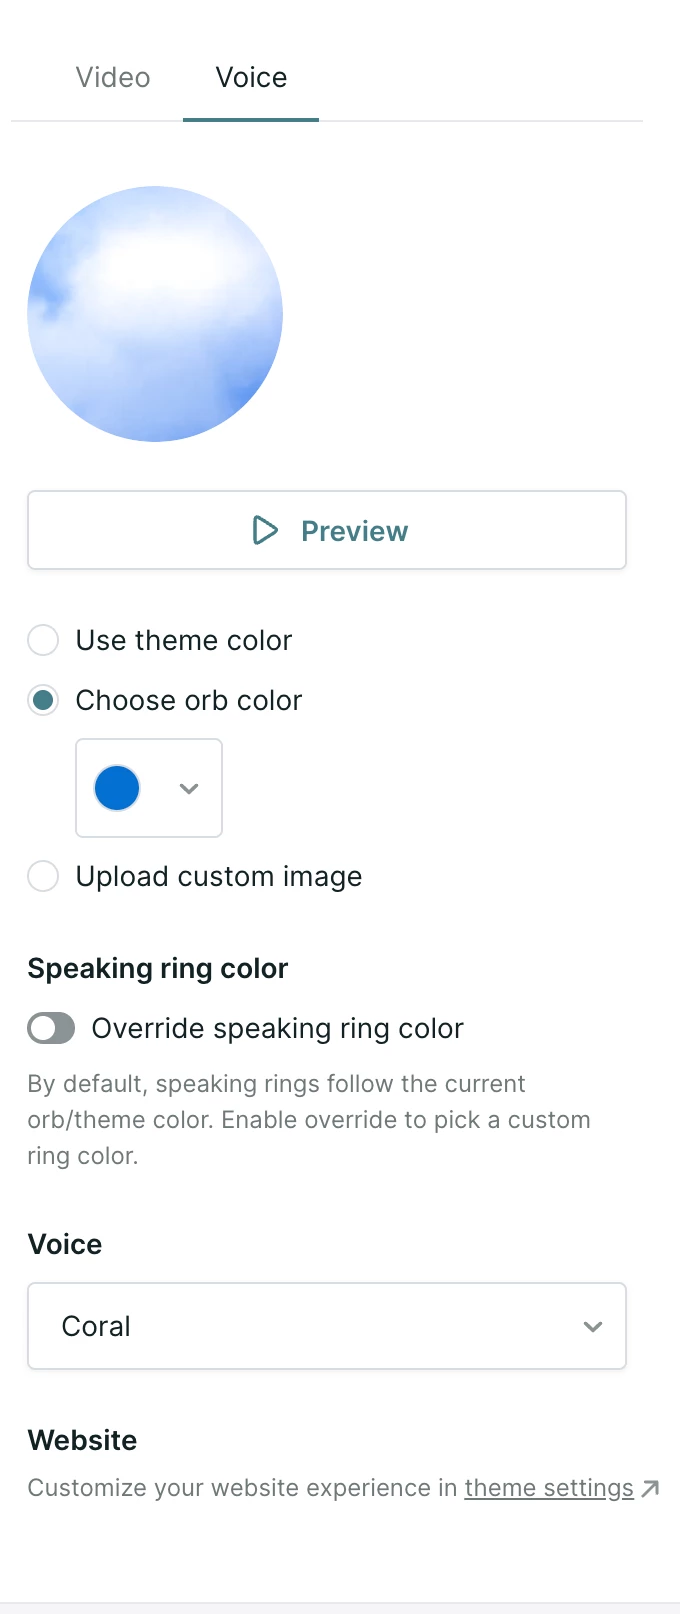
With Voice, your agent greets and qualifies visitors without a face, using an orb you can style so it matches your website.
Select one of the following appearance options:
- Use theme color: use the primary color set in Qualified themes.
- Choose orb color: use the color picker to select a custom hex code.
- Upload custom image: upload a custom image file, such as your company logo or a custom icon, to represent your agent.
Additionally, you can choose to select an alternate Speaking ring color - by default, this will match the orb/theme color.
Selecting a voice and previewing
For both video and voice, you will need to select a voice for your agent to speak with.
- Select a voice from the list of available options, to match your brand's preferred tone.
- Click Preview.
Your agent gives a short introduction so you can see and hear how it will come across to your website visitors.
To further customize how your agent and the messenger appear on your site, see Qualified theme settings.
Enabling rep AI tools
Rep AI tools, formerly known as AI Copilot, let your human sales reps hold more efficient, on-brand conversations during live chats.
- Scroll to the Rep AI tools section in the Agent Profile tab.
- Enable any of the following:
- Suggest: generates recommended responses for reps based on your uploaded content.
- Expand: turns short, shorthand notes into full, professional responses.
- Tune: automatically adjusts message tone and fixes grammar.
Deleting a profile
If a profile is no longer needed, scroll to the Delete profile section of the Agent Profile tab, click Delete profile and confirm the action.
Note: Deleting an AI profile is permanent and removes all associated settings, content and goals. This action cannot be undone, and you must always have at least one active profile.
A variant cannot be deleted while it is in use in any experience or email campaign. Remove it from those first.


.svg)


