
The report feature within Qualified works as a database to help you keep track of website visitors, their sessions on your website, and your existing leads and prospects.
Report email digests automatically notify Qualified users when visitors are added to a report. For example, send a weekly email digest to inform stakeholders about visitors from Target Accounts.
Creating a new report
To get started:
- Go to Analytics → Reports.
- Find the Reports section.
- Click on the + symbol to create a new report from scratch.
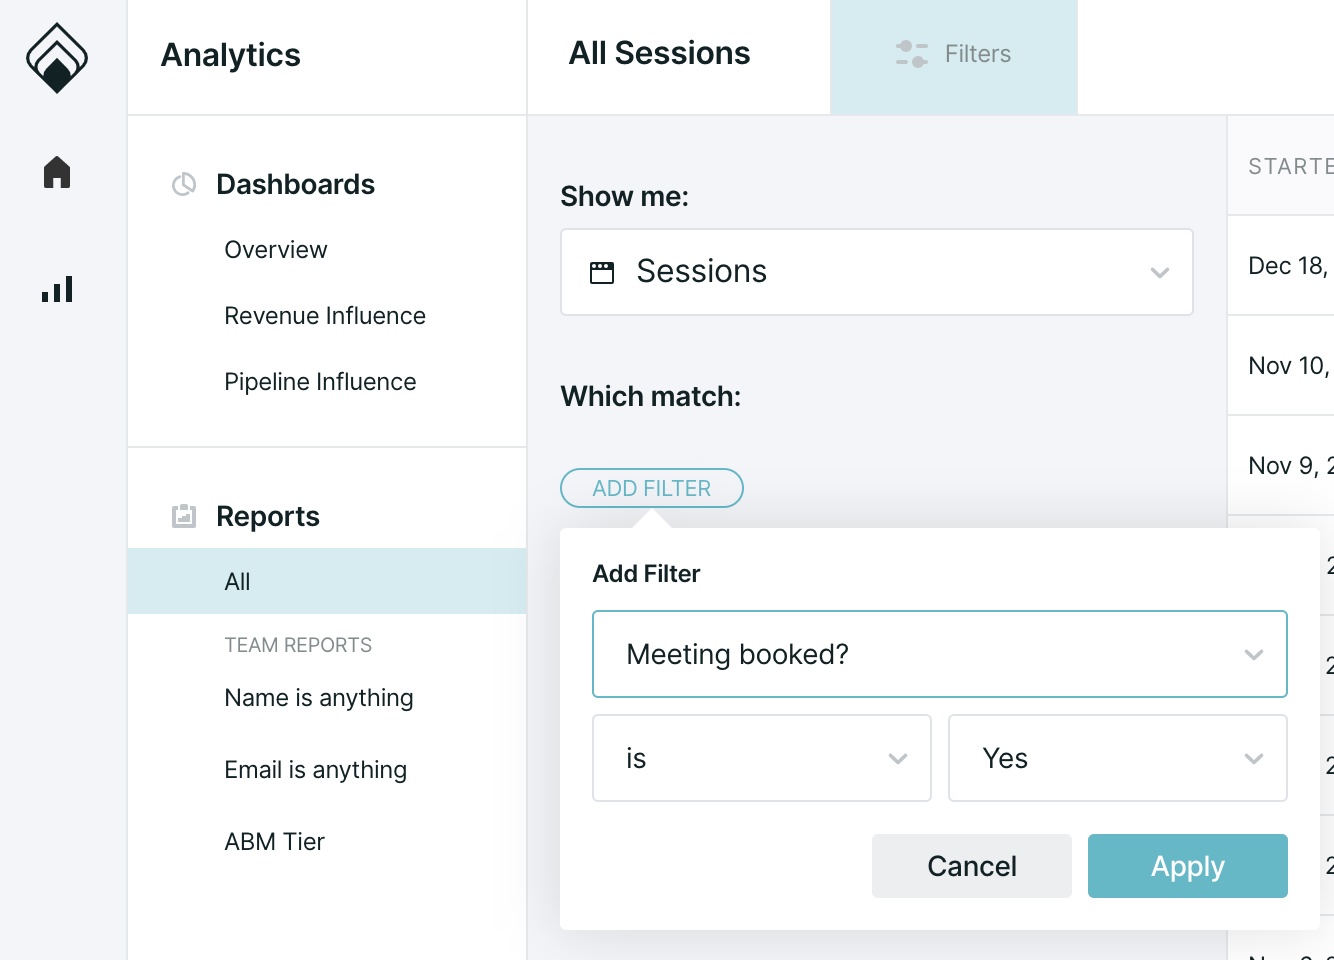
Setting filters
Qualified reports are based on visitor sessions. A session is defined as every time a visitor is on the website. A session will end for a visitor when they are idle for more than 60 minutes or a visitor left your site for at least five minutes before returning. A visitor can have multiple sessions on your website.
Note: A session closes five minutes after the visitor leaves your site, and it can take a few more minutes to appear in reports. If a session you just watched is missing, check back shortly.
Meetings booked through the Live Booker or Meeting Links happen outside a website session. To include or exclude them, use the Via Live Booker? and Via Meeting Links? filters. Reports opened from session-based dashboard tiles already set both filters to No, so the report matches the tile. For definitions, see the Analytics glossary.
Reports cover the previous 18 months. Dates before that are greyed out in the date picker. For older data, contact your Qualified Success Architect.
Changing columns
You can also change the columns that appear by using the cog icon on the right-hand side to add or remove columns as needed. As well as change the order of the column to better fit your needs.
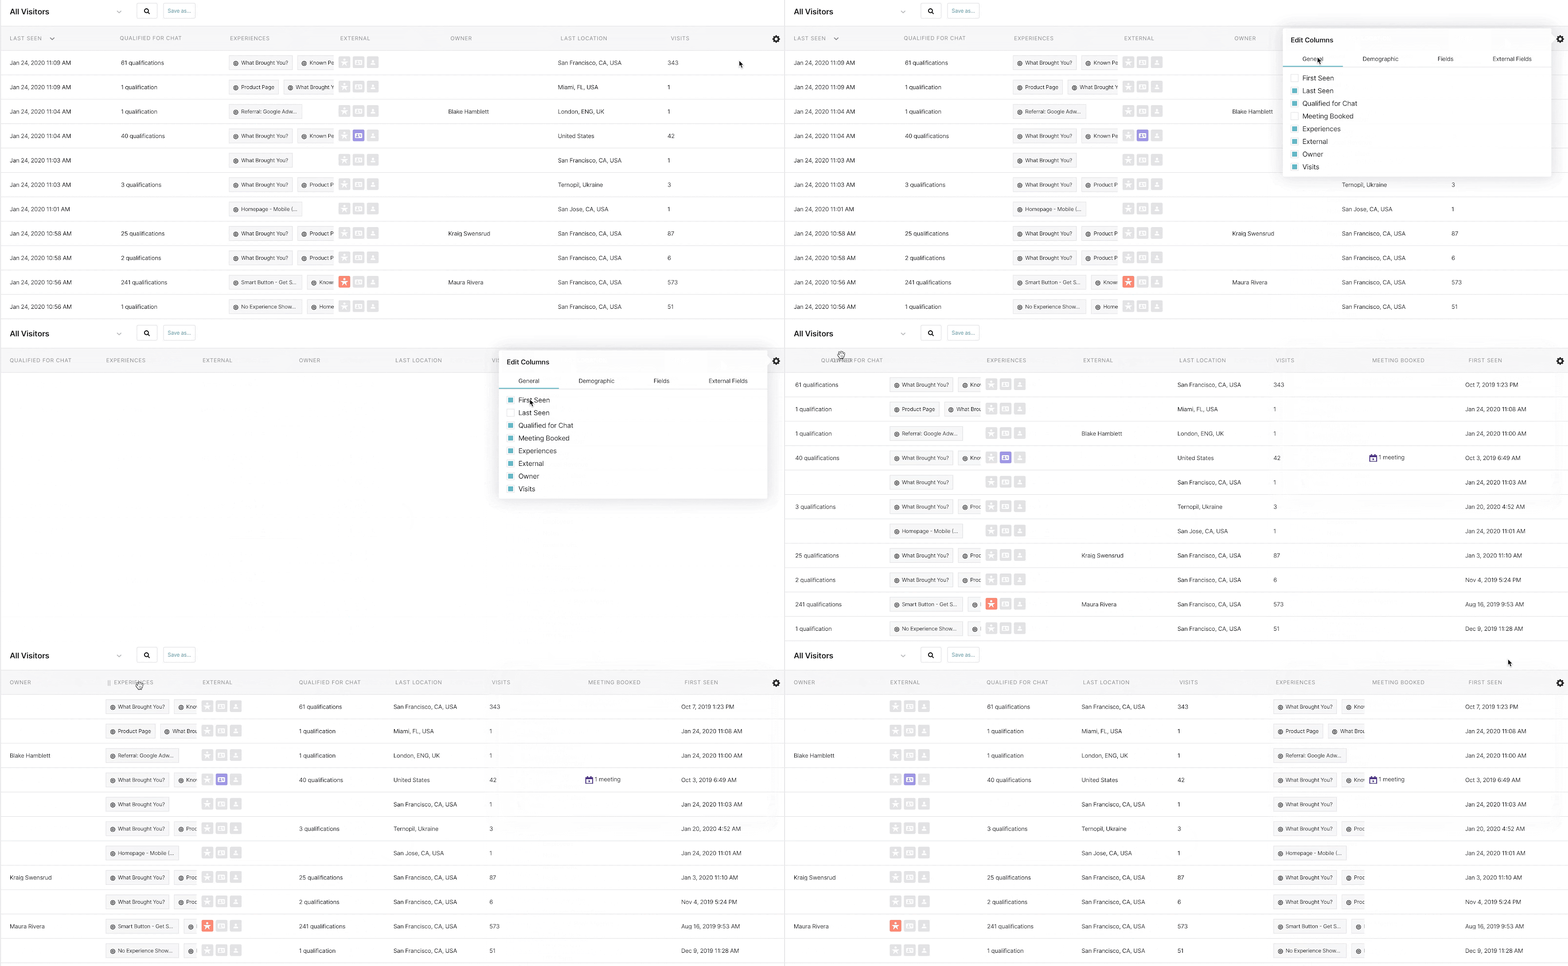
To revert your changes, click to clear your filters below your settings or, to see more details about a particular visitor, click on the visitor row to open the playback URL which contains the conversation history and browsing history of the visitor.
Saving reports
You can share the reports you create with other Qualified users and save reports across your whole team.
When you share your reports with other Qualified users, they will appear under your reports list as shown below as well as in the same view for your team. A few things to keep in mind:
- Reps cannot edit your original list once it's shared with them, but they can make changes and save as a copy.
- Reps cannot share lists to the whole team, but they can save their own lists privately.
- Reps will not be able to view individual conversations with visitors that they do not own in Qualified.
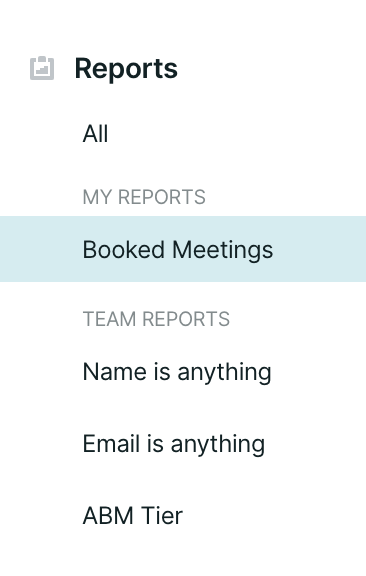
Deleting reports
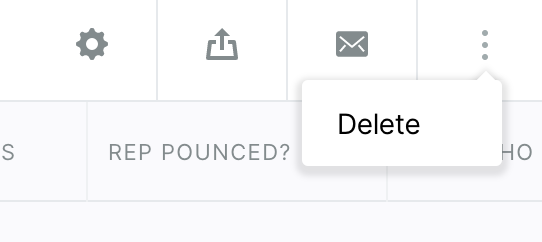
When you delete a report that is shared with others, keep in mind that this deletes the report for everyone on your team. To delete a list, select the list from the dropdown on the left-hand side to make it active. You'll then select the 'delete' option that appears to the right as shown below.
Exporting reports
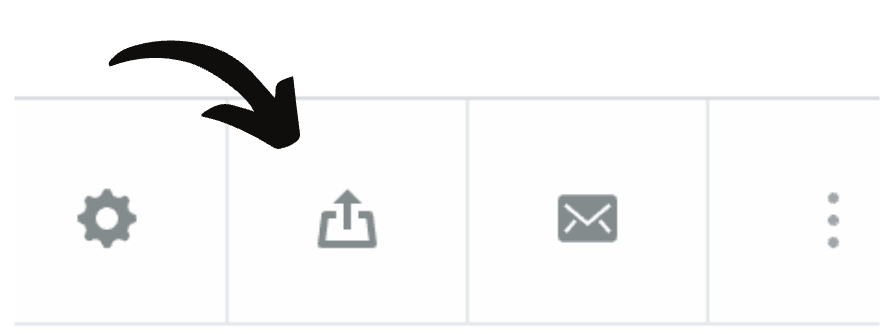
You'll be able to export your reports if those reports are 50k rows or less and you are an admin within your account. To do this, run your filters and check to see the button for exporting on the right-hand side of your screen. If the button is not there, your list might be too big and will need to be refined more. When you do see the button, click on it to export your report information into CSV format.
Report times appear in your own time zone. The exported CSV uses UTC, so convert timestamps to your local time as needed.
Creating report email digests
Create and save the reports you want to share. We recommend building reports about visitors that are from your Target Accounts, booked meetings with your reps, or were sent outbound marketing campaigns.
Keep in mind that you can only send email digests to other Qualified users that already have access to a report. If you want to send an email digest to someone, share that report with their Qualified account first.
Note: Email digests are available for reports only. A digest sends only when its report has new data.
Set up your email digest
Here's how reps and admins can send email digests to other users:
- Go to Analytics → Reports.
- Under the Reports section, click on the report title that you want to share.
- Click the Email icon in the upper-right corner.
- Click + New Digest.
- From the drop-down menu, select how frequently the email digest is sent: every Day, Week, or Month.
- Using the next drop-down menu, select who will receive the email digest. Click on their names.
- Click Save.
Note: Leave date filters off the report behind a digest. The digest frequency already sets the time window for each send. The first digest includes all data on the report.
View your email digest
Email digests are sent around 8:00 am in the time zone of the user that set up the digest and only if there's new data on that report.
At the top of your email digest, we include the number of new visitors since our last notification and the total number of visitors on your report. These numbers are the running list of visitors who were added to your list and also matched to Salesforce accounts.
In the email digest, we display information about up to 19 new visitors. If there were 20 or more new visitors, click View the Report in the email to open the report within Qualified.