


The Qualified Live Booker lets your reps schedule meetings without leaving Salesforce. There are two ways to add it: as a custom button on Lead and Contact records, or through the Qualified Canvas App. If you previously set it up using the Lightning Component/iframe method, that configuration will continue to work — see the deprecated section below for details.
⚠️ Before you begin: Regardless of which method you use, each end user who will access the Live Booker must connect their personal Salesforce account to their Qualified account. Users can do this themselves from Settings → Salesforce → Connection in Qualified. Admins can also manage this on behalf of users from Settings → Organization → Users — look for the Salesforce Connection column in the user management table.
Adding the Live Booker as a button
Adding the Live Booker as a custom button gives your reps one-click access to meeting scheduling directly from any Lead or Contact record.
Create buttons in Salesforce
- In Salesforce, navigate to Setup → Object Manager → Lead/Contact → Buttons, Links, and Actions.
- Select the “New Button or Link" button.
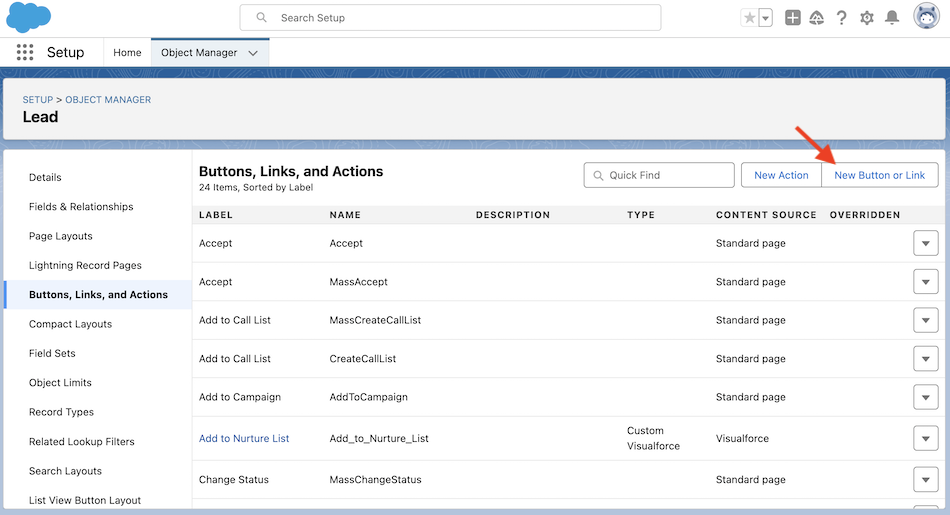
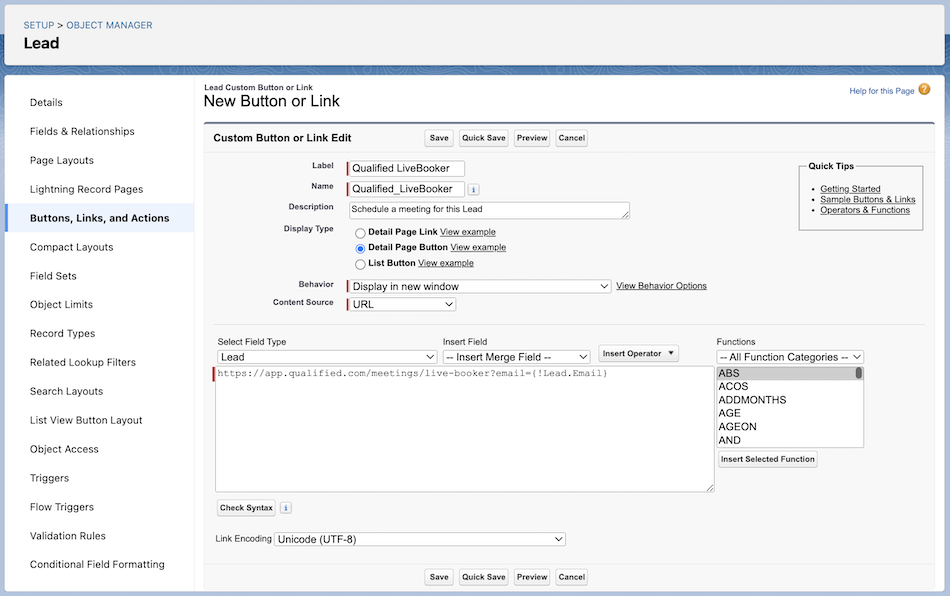
- Create a button with these details:
- Label:
Qualified Live Booker - Display Type: Detail Page Button
- Behavior: Display in a new window
- Content Source: URL
- URLs:
- Lead Object:
https://app.qualified.com/meetings/live-booker?email={!Lead.Email} - Contact Object:
https://app.qualified.com/meetings/live-booker?email={!Contact.Email}
- Lead Object:
- Link Encoding: Unicode (UTF-8)
- Label:
- Save the button.
Add button to Lead/Contact Page Layouts
- Navigate to Setup → Object Manager → Lead (or Contact) → Page Layouts.
- Drag and drop the Qualified Live Booker button to the desired page layout.
- Save the layout
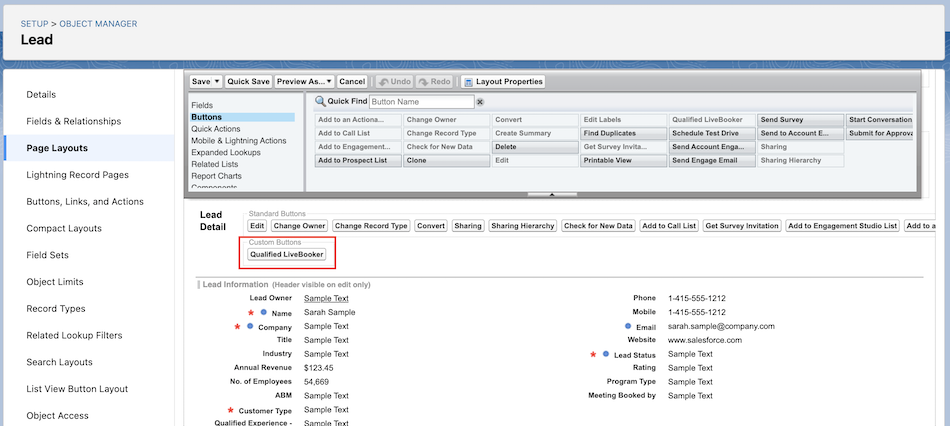
📝 Note: For Lightning users, you'll also need to edit the Action Button Panel in the Lightning App Builder to include the button on record pages.
Legacy iframe setup (deprecated)
📝 Note: If your team previously set up the Live Booker using the Lightning Component/iframe method, that configuration will continue to work — no changes are needed on your end. When you're ready to migrate to the current setup, see Displaying Qualified Data in Salesforce with the Canvas App.



.svg)


