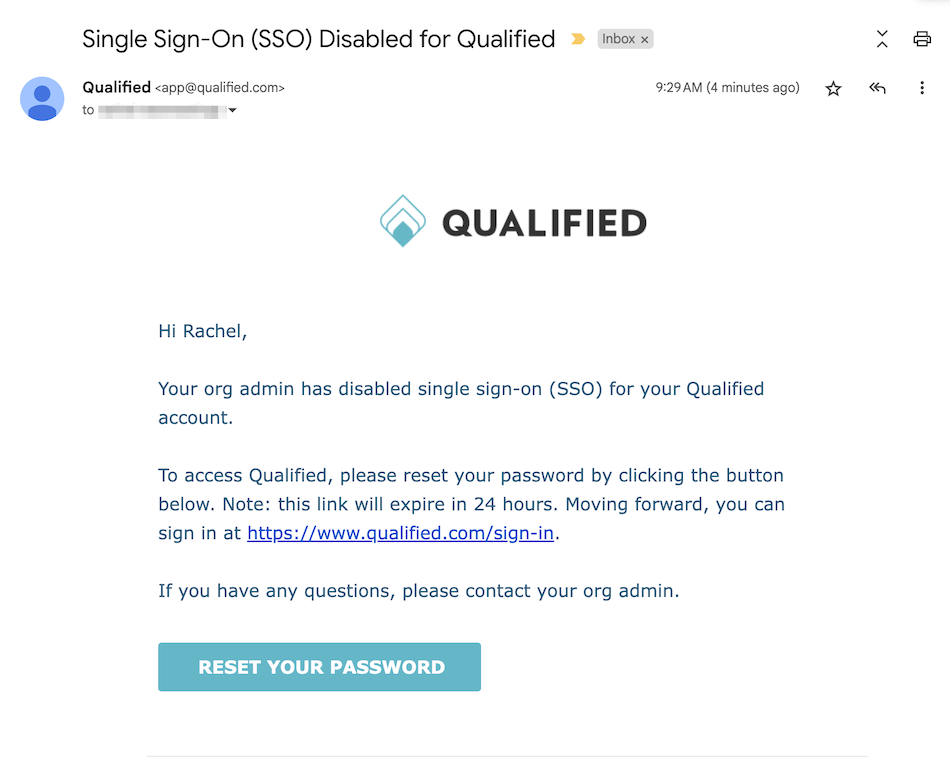


This guide outlines the steps to configure Single Sign-On (SSO) with Microsoft Entra ID (Azure AD) for Qualified. Follow these instructions to streamline authentication for your users and enhance security.
Prerequisites
-
A Microsoft Entra subscription and at least the Cloud Application Administrator role.
-
Access to Qualified’s Enterprise Single Sign-On and the Admin user role.
-
Your organization’s Company ID from Qualified.
-
A basic understanding of SAML 2.0 configuration.
Steps to Configure Microsoft Entra ID SSO
Step 1: Set up in Qualified
-
Log in to your Qualified Admin account.
-
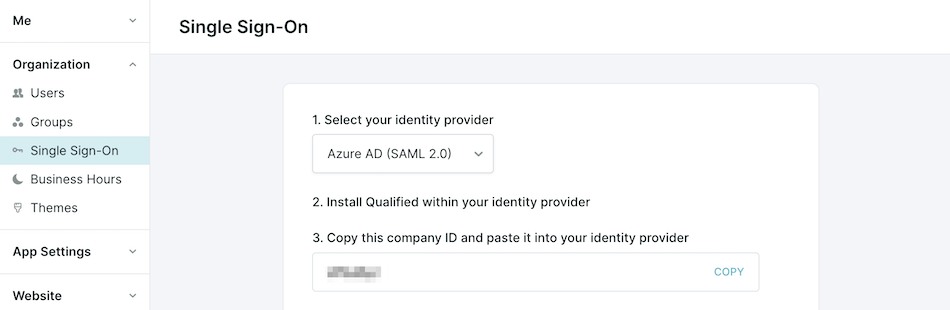
Navigate to Settings → Organization → Single Sign-On.
-
Select Azure AD (SAML 2.0) from the dropdown menu.
-
Copy your Company ID.
-
Create your SAML Assertion Consumer Service (ACS) URL and store it somewhere temporarily to be used in a later step below:
https://app.qualified.com/auth/saml/[PASTE_YOUR_COMPANY_ID_HERE]
Step 2: Configure in Microsoft Entra
-
Sign in to the Microsoft Entra admin center with at least a Cloud Application Administrator role.
-
Create a new enterprise app for Qualified:
-
Navigate to Entra ID → Enterprise apps.
-
Select New application and click Create your own application.
-
Name the app “Qualified”, select Integrate any other application you don’t find in the gallery (Non-gallery), then click Create.
-
-
Once created, use the image below for the app’s logo:

-
Assign yourself as a user for the application.
-
Configure Single Sign-On:
-
Select SAML as the SSO method.
-
In Basic SAML Configuration, enter
-
Identifier (Entity ID): https://app.qualified.com
If you’re connecting an additional Qualified org to the same Microsoft Entra tenant, use the Entity ID in Multiple Qualified orgs on one identity provider instead.
-
Reply URL (ACS URL): Your custom SAML ACS URL with the Company ID from Qualified:
https://app.qualified.com/auth/saml/[PASTE_YOUR_COMPANY_ID_HERE]
-
-
Save your configuration.
-
-
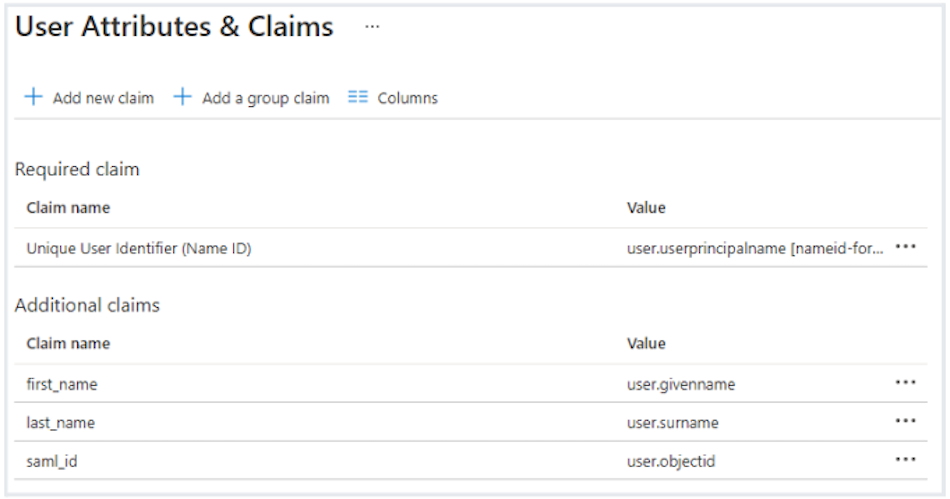
Configure Attributes & Claims:
-
Delete default attributes except Unique User Identifier (Name ID).
-
Add new claims:
-
first_name: user.givenname
-
last_name: user.surname
-
saml_id: user.objectid
-
-
-
Save your configuration.
-
Under SAML Signing Certificate, copy the App Federation Metadata URL.
Microsoft Entra documentation: Add an Enterprise Application & Create your own Application.
Step 3: Finalize SSO in Qualified
-
Return to Settings → Organization → Single Sign-On in Qualified.
-
Paste the App Federation Metadata URL into the required field.
-
Click Save and then Verify Configuration to test the connection.
-
If you encounter issues during verification, such as a failed connection or mismatch errors, double-check that the metadata URL matches exactly with the one provided in Microsoft Entra.
-
-
Assign all existing Qualified users access to the new Qualified application in Microsoft Entra before enabling SSO.
-
When ready, click Enable single sign-on for this org.
Multiple Qualified orgs on one identity provider
If your company has more than one Qualified org, you can connect each of them to the same Microsoft Entra tenant. Each Qualified org needs its own enterprise application in Microsoft Entra.
-
First org: Follow the steps above as written.
-
Each additional org: Create a separate enterprise application and follow the same steps, with one change: set the Identifier (Entity ID) to
https://app.qualified.com/[PASTE_YOUR_COMPANY_ID_HERE], using that org’s Company ID from Settings → Organization → Single Sign-On.
Request to enable: Contact your Qualified Success Architect before you set up SSO for an additional org. Qualified turns on the new Entity ID format for that org.
Enable SCIM Provisioning (Optional)
SCIM provisioning automates user creation, updates, and deactivation directly from Microsoft Entra. This step is optional but highly recommended for efficient user management.
Supported Provisioning Features
The following provisioning features are supported within Qualified provisioning of SSO users:
-
Push New Users: New users created in Microsoft Entra are automatically created in Qualified. When a user is provisioned, their name, job title, profile (role), phone number, email, and timezone are synced to Qualified.
-
Push Profile Updates: Changes to a user's email or profile (role) in Microsoft Entra are pushed to Qualified. Other details, such as name, job title, and phone number, are set when the user is created and aren't updated afterward.
-
Push User Deactivation: Deactivating a user in Microsoft Entra will deactivate the user in Qualified. This removes their login access but retains their information.
-
Reactivate Users: User accounts can be reactivated in Qualified directly from Microsoft Entra.
Using Custom User Profiles with SCIM
In addition to the default roles, Qualified's User Profiles feature allows you to create custom permission sets. You can sync these custom profiles via SCIM by creating new App Roles in Microsoft Entra that correspond to the profile's unique API Name in Qualified.
Note: A profile's API Name must be all lowercase with no spaces, for example
sales_manager. Qualified doesn't show an error when an API Name is formatted incorrectly, and a profile with a badly formatted API Name won't sync from Microsoft Entra. Check the API Name in Qualified before you add it to Microsoft Entra.
For full details on creating custom profiles and finding their API Name, please see our main University article: How to manage users in Qualified.
Steps to Enable SCIM Provisioning
Step 1: In Microsoft Entra, create App Roles for the Qualified application:
-
Sign in to the Microsoft Entra admin center.
-
Navigate to Entra ID → App registrations and select the Qualified application.
-
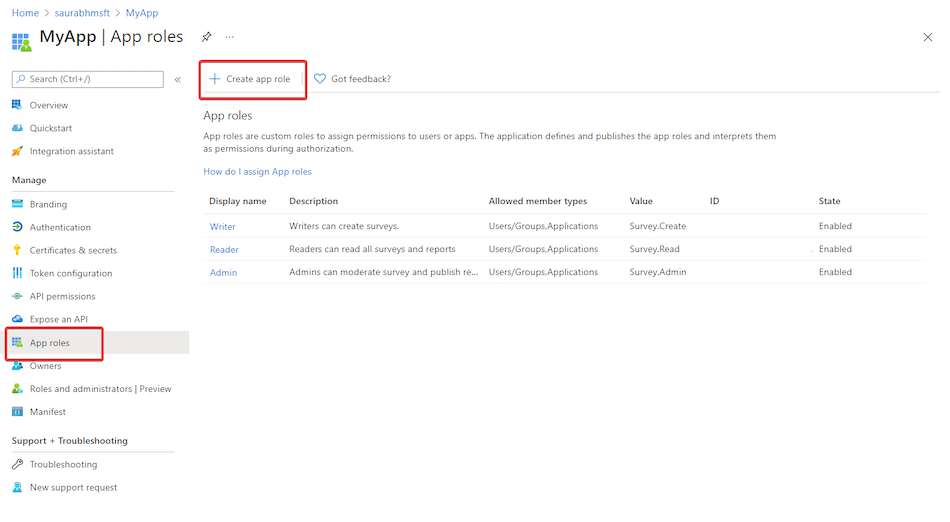
Under Manage, select App roles and then click Create app role.
-
In the Create app role pane, you will configure roles that map to your Qualified User Profiles. By default, you should create the following three roles:
-
Display Name: Qualified Admin
-
Allowed Member Types: Users/Groups
-
Value:
admin(case sensitive) -
Description: Qualified Admins have full access.
-
-
Display Name: Qualified Chat
-
Allowed Member Types: Users/Groups
-
Value:
chat(case sensitive) -
Description: Reps engage in chat and meetings.
-
-
Display Name: Qualified Meetings
-
Allowed Member Types: Users/Groups
-
Value:
meetings(case sensitive) -
Description: Meetings users have limited access.
-
-
-
To use a custom profile, create an additional app role. Use the API Name from your custom profile in Qualified as the Value here. For example:
-
Display Name: Qualified Sales Manager
-
Allowed Member Types: Users/Groups
-
Value:
sales_manager(This must exactly match the API Name in Qualified) -
Description: Custom profile for sales managers.
-
-
-
Ensure each app role is enabled and click Apply.
Microsoft Entra documentation: Add App Roles to your Application
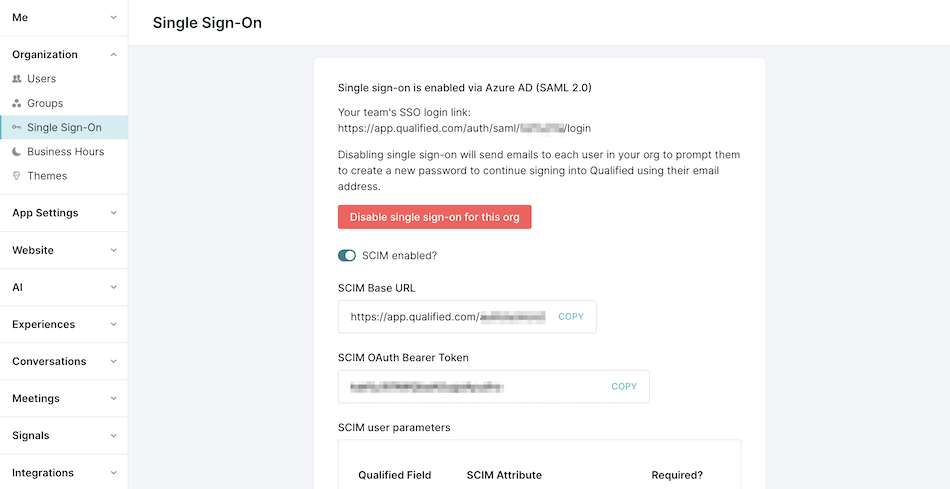
Step 2: In Qualified, collect your API URL and Bearer Token:
-
Go to Settings → Organization → Single Sign-On.
-
Toggle on SCIM Enabled.
-
Copy the API URL and Bearer Token.
Step 3: In Microsoft Entra, complete SCIM provisioning setup:
-
Return to the Microsoft Entra admin center.
-
Navigate to Entra ID → Enterprise apps and select your Qualified app.
-
Open the Provisioning tab.
-
Under Admin Credentials, paste the API URL and Bearer Token from Qualified.
-
Click Test Connection to verify the integration.
-
Expand Mappings, and select Provision Microsoft Entra ID Users to edit the user attribute mappings.
-
Ensure the standard attributes match the following table. You will then add the final
rolesattribute as a custom expression in the next step.
| customappsso Attribute | Microsoft Entra ID Attribute | Matching Precedence |
|---|---|---|
| userName | userPrincipalName | 1 |
| active | Switch([IsSoftDeleted], , "False", "True", "True", "False") | |
| title | jobTitle | |
| name.givenName | givenName | |
| name.familyName | surname | |
| phoneNumbers[type eq "work"].value | telephoneNumber | |
| externalId | objectId | |
| roles[primary eq "True"].value | (custom expression) |
-
Adding the Custom Role Expression: The
rolesattribute requires a custom expression to map correctly. Follow these steps carefully:-
In the Attribute Mapping section, click Add New Mapping.
-
Set the Mapping type to Expression.
-
For the Expression, copy and paste the following base expression:
Switch( ToLower(SingleAppRoleAssignment([appRoleAssignments])), "meetings", "qualified meetings", "meetings", "qualified admin", "admin", "qualified chat", "chat" ) -
For the Target attribute, select
roles[primary eq "True"].value. -
Click Ok to save the new mapping.
Heads up! To sync custom profiles, you must add a new line for each one inside the expression.
You will add a new line for each custom profile you want to sync. The format is
"app role display name in lowercase", "Qualified Profile API Name",.The expression reads the display name of the app role assigned to each user, in lowercase. The first value on each new line is the Display Name you entered in step 5, written in lowercase.
For example, if you created an app role in Entra with the display name Qualified Sales Manager, and the corresponding API Name in Qualified is
sales_manager, your new expression would be:Switch( ToLower(SingleAppRoleAssignment([appRoleAssignments])), "meetings", "qualified sales manager", "sales_manager", "qualified meetings", "meetings", "qualified admin", "admin", "qualified chat", "chat" )
-
Microsoft Entra documentation: Provisioning a role to a SCIM app and Reference for writing expressions for attribute mappings: Switch
Step 4: Finalize and Test
-
Return to the Mappings screen and Disable the Provision Microsoft Entra ID Groups mapping, as Qualified does not support Group mappings at this time.
-
Save your settings and enable Provisioning.
-
Add a test user in Microsoft Entra ID and verify that the user is created in Qualified with the correct attributes and profile.
Binding Email Process for Existing Users
After enabling SSO, all existing Qualified users receive an email from app@qualified.com with a unique binding link.
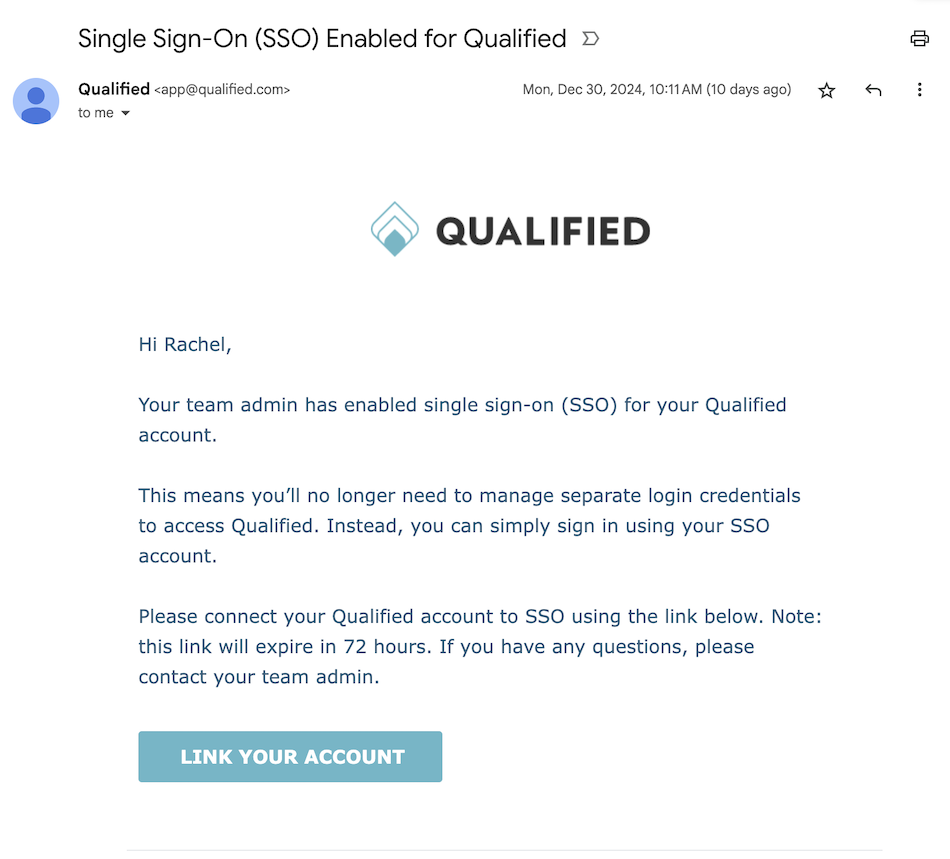
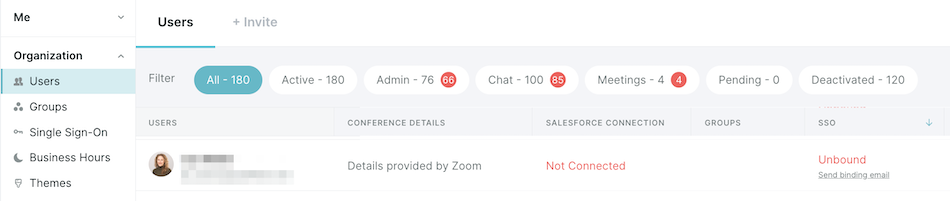
Users must click the link within 72 hours to bind their Qualified account to their Microsoft Account. If the binding link expires, an admin can resend it from Settings → Organization → Users.
Adding New Users
With SCIM Provisioning Enabled
A Microsoft Entra user with at least a Cloud Application Administrator role will need to assign the user to the Qualified application.
Users added through SCIM don't receive a binding email. They sign in from the Qualified SSO page or from the Qualified app in Microsoft My Apps.
Microsoft Entra documentation: Assign Users and Groups to an Application
Without SCIM Provisioning
If your company does not have SCIM Provisioning enabled, then you’ll follow the steps below to add new users to Qualified:
-
Assign Users in Microsoft Entra: A Microsoft Entra user with at least a Cloud Application Administrator role will need to assign the user to the Qualified application: Assign Users and Groups to an Application
-
Invite Users in Qualified: Invite users from Settings → Organization → Users in Qualified: Provisioning Users in Qualified
-
User Accepts Invite: Invited users will receive an email with a button to link their account and access Qualified.
Disconnecting SSO
If you'd like to disconnect your company’s SSO, you can do so at any time.
-
Go to Settings → Organization → Single Sign-On
-
Click Disable SSO for this Team.
-
Users will receive an email to create a new password and log in using their email addresses.