


This guide outlines the steps to configure Single Sign-On (SSO) with OneLogin for Qualified. Follow these instructions to streamline authentication for your users and enhance security.
Prerequisites
- Access to OneLogin as an Account Owner, or as a user with Super User or Manage App privileges.
- Access to Qualified’s Enterprise Single Sign-on, and the Admin user role.
- Your organization’s Company ID from Qualified.
- A basic understanding of SAML 2.0 configuration.
Steps to Configure OneLogin SSO
Step 1: Set up in Qualified
- Log in to your Qualified Admin account.
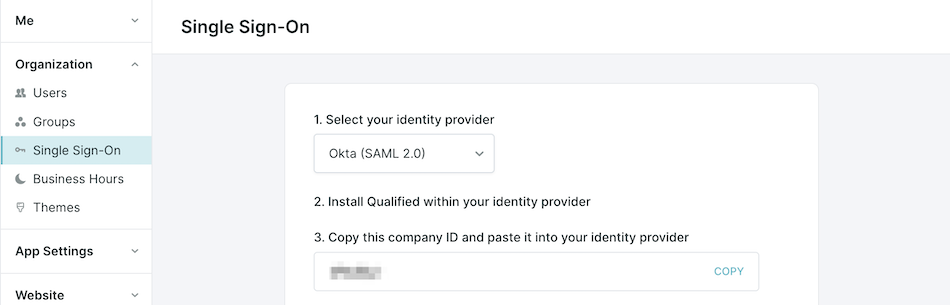
- Navigate to Settings → Organization → Single Sign-On.
- Select OneLogin (SAML 2.0) from the dropdown menu.
- Copy your Company ID.
Step 2: Configure in OneLogin
- Log in to the OneLogin Admin Console.
- Go to Applications → Applications and click Add App.
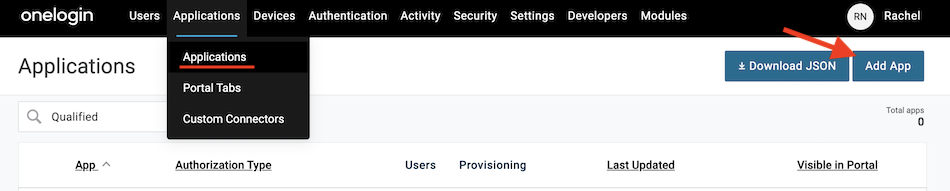
- Search for “Qualified” to find our application and select it.
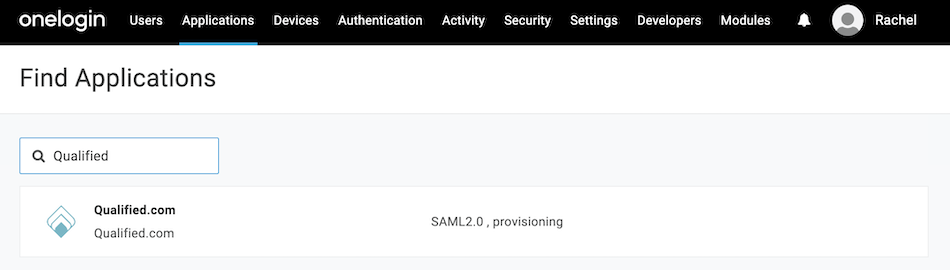
- Click Save to display additional configuration tabs.
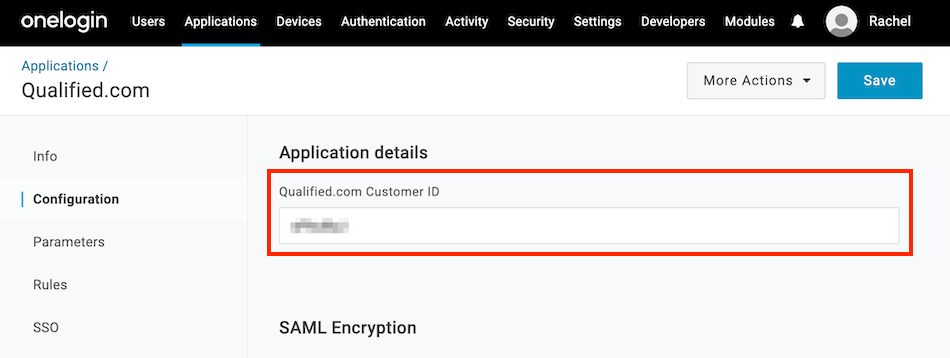
- Under the Configuration tab, enter the Company ID you copied from your Qualified account to the Application Details and Save.
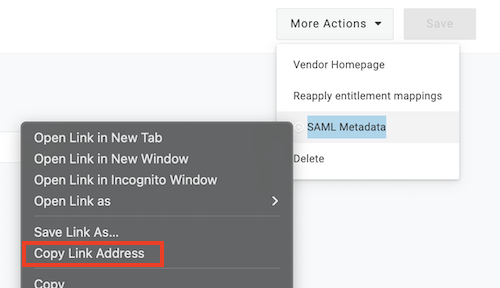
- Next, click More Actions, then right-click on SAML Metadata, and select Copy link address. You’ll add this link in Qualified in just a moment.
- Lastly, assign the application to yourself to complete the configuration.
OneLogin Documentation: Introduction to App Management
Step 3: Finalize SSO in Qualified
- Return to Settings → Organization → Single Sign-On in Qualified.
- Paste the SAML Metadata link you copied from OneLogin into the required field, and click Save.
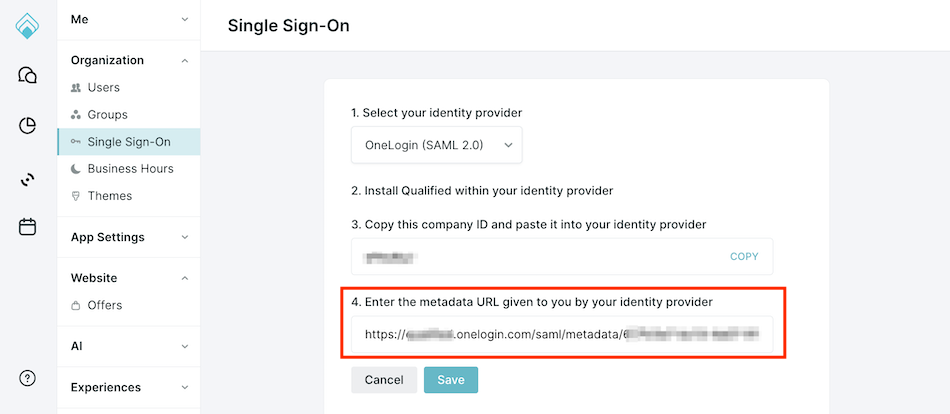
- Click Verify Configuration to test the connection.
- Before enabling single sign-on, make sure to assign all existing Qualified users access to the Qualified application in OneLogin as they will no longer be able to access Qualified with their password once SSO is enabled.
- Existing users will receive an email to bind their accounts.
- When you’re ready, click Enable single sign-on for this org.
Enable SCIM Provisioning (Optional)
SCIM provisioning automates user creation, updates, and deactivation directly from OneLogin. This step is optional but highly recommended for efficient user management.
Supported Provisioning Features
The following provisioning features are supported within Qualified provisioning of SSO users:
- Push New Users: New users created in OneLogin are automatically created in Qualified. When a user is provisioned, their name, profile (role), phone number, email, and timezone are synced.
- Push Profile Updates: Updates made to a user's email or profile in OneLogin are pushed to Qualified.
- Push User Deactivation: Deactivating a user in OneLogin will deactivate the user in Qualified. This removes their login access but retains their information.
- Reactivate Users: User accounts can be reactivated in Qualified directly from OneLogin.
Using Custom User Profiles with SCIM
In addition to the default profiles, Qualified's User Profiles feature allows you to create custom permission sets. You can sync these custom profiles via SCIM by creating new Roles in OneLogin and mapping them to the profile's unique API Name in Qualified.
For full details on creating custom profiles and finding their API Name, please see our main University article: How to manage users in Qualified.
Steps to Enable SCIM Provisioning
Step 1: In Qualified
- Go to Settings → Organization → Single Sign-On.
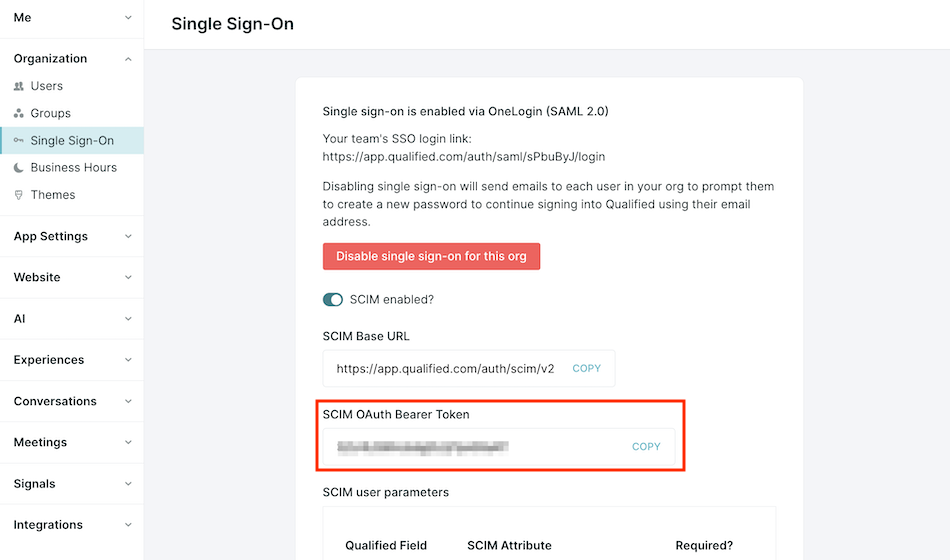
- Toggle on SCIM Enabled to enable SCIM provisioning.
- Copy the SCIM OAuth Bearer Token displayed on the screen.
Step 2: In OneLogin
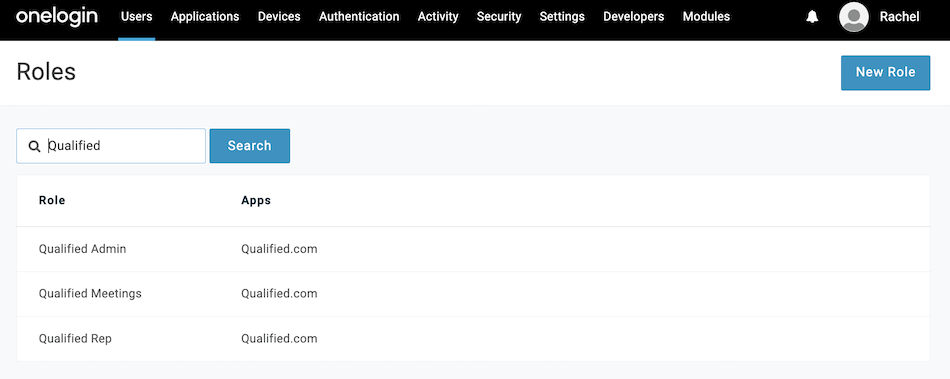
- In your OneLogin Admin console, go to Users → Roles
- Create a Role for each of your Qualified User Profiles and add access to the Qualified app. You should create the three default roles, plus any custom profiles you wish to sync. For example
- Qualified Admin
- Qualified Rep
- Qualified Meeting
- Sales Manager (This would be a custom profile)
OneLogin Documentation: Creating Roles
- Next, go to Applications → Applications, find the Qualified application, and click to open it.
- Navigate to the Configuration tab.
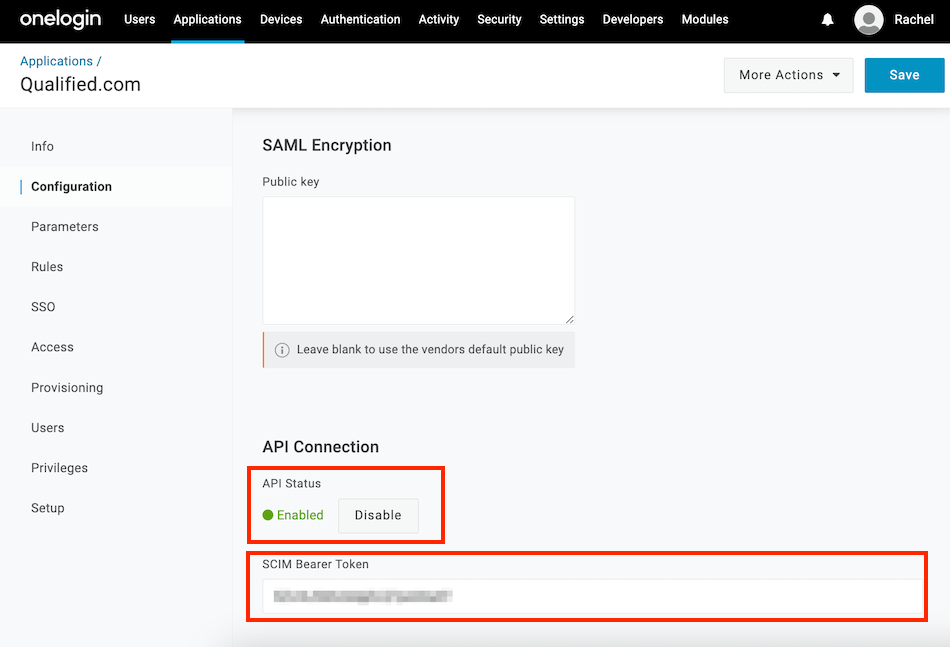
- Enable the API Connection.
- Paste the SCIM OAuth Bearer Token from Qualified into the SCIM Bearer Token field, and Save.
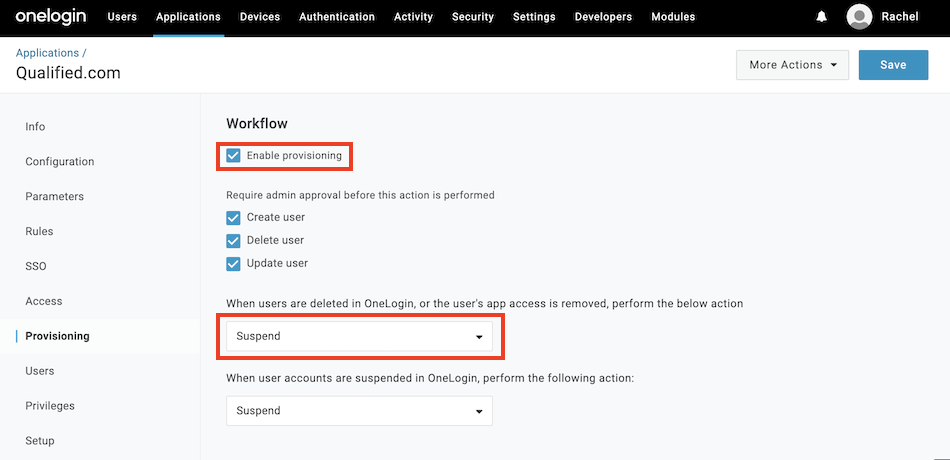
- Next, go to to the Provisioning tab.
- Check the box to Enable Provisioning.
- Under "When users are deleted in OneLogin, or the user's app access is removed," select Suspend. Then, click Save.
- Navigate to the Rules tab and click Add Rule to create a mapping for each role.
- Example Rule for a Default Profile:
- Name:
Qualified Admin - Conditions:
Roles→ include →Qualified Admin - Actions:
Set Role in Qualified.com(check "Map from OneLogin") → Set Role to →- Macro -→admin
- Name:
- Example Rule for a Custom Profile:
- Name:
Sales Manager Profile - Conditions:
Roles→ include →Sales Manager - Actions:
Set Role in Qualified.com(check "Map from OneLogin") → Set Role to →- Macro -→sales_manager(This must exactly match the API Name in Qualified)
- Name:
- Example Rule for a Default Profile:
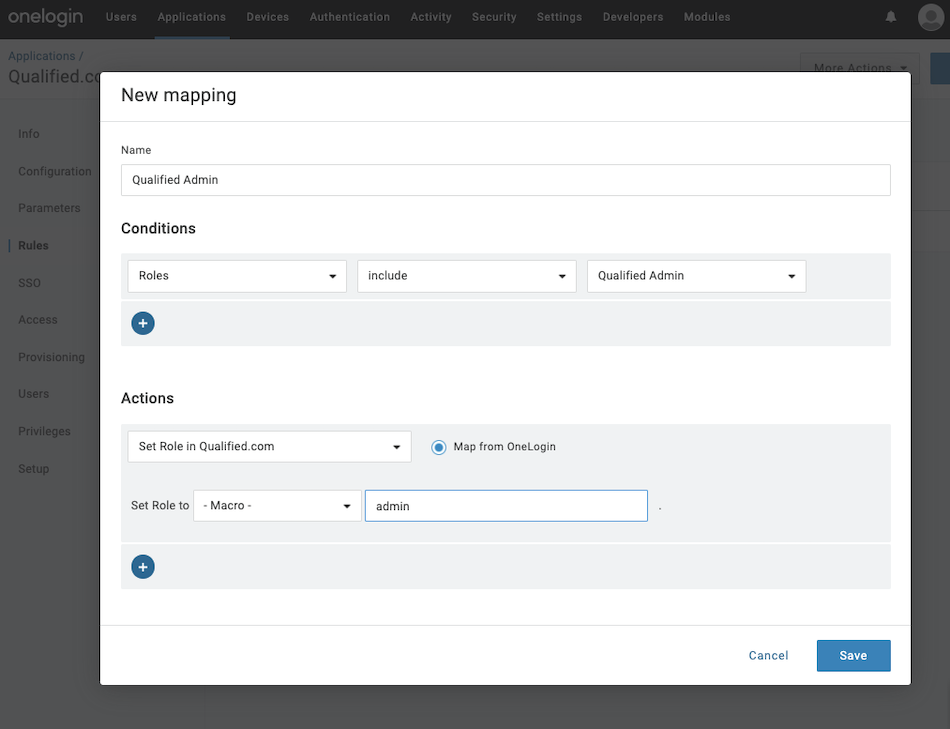
- Create a rule for each of your default and custom profiles, then click Save.
OneLogin Documentation: Configuring Apps
Step 3: Testing and Verification
- Add a test user in OneLogin and assign them one of the Roles you created.
- Verify the user is created in Qualified with the correct attributes and profile.
- Update the test user's attributes (e.g., role or email) and confirm the changes sync in Qualified.
- Deactivate the test user and ensure their access is removed in Qualified.
Binding Email Process for Existing Users
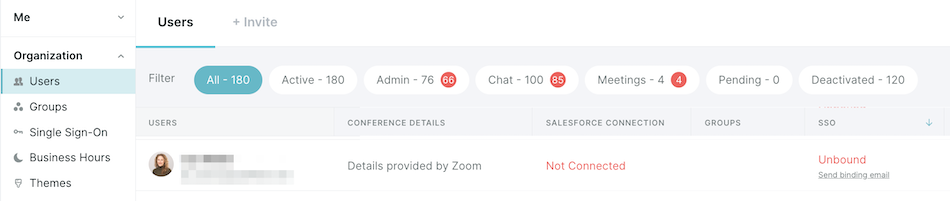
After enabling SSO, all existing Qualified users receive an email from app@qualified.com with a unique binding link.
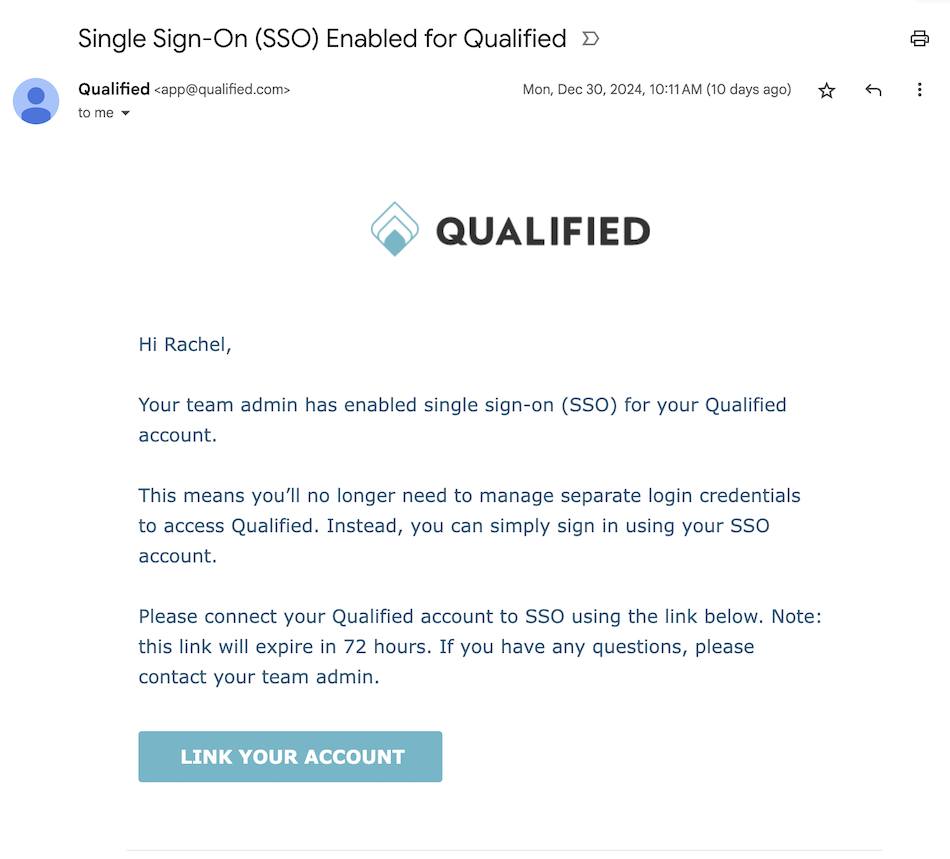
Users must click the link within 72 hours to bind their Qualified account to their OneLogin Account. If the binding link expires, an admin can resend it from Qualified by going to Settings → Organization → Users.
Adding New Users
With SCIM Provisioning Enabled
A OneLogin user with Super user, or have the Manage Role privilege to the Qualified roles, will need to assign the user to the appropriate Qualified Role to add them to Qualified.
OneLogin Documentation: Assigning Roles to Users
Without SCIM Provisioning
If your company does not have SCIM Provisioning enabled, then you’ll follow the steps below to add new users to Qualified:
- Assign Users in OneLogin: A OneLogin admin with Super user, Manage user, or Manage application privileges will need to assign the user to the Qualified application: Manually Assigning Apps to Users
- Invite Users in Qualified: Invite users from Settings → Organization → Users in Qualified: Provisioning Users in Qualified.
- User Accepts Invite: Invited users will receive an email with a button to link their account and access Qualified.
Disconnecting SSO
If you'd like to disconnect your company’s SSO, you can do so at any time.
- Go to Settings → Organization → Single Sign-On
- Click Disable SSO for this team.
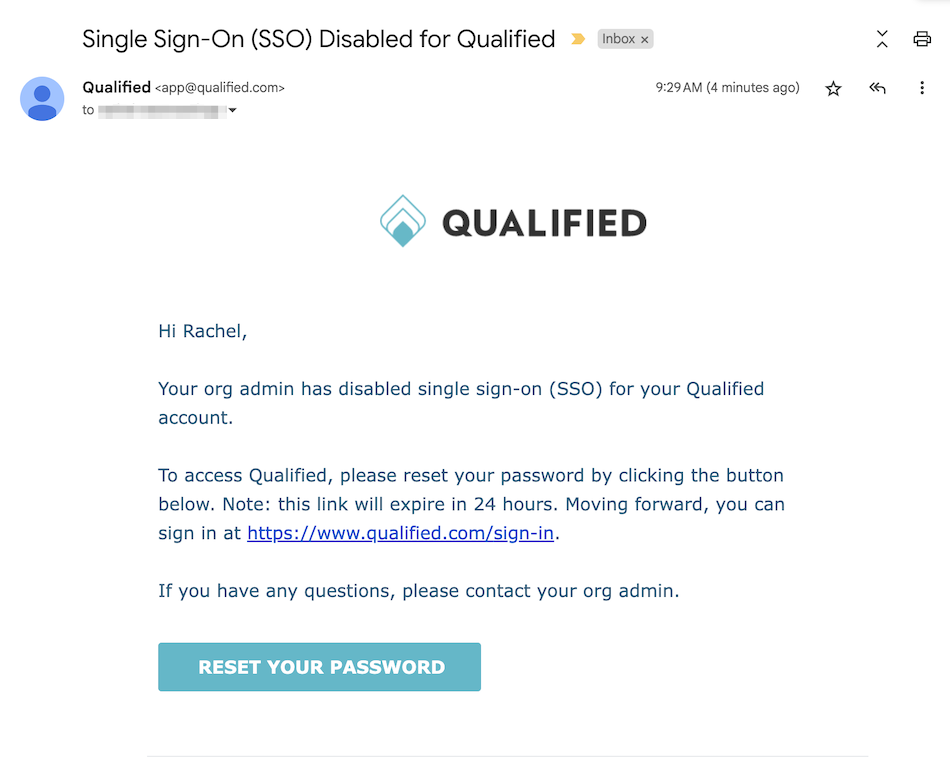
- Users will receive an email to create a new password and log in using their email addresses.


.svg)


