


If you use Google Analytics or Facebook conversion tracking, track which visitors converted after interacting with your Qualified messenger. Qualified can create standard and custom events based on specific visitor interactions.
If you’re interested in sending events to Google Analytics or Facebook conversion tracking, contact your Qualified Success Architect or Qualified Support.
Sending standard events from Qualified
Qualified can send three standard events to Google Analytics or Facebook events:
- Conversation Started
- Email Captured
- Meeting Booked
When enabled, Qualified automatically sends these events when these actions occur with no additional configuration needed. If you would like to track additional touchpoints, you can add Custom Events within your Experiences as well.
Sending custom events from Qualified
If you would like to track touchpoints other than what initiates a standard event, add Custom Events within your Experience.
Configure your experience
First, decide when you want to create an event in Google Analytics or Facebook. Then open that Experience and find the meaningful step(s), such as:
- Downloading content
- Creating a Salesforce lead
- Creating a Pardot prospect
Next, create a new Track Event step directly beneath that meaningful step:
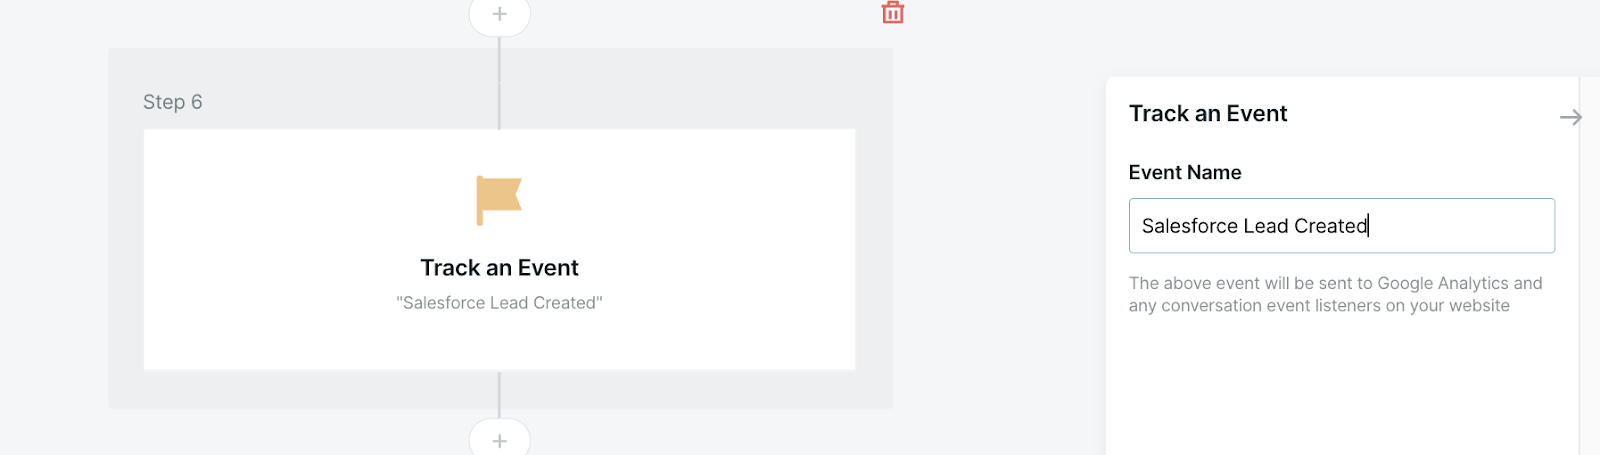
After you add the Track Event step, enter a name and click Save Experience.
For more information on the Track Event step, see General experience actions
Set up your analytics tracking
Google: Google Analytics 4
If you're interested in sending events to Google Analytics, contact your Qualified Success Architect or Qualified Support.
You may need to update your Google Analytics configuration because Google is moving from Universal Analytics to Google Analytics 4 (GA4). If your new implementation of GA4 is within Google Tag Manager (GTM), you will need some additional setup to capture Qualified’s events.
The instructions below assume you already have a basic GA4 implementation in your GTM container that tracks pageviews.
After configuring GA4, it may take up to an hour for GA4 to receive events from Qualified.
Create a trigger in Google Tag Manager
First, build a trigger so GTM registers an event from Qualified. Within GTM:
1. Navigate to the Triggers section.
2. Click New.
3. Click Trigger Configuration.
4. From Trigger Type, select Custom Event.
5. Enter ga_event as the Label Name and Event Name.
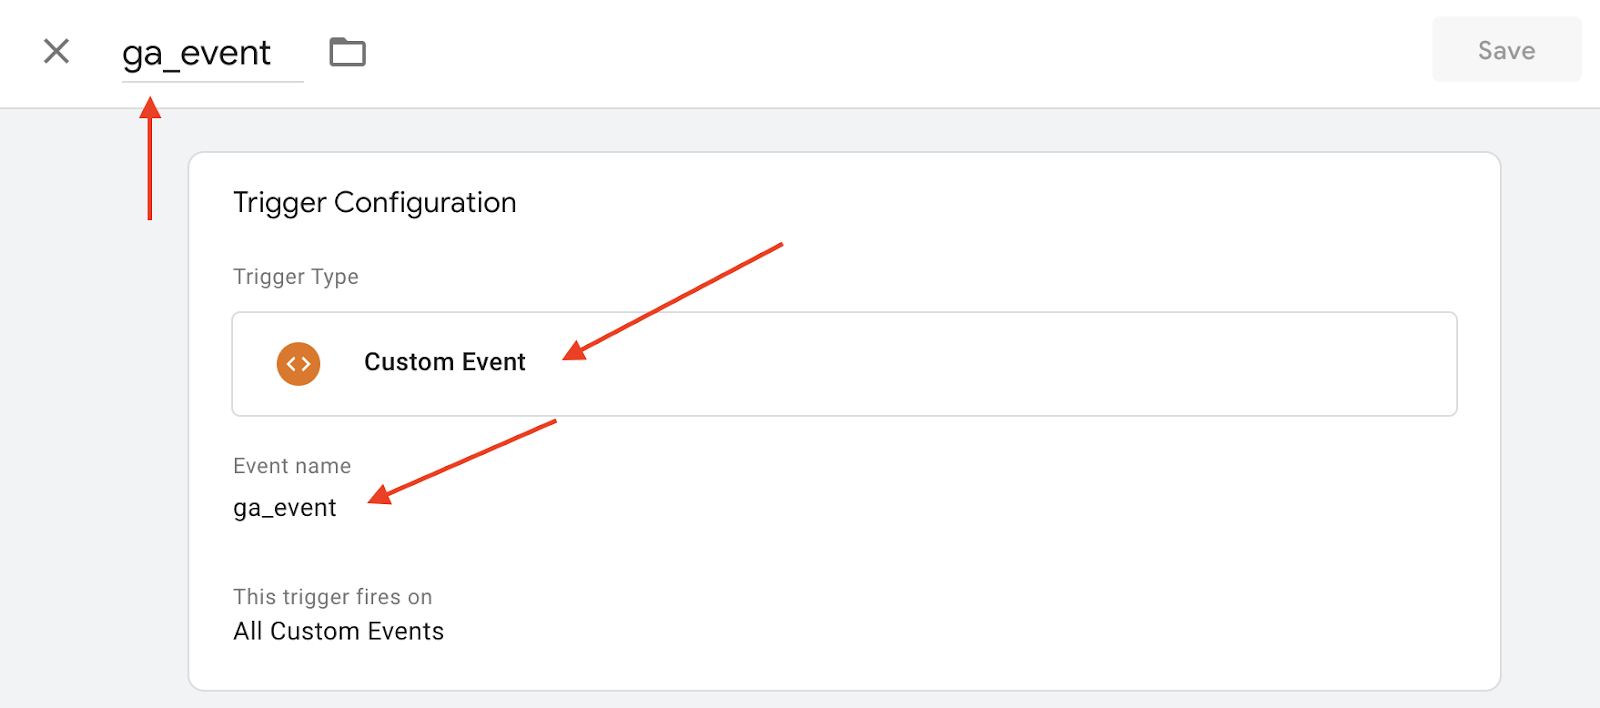
6. The trigger should fire on All Custom Events.
7. Click Save Trigger.
This event must be named ga_event to work properly.
Create a GA4 Tag
Create a tag with the type “Google Analytics: GA4 Event,” solely dedicated to the ga_event event. To do this:
1. Create a new tag in GTM.
2. Click Tag Configuration.
3. Set the Configuration Tag to your Google Analytics GA4 Event.
4. Enter ga_event as the Event Name:
5. Add two Event Parameters
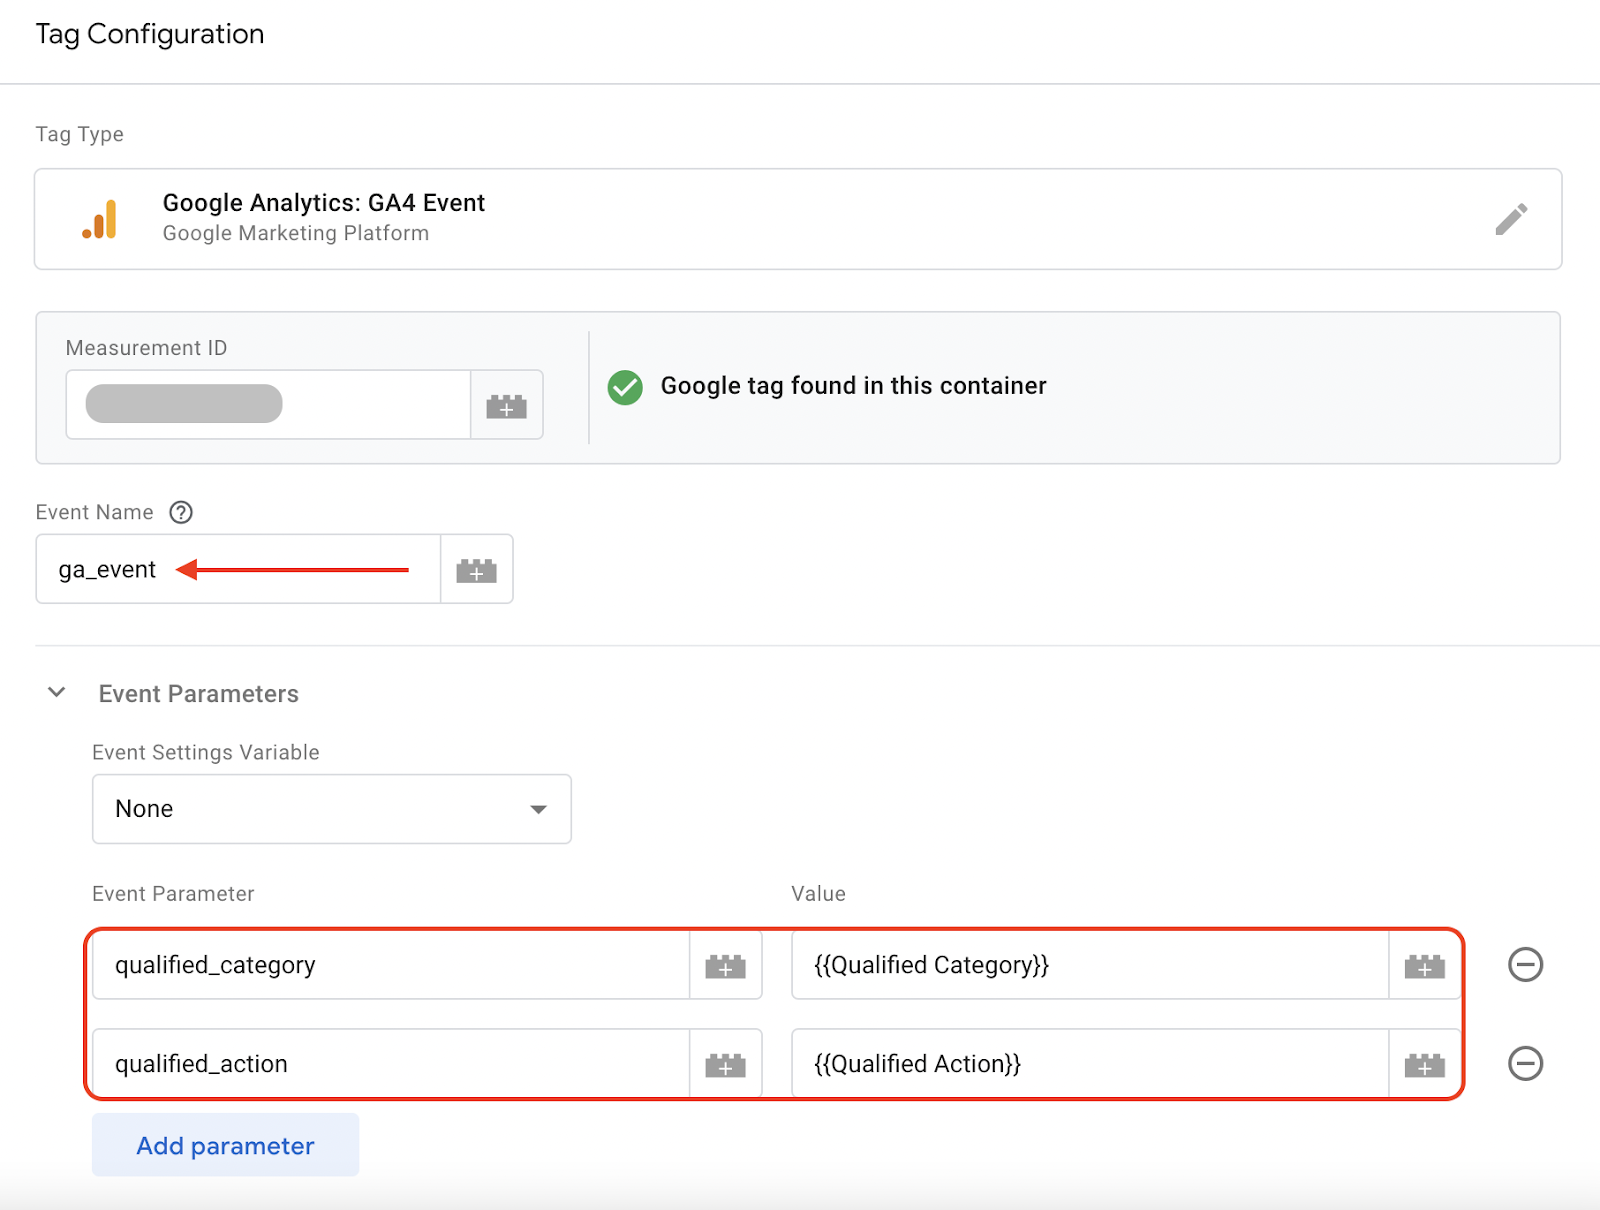
6. See Values below:
| Event Parameter | Value |
|---|---|
| qualified_category | {{Qualified Category}} |
| qualified_action | {{Qualified Action}} |
7. Click Triggering.
8. Select the ga_event trigger that you created earlier.
Create Data-Layer Variables in GTM
Next, create two data layer variables to hold the data that Qualified sends into GTM:
1. Open the Variables page in GTM.
2. Below User-Defined Variables, click New:

3. Click Variable Configuration.
4. Select Data Layer Variable as the variable type
5. Set the Data Layer Variable Name to action
7. Ensure the variable label name is Qualified Action
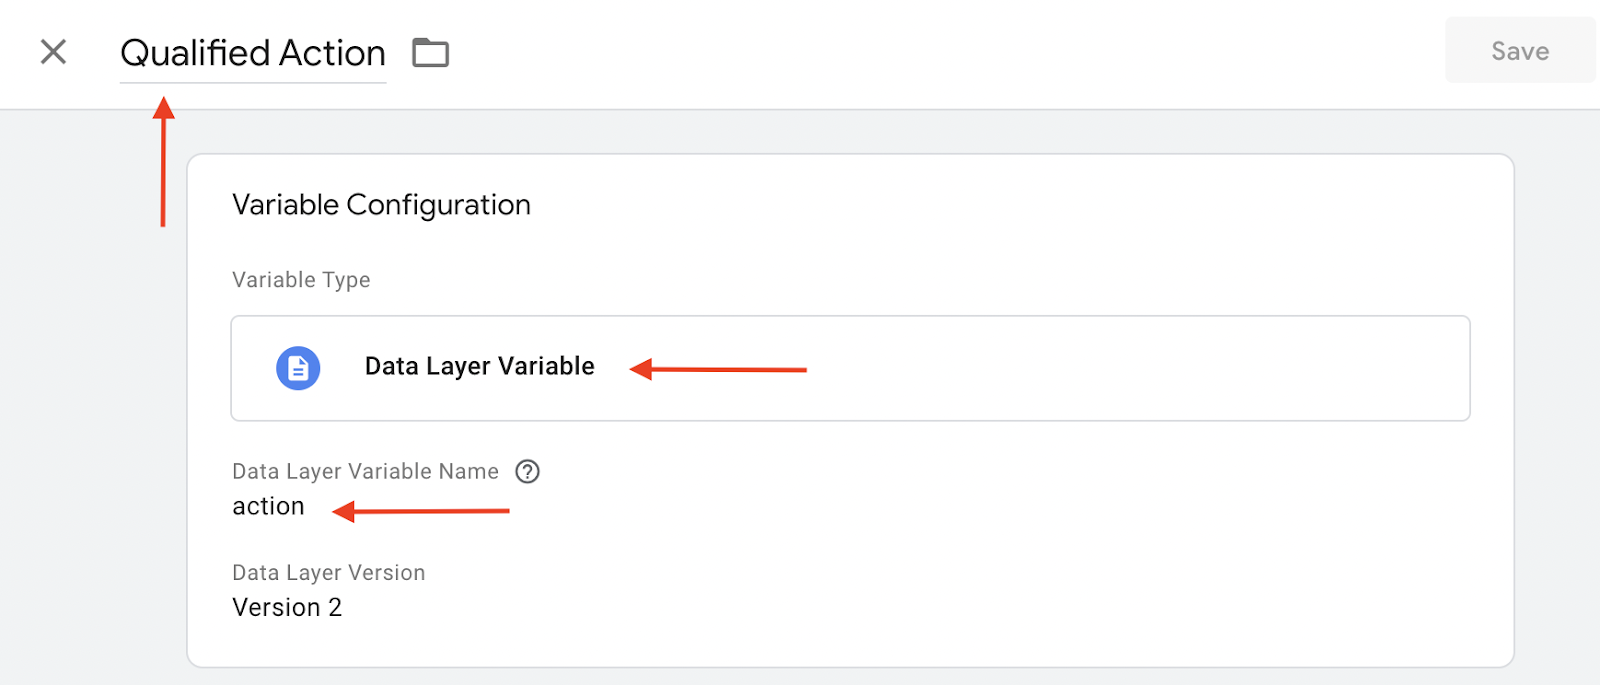
8. Click Save Variable
9. Repeat steps 1-7 to create a second data layer variable with Data Layer Variable Name as category and the variable label name as Qualified Category.
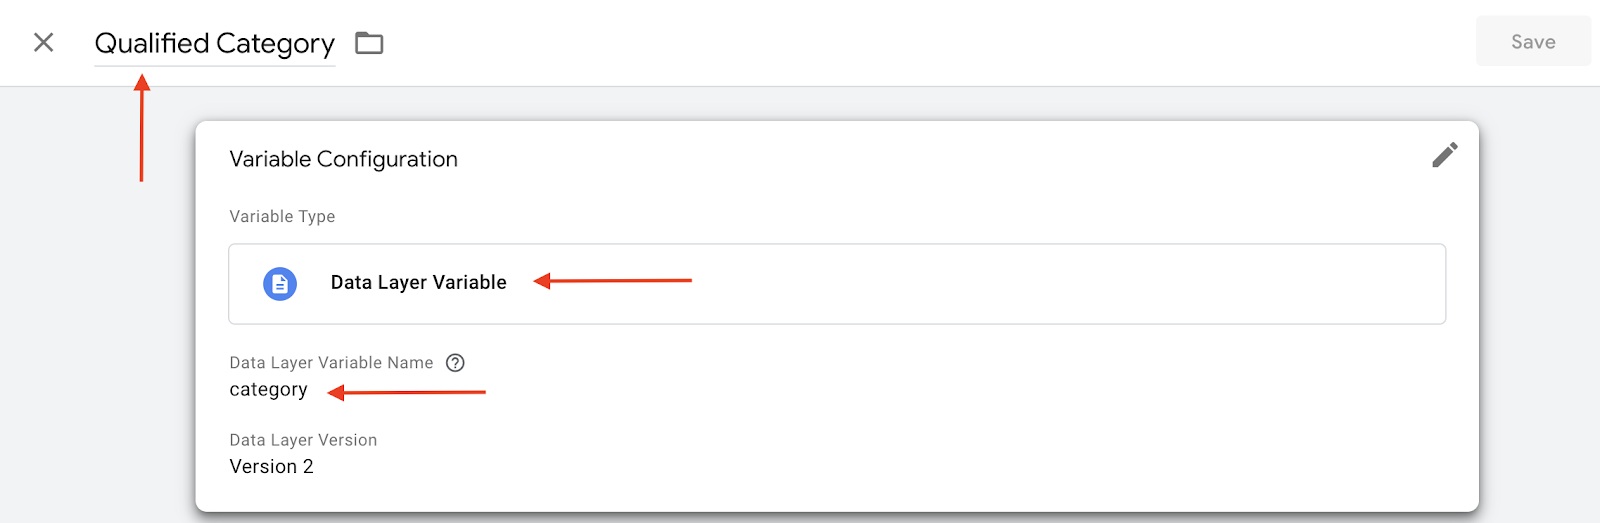
These variables must be named action and category to work properly.
GA4 Reporting
To report on the events sent from Qualified you will also need to create two custom dimensions: Qualified Action and Qualified Category.
1. Navigate to your admin portal and select Custom Definitions.
2. Select Custom Dimensions, create a Qualified Action and Qualified Category custom dimension with "qualified_action" and "qualified_category" in the Event Parameter.
You may not see "qualified_action" or "qualified_category" in the parameter, you can manually type that in.
Use Explore Reports within Google Analytics to view your results.
1. In your navigation bar, select Explore.
2. Select "Blank" to create a new report
3. Under Segments, select the "+" and "Event segment”
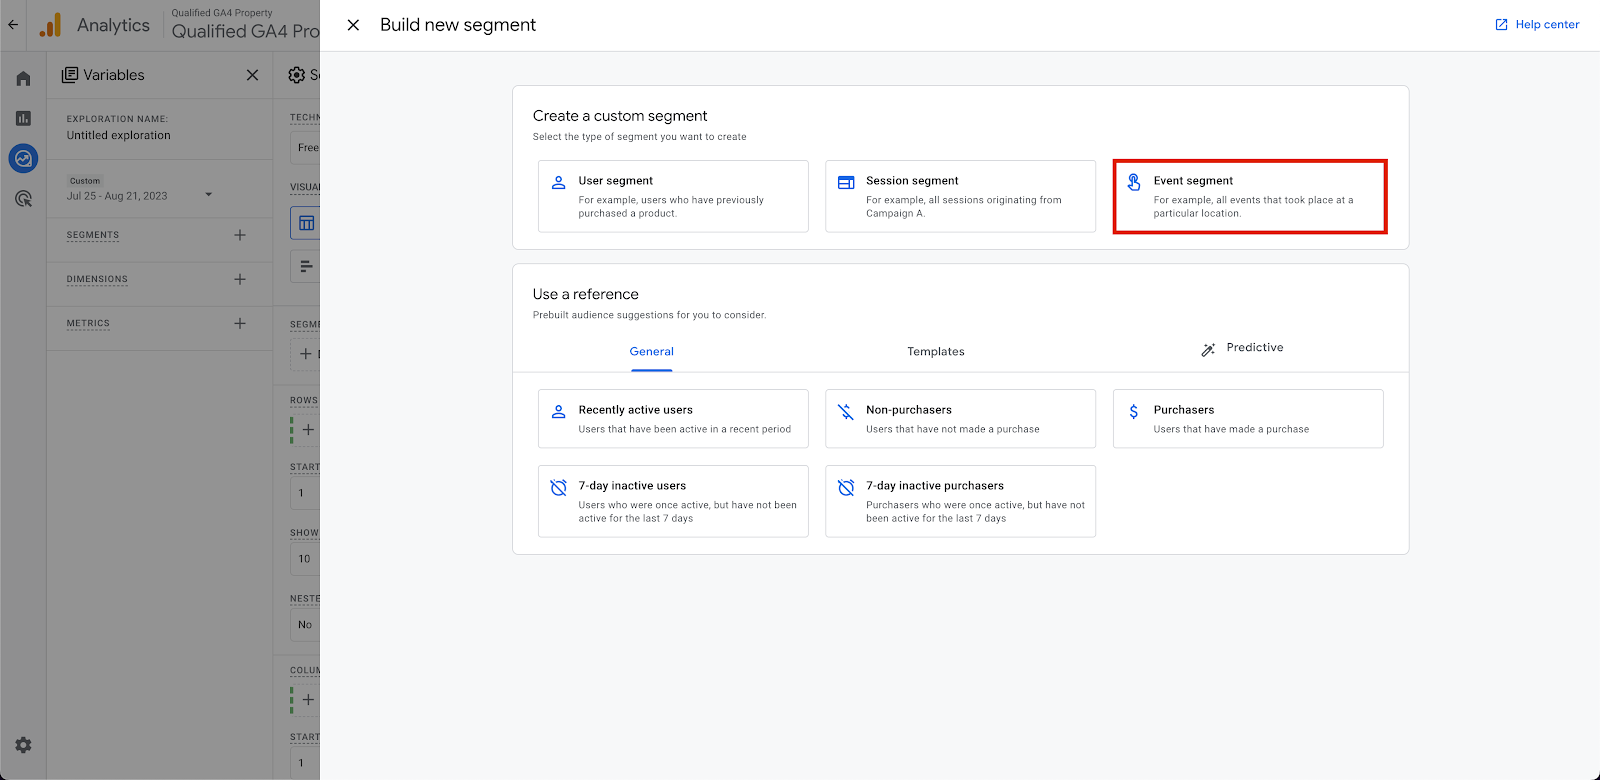
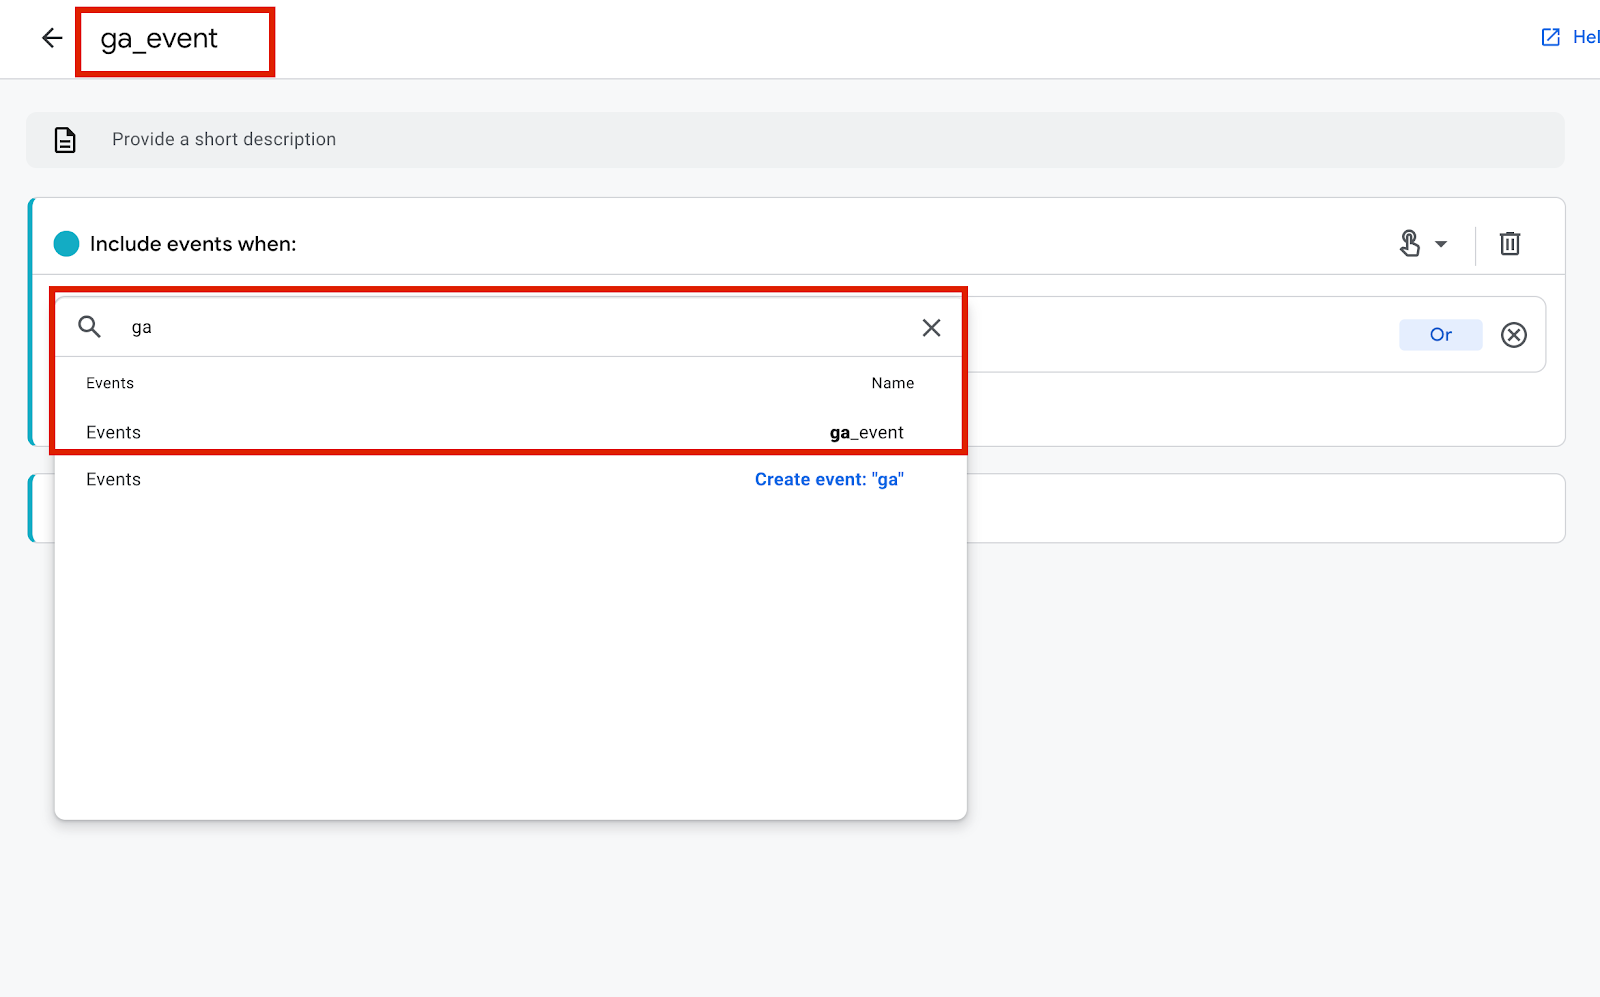
4. Name this segment and select the ga_event in the "add new condition" dialog box.
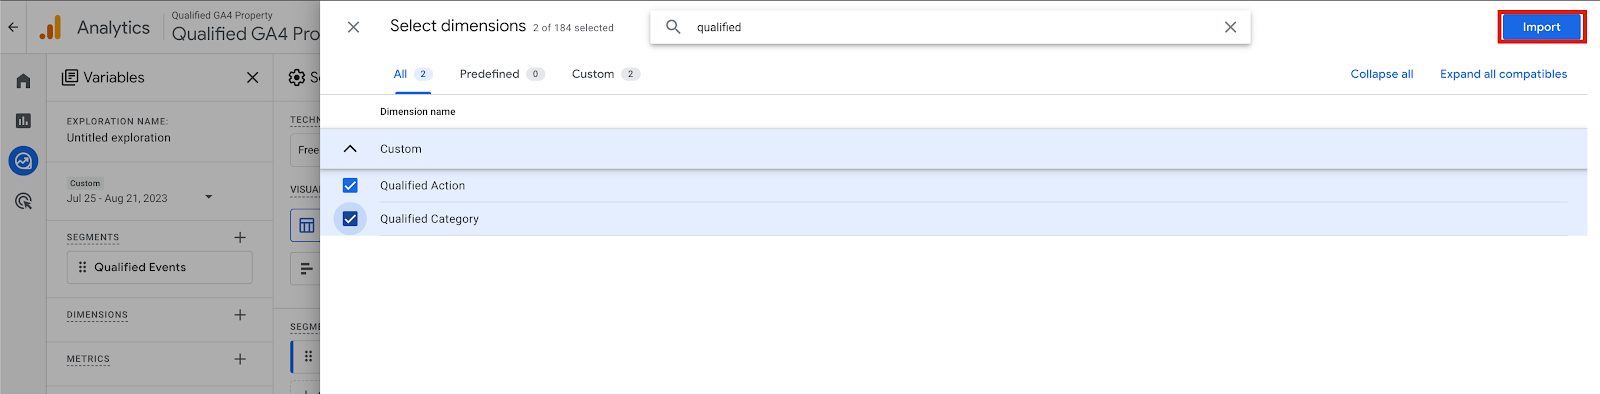
5. Under Dimensions, select the "+" and type Qualified Action and Qualified Category in the search bar to import and click "Import"
6. Add your Dimensions to the "Breakdowns" section in Settings and select the Technique to your preference. We suggest starting with "Segment Overlap"
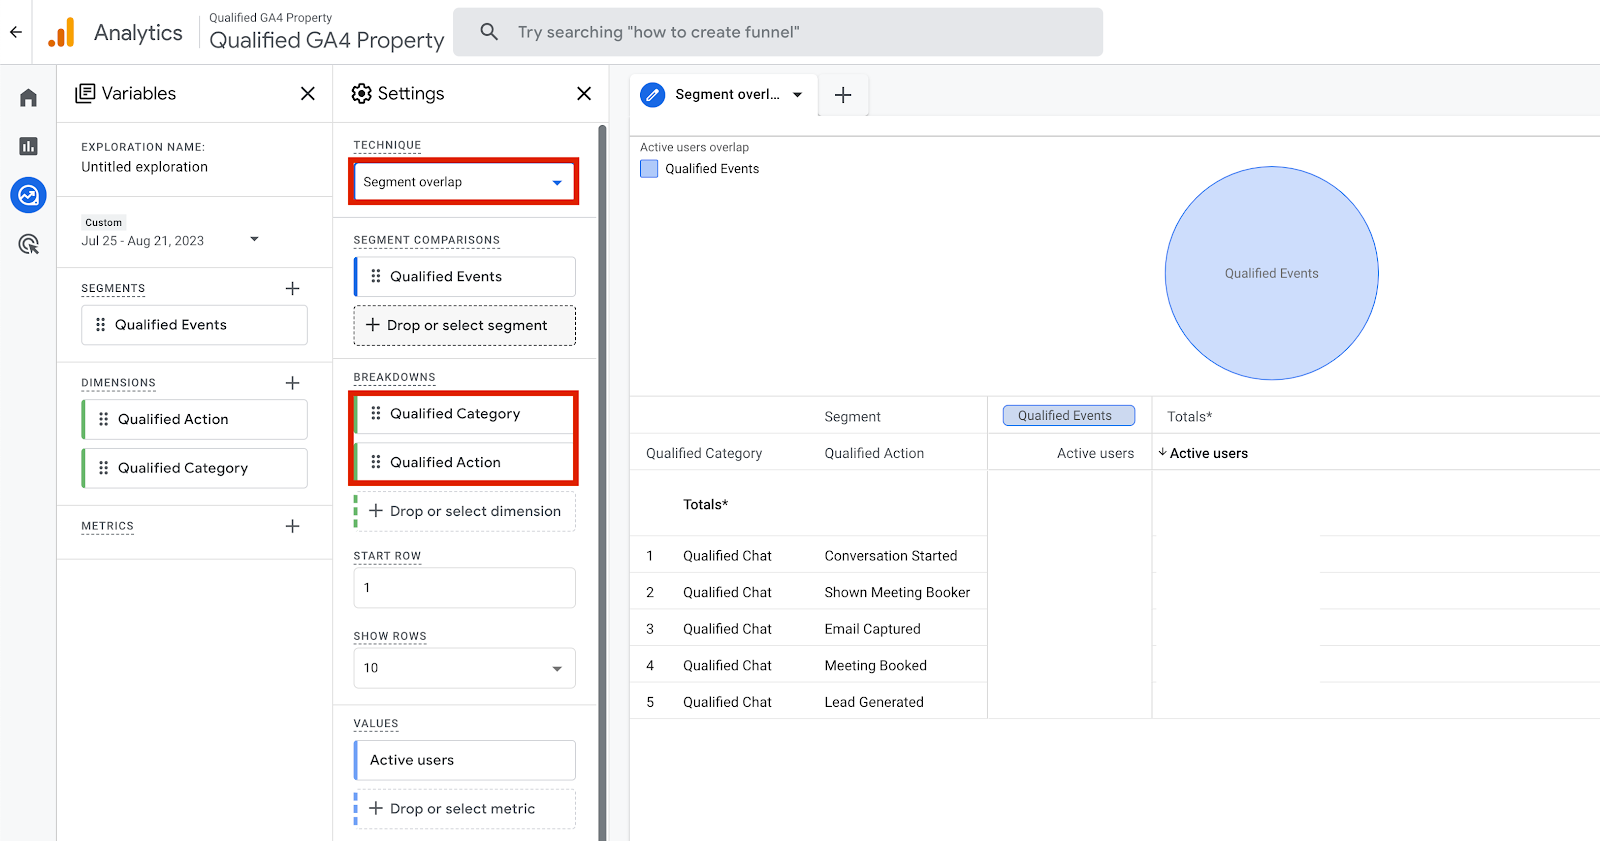
You're all set! You should see metrics being pulled into the report.
Facebook Conversion Tracking
Qualified can also track Facebook events. To do so, connect with your QSA or our support team, and then add the Meta pixel code to your website wherever you need to track conversions.
As visitors come to your site and interact with the Qualified app, the event is added as a custom event under ‘sharedDiscount' with the event name as one of our Standard Events or a Custom Event name that you've specified in your Qualified Experience.


.svg)


