


Setting up an email campaign enables Piper to engage leads, follow up automatically, and book meetings. This guide covers agentic email campaigns, which are configured through plain-language instructions rather than separate template fields.
This article refers to the updated functionality of AI Email as of Spring 2026. If you are maintaining an existing legacy campaign, see the legacy email setup guide for configuration details.
Agentic email vs. legacy email
| Legacy Email | Agentic Email | |
|---|---|---|
| How instructions work | Separate fields for purpose, samples, personalization, and persistence | A single instruction field plus a global email writing guide |
| Goal configuration | Goal set in campaign settings | Goals configured in the Campaign Guide, with optional inline references |
| Goals required? | Yes | No |
| Salesforce record required? | Yes | No |
| Reply behavior | Replies exit the lead from the campaign (unless auto-reply is enabled) | The AI SDR agent can reply to leads until a goal is met, a handoff occurs, or the lead exits |
| Handoff | "Route for chat" goal | Dedicated Handoff goal with configurable behavior |
| Qualification | Not supported | The agent can ask qualification questions over email when field information is incomplete |
Before you begin
Before creating a new campaign, complete the steps in the email sender setup and email unsubscribe management help articles. You will not be able to save a campaign without completing those steps first.
We also recommend setting up your Email Writing Guide before creating campaigns, as it provides the global instructions that apply to every email your AI SDR agent sends. To configure it, navigate to Settings → Agent Studio → Guides → Emails.
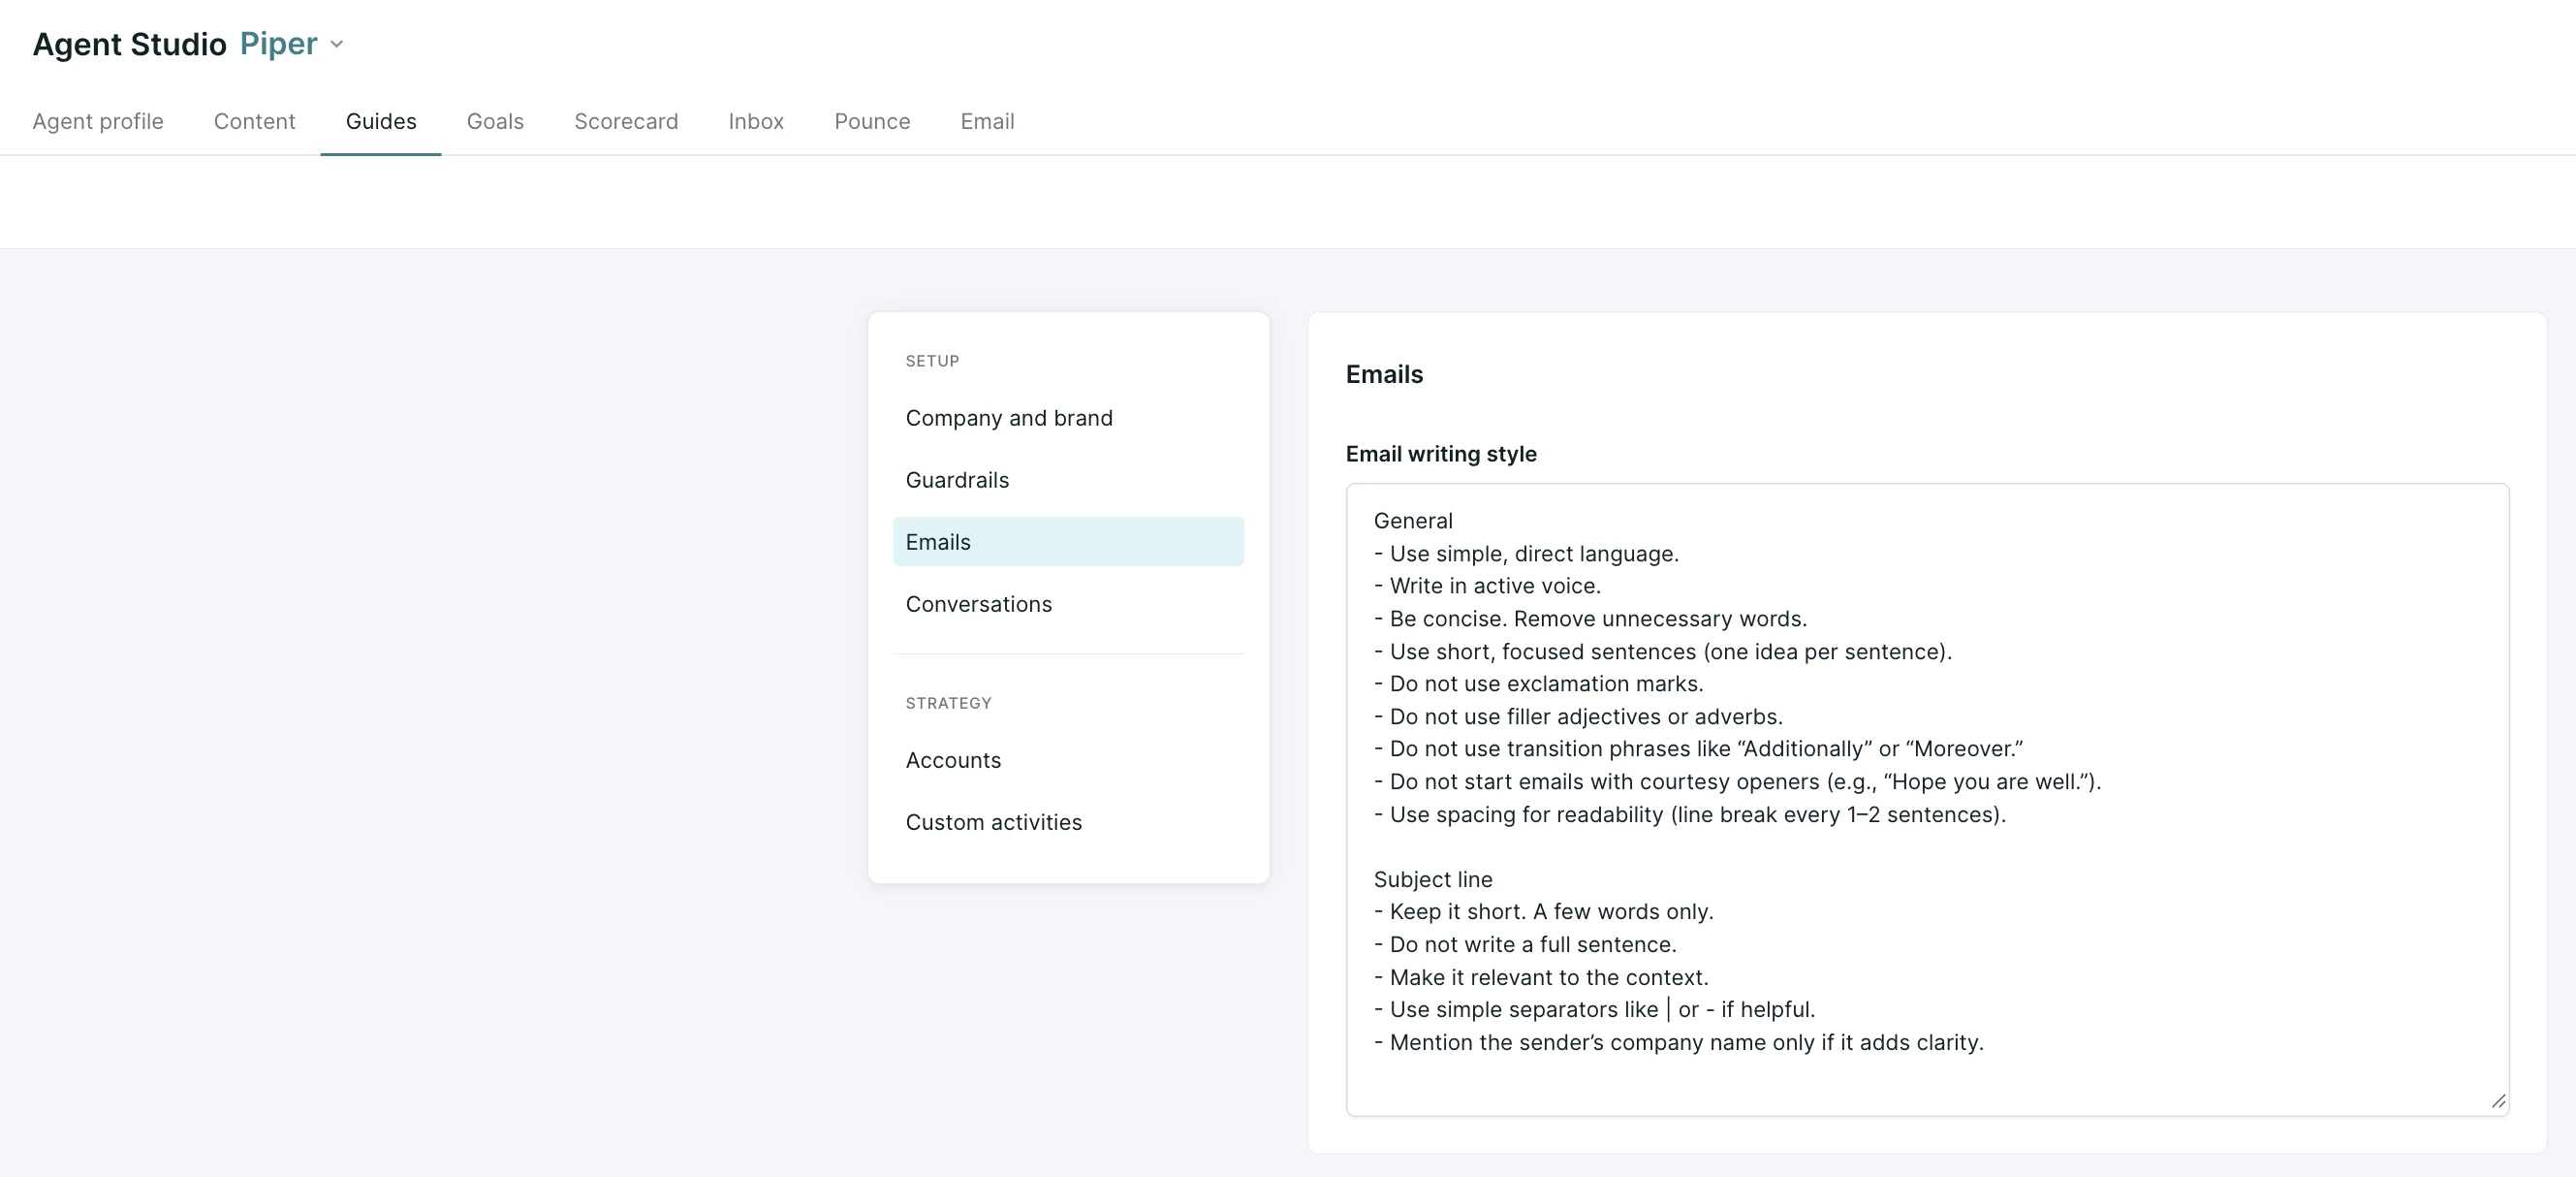
Write a plain-language strategy for your emails. We recommend including the following as a starting point:
- Brand rules. Define your positioning (e.g., "Always position us as a partner, not a vendor").
- Content strategy. Set global preferences, such as referencing customer success stories or specific industry use cases.
- Stylistic preferences. Establish language rules (e.g., "Say 'clients' not 'customers'") or formatting choices.
- Email Conversation Design. Use this section to define goals and reply behavior that should apply across campaigns given certain conditions. For example: "If a lead mentions pricing, use @goal [Book a Meeting]."
Tip: If you find yourself writing the same instruction across multiple campaigns, move it to the email writing guide instead.
Create a campaign
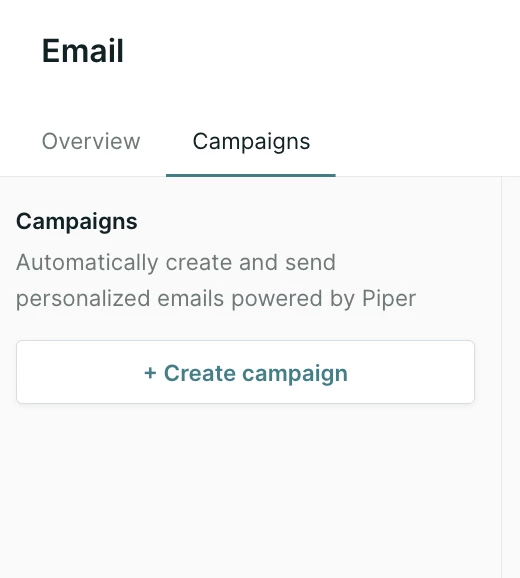
Navigate to Email → Campaigns and click + Create Campaign. Add a unique Name at the top.
The campaign is organized into the following sections. Complete all sections before saving.
General
Enrollment
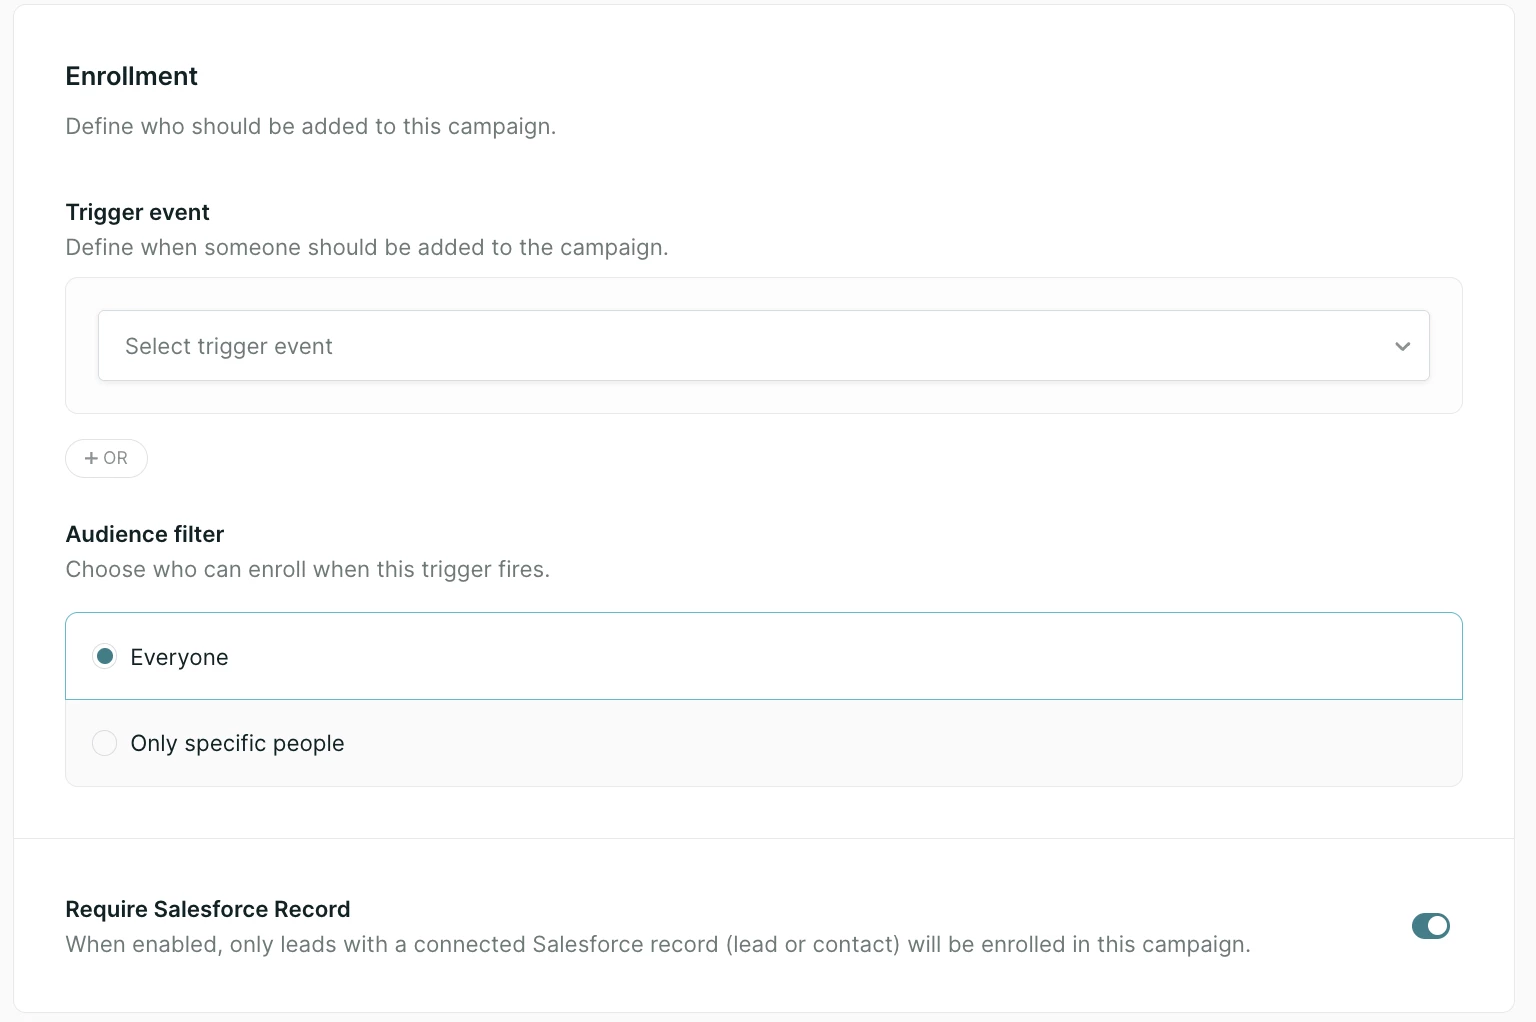
Trigger event: Define the event that will enroll leads into the campaign. Supported triggers include:
- Meeting offered but not booked: Triggered when a meeting is offered via Qualified but not booked after the visitor's session ends. This trigger can be refined by meeting type, meeting source, or the rep who offered the meeting.
- Meeting Canceled: Triggers when a prospect uses the reschedule or cancel link from a Qualified meeting invite.
- Meeting No-Show: Triggers when a meeting type is set to report no-shows and the prospect does not attend.
- Inbound chat request missed: Triggers when an inbound chat is missed, no rep enters the conversation, and no meeting is booked after the session ends.
- Qualified form submitted: Triggers when a Qualified form is submitted.
- Salesforce campaign member matches: Records added to a specific Salesforce campaign with a specific member status. Members who meet the criteria when the campaign is activated will be emailed. Qualified checks Salesforce every 15 minutes for new matching members. Only active campaigns may be selected.
Note: If you activate a campaign using the "Salesforce campaign member matches" trigger, members who already meet the criteria at the time of activation will be emailed. A preview window will show an estimate of how many members will be emailed.
- Salesforce field updated: Triggers when a mapped field on the Lead or Contact record is updated to match the defined criteria. Qualified checks Salesforce every 15 minutes. Note: formula fields are not supported.
- Added to Marketo Static List: Triggers when a contact is added to a defined Static list in Marketo.
- Added to Marketo Smart List: Triggers when a contact is added to a defined Smart list in Marketo.
- Added to Marketo Program: Triggers when a contact is added to a Program in Marketo.
- MAP form submitted: Triggers when a Marketo, HubSpot, or Pardot form is submitted.
Note: Marketo syncs occur daily at 5am UTC by default. Newly synced records for Marketo triggers will process at the next sync. For an immediate sync, trigger a manual sync from the Marketo Integrations settings page.
- Custom activity recorded: Triggers when a custom activity guide’s behavior is observed by a lead.
Audience filter: Choose whether to target Everyone who triggers the enrollment event, or Only specific people based on criteria such as:
- Excluding employees or current customers
- Filtering by CRM fields indicating qualification (e.g., company type, employee count, lead status)
- Segmenting visitors who qualify but are not already in Outreach or Salesloft sequences
Note: To prevent spam, each lead or contact can only be in one email campaign at a time. Campaigns are ranked in priority order and can be reordered by drag-and-drop. When a lead joins a higher-priority campaign, they are automatically exited from a lower-priority one.
Require a Salesforce record: Toggle whether a matching Salesforce Lead or Contact record is required before a lead can be enrolled. This is optional in agentic campaigns. Legacy campaigns always required a Salesforce record.
Exit criteria
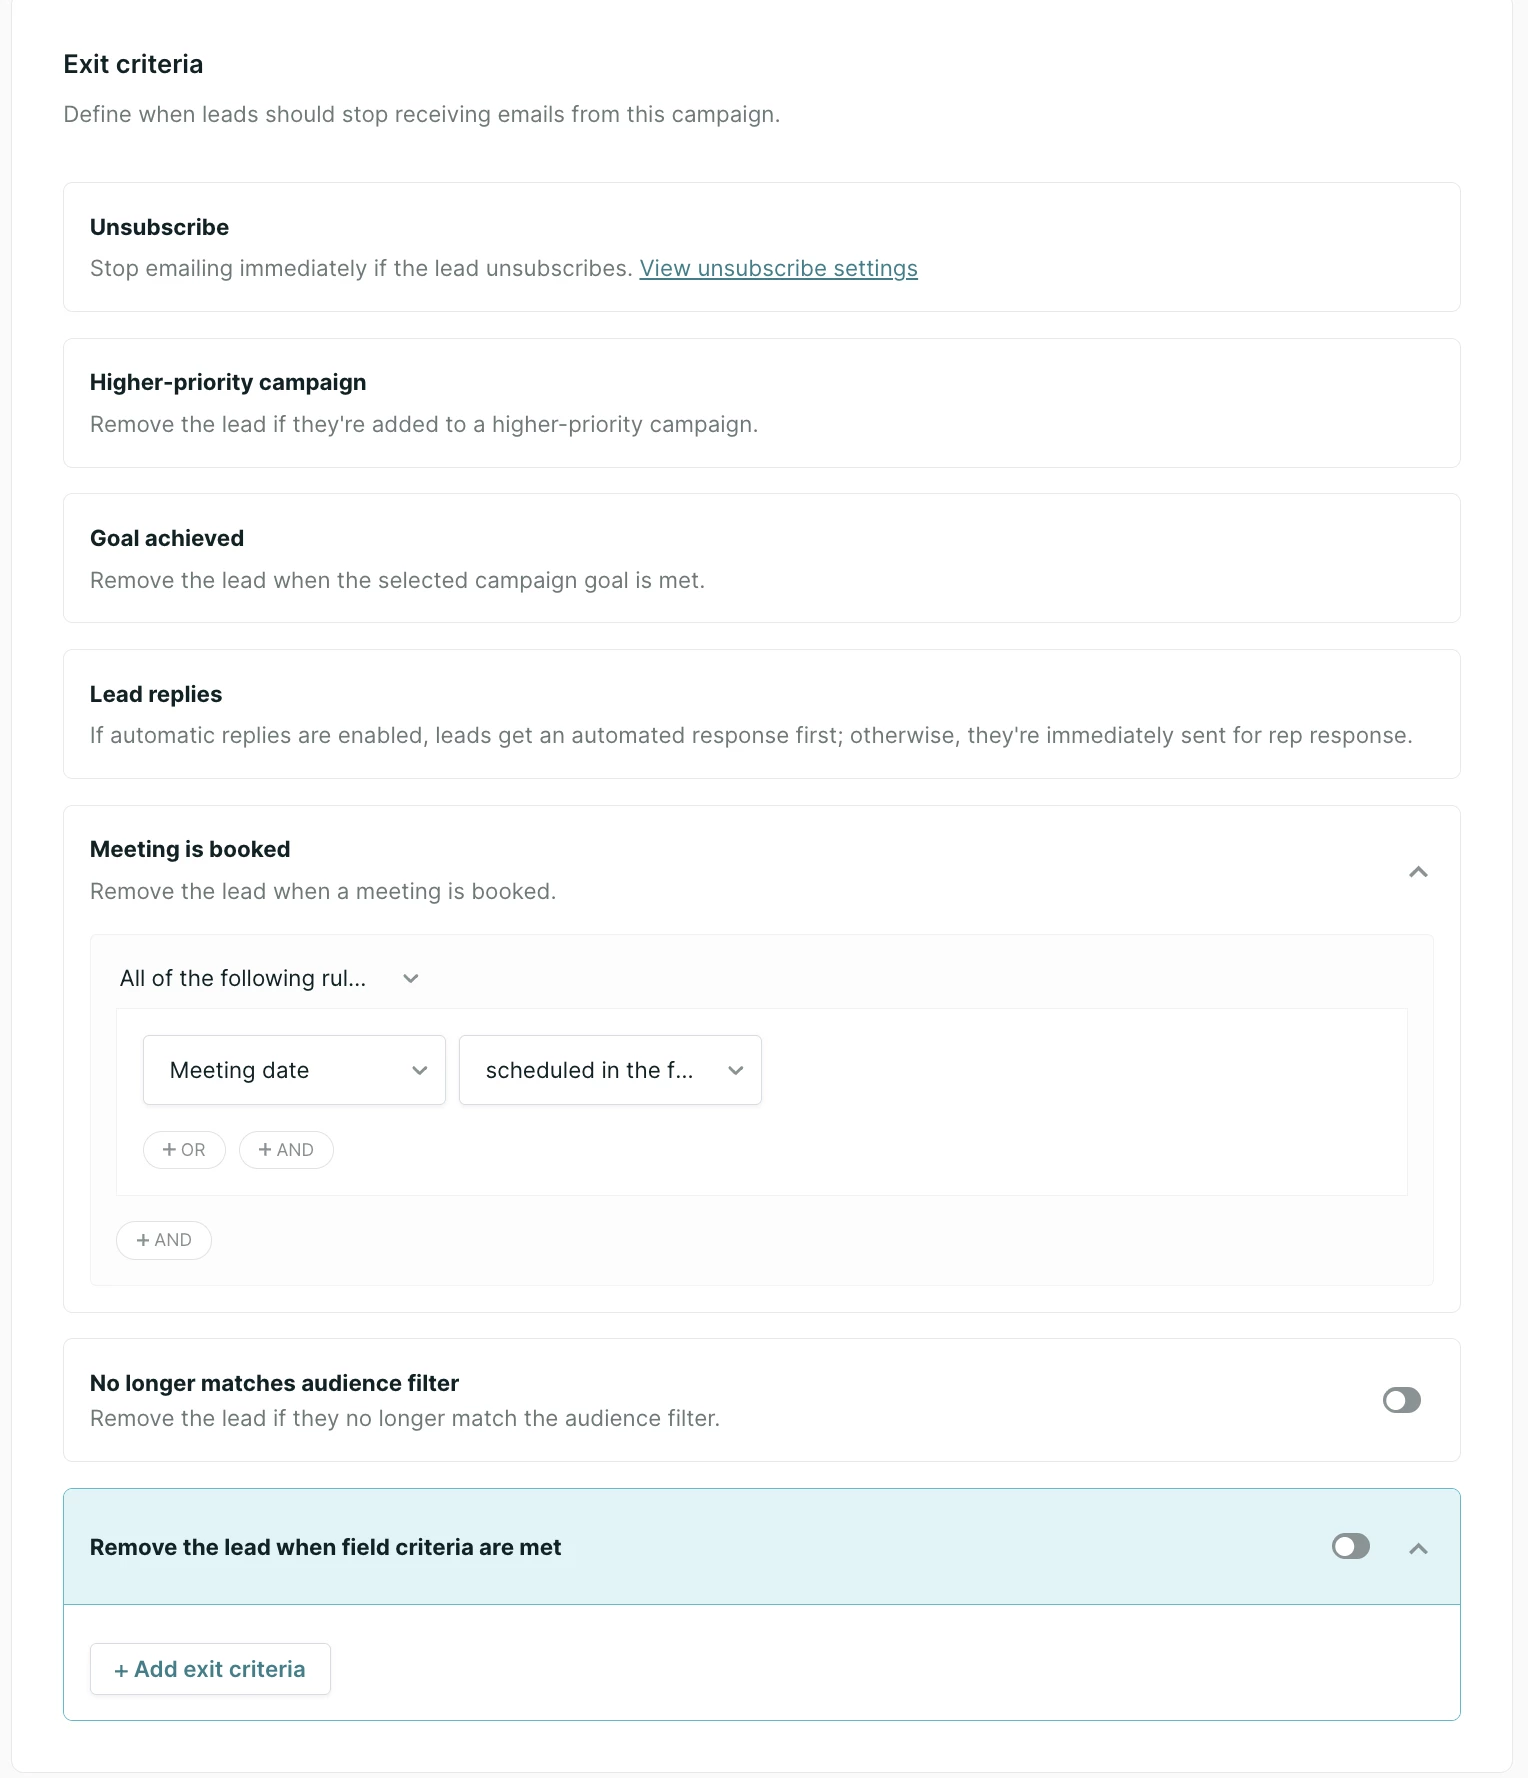
A recipient will always be removed from the campaign if any of the following occur:
- They click the unsubscribe link
- They are enrolled in a higher-priority campaign
- A campaign goal is met
The following exit conditions are configurable:
- Lead replies: Whether a reply removes the lead from the campaign. In agentic campaigns, the AI SDR agent can continue the conversation rather than exiting the lead on reply. Out-of-office replies do not trigger exit.
- Meeting is booked: Optionally remove a lead if any meeting is booked, regardless of email activity. You can specify which meeting type(s) apply.
- No longer matches audience filter: If enabled, leads will be re-evaluated before each send and removed if they no longer meet the criteria.
Custom exit criteria: Expand this section to build additional exit conditions based on changes to the Salesforce Lead or Contact record:
- Click + Add exit criteria.
- Select the field change(s) on the Lead or Contact record, or the campaign member update, that should trigger exit.
- Repeat as needed for additional criteria.
PRO TIP: Configure workflows in Qualified to log campaign exits in Salesforce or Marketo. Learn more about workflows for AI Email Campaigns.
Sender & Replies
Choose who the campaign emails will be sent on behalf of.
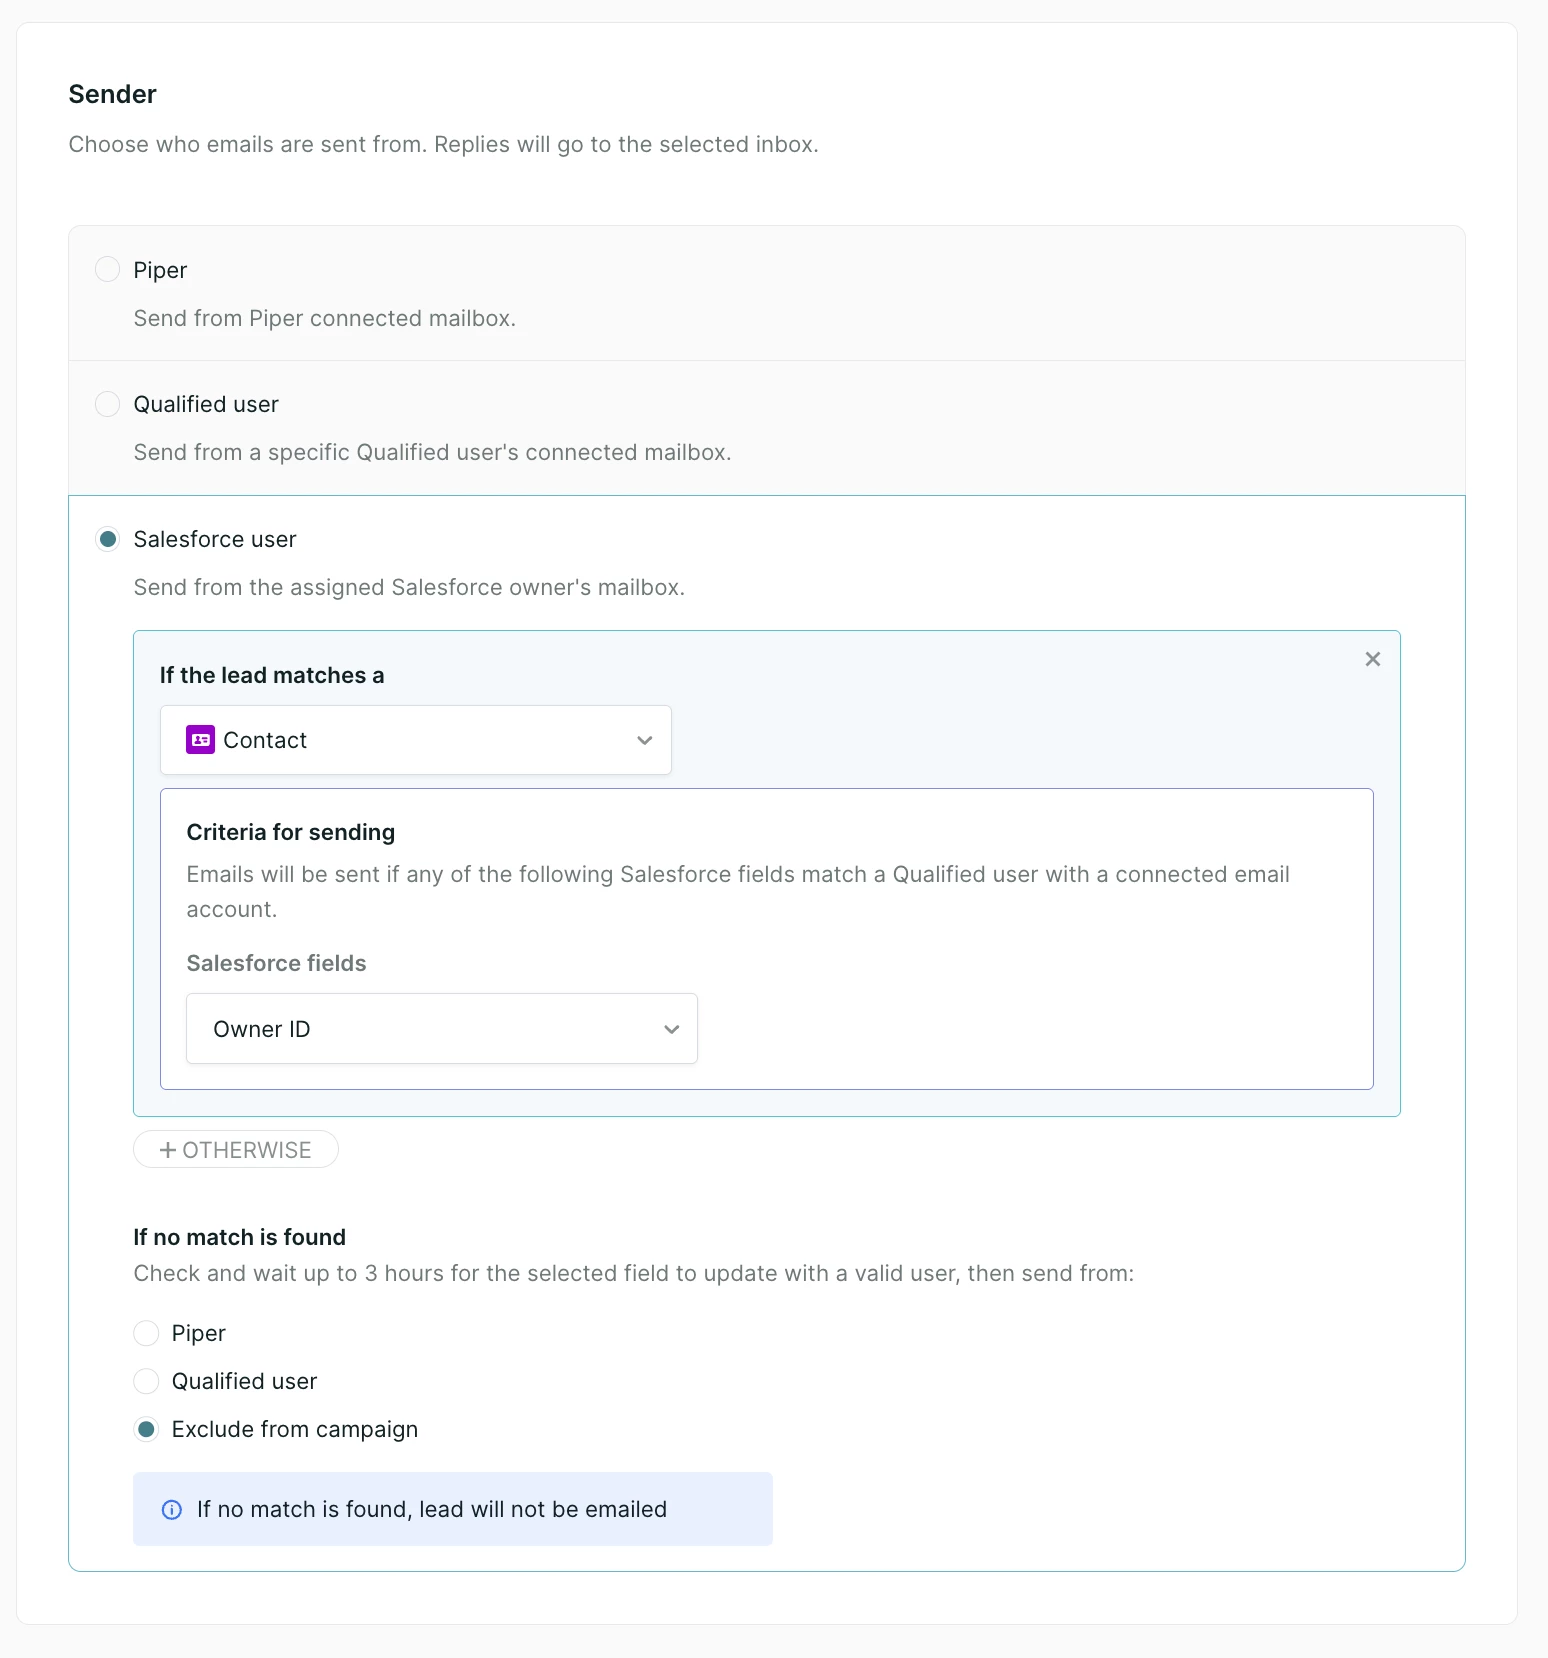
Agent
All emails are sent from your AI SDR agent's connected email account. Select the reply behavior for this campaign. For more information, see the replies article.
Qualified user
Emails will appear as coming from a specific user. Select the user from the dropdown. Replies will go to that user's inbox. The selected user must have a Google or Microsoft account connected.
Salesforce user
Select fields on the Lead and/or Contact objects in Salesforce to identify the sender. Qualified will wait up to 3 hours for record creation and assignment. If no matching Qualified user is found, choose a fallback:
- Send from your Qualified connected mailbox (AI SDR agent)
- Send on behalf of a specific Qualified user with a connected email account
- Exclude from campaign — no email will be sent
The identified user must have a Google or Microsoft account connected. If Salesforce routing identifies a user without a connected email account, no email will be sent.
Delivery
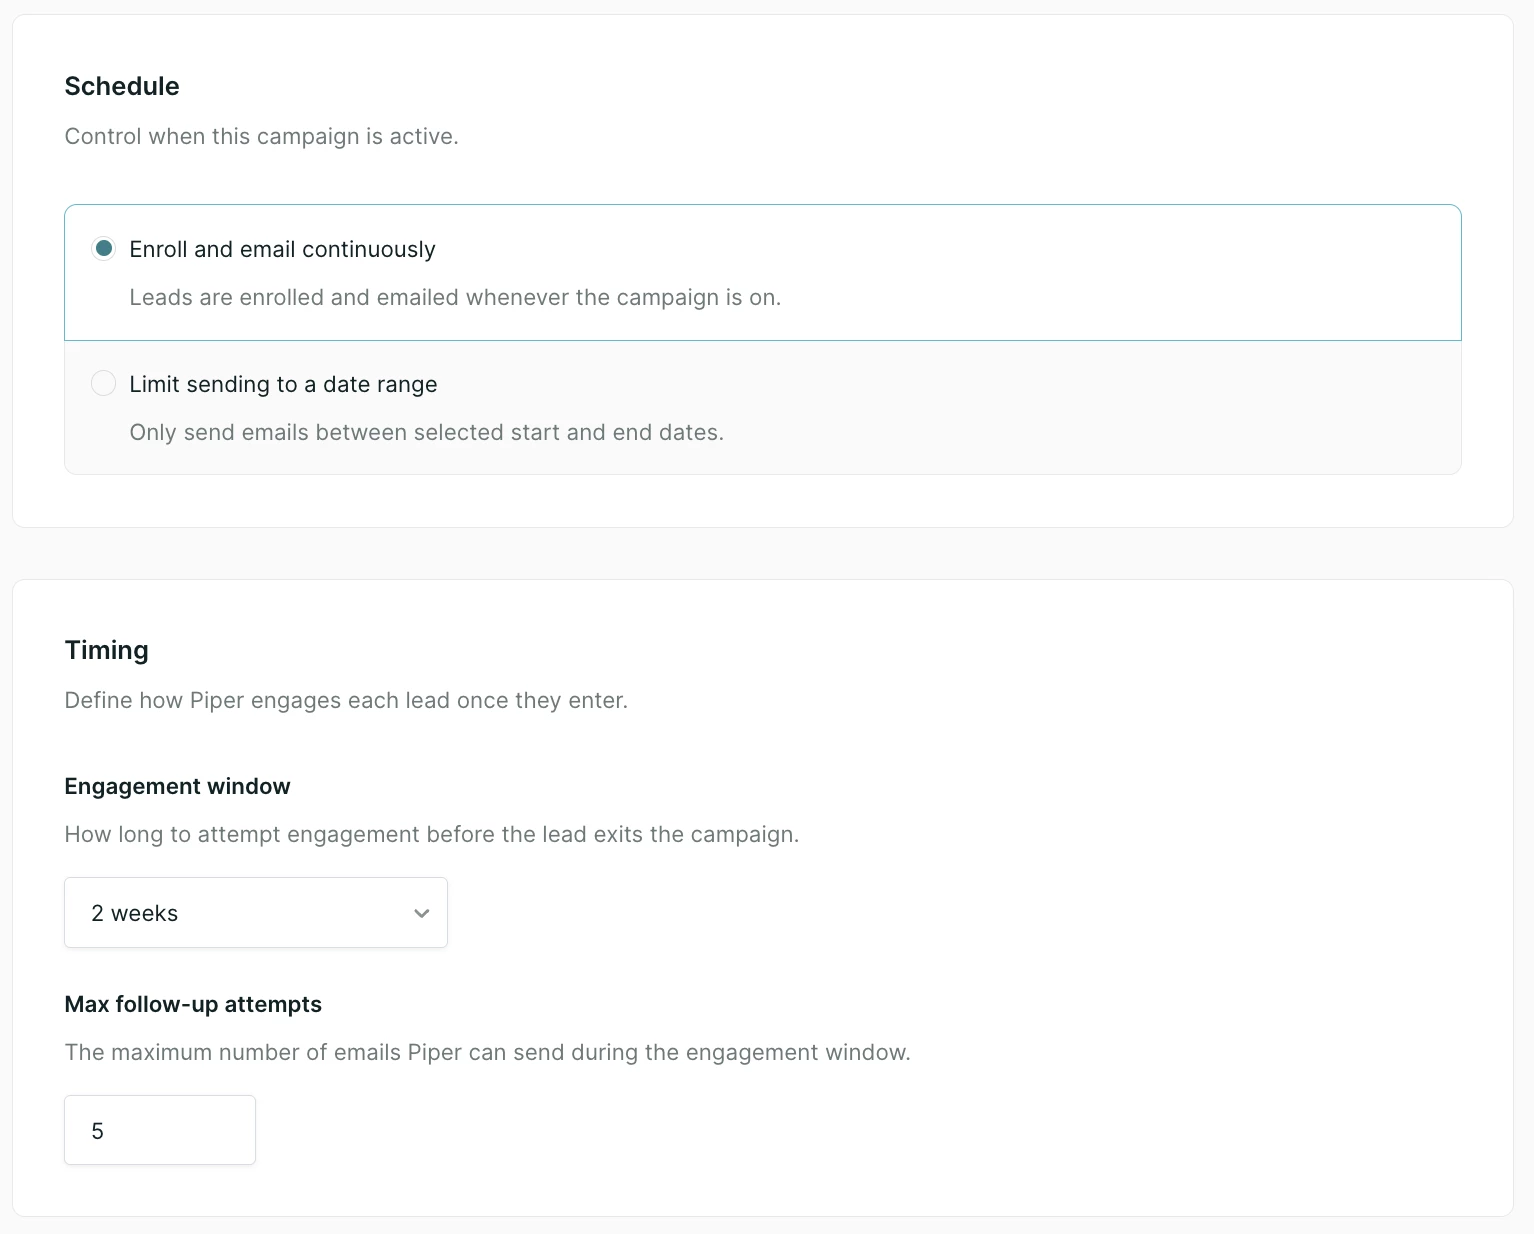
Schedule
Choose whether the campaign runs continuously or over a specific date range.
Engagement window
Defines the maximum number of weeks a recipient stays in the campaign if they do not respond, book a meeting, or unsubscribe. The default is 2 weeks. If no action is taken within this period, the recipient will automatically exit the campaign.
Follow-up frequency
Controls how often follow-up emails are sent within the engagement window. Options are:
- Low: 1 email per week
- Moderate: 2–3 emails per week
- High: 1 email per day
Note: Email send limits are enforced per organization. Contact your Qualified Success Architect if you need to send more than 1,000 emails per day.
Email Preferences
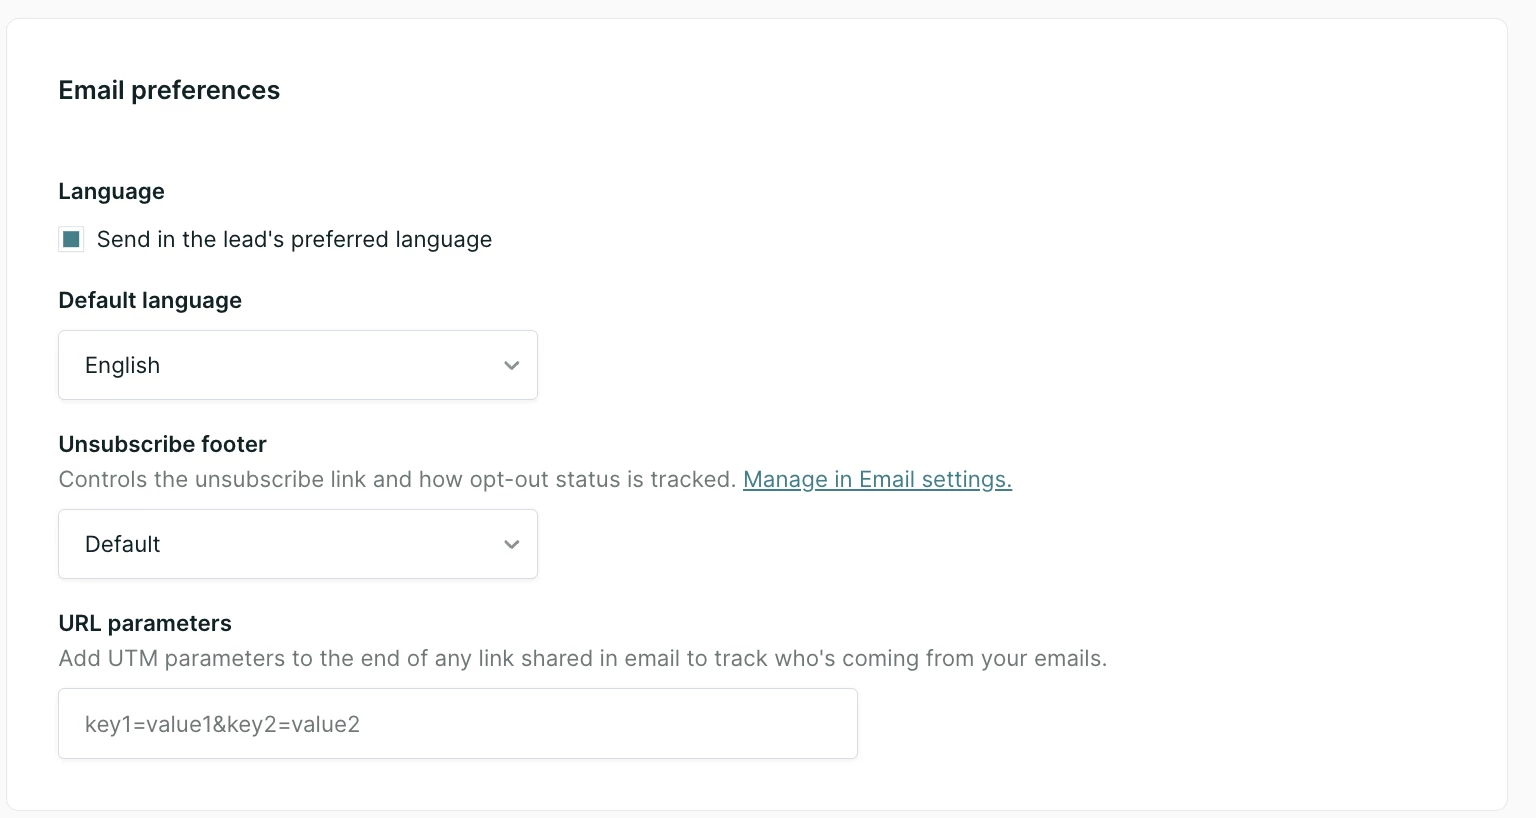
Language
Select if emails should be sent in the lead’s preferred language. If this language is unknown or this box is unchecked, select the default language to be used instead.
Unsubscribe footer
Select the unsubscribe footer to use for this campaign. If you have multiple AI profiles, first select the AI profile for this campaign (which determines which footers and promoted content are available), then select the footer. If you have not configured an unsubscribe footer yet, see the email unsubscribe management help article.
URL parameters
To append UTM parameters to links Piper includes in emails (meeting links, promotions, and more), enter them in the URL parameters field. Parameters will not appear in the preview or emails tab to prevent false attribution.
Campaign Guide
The Campaign Guide is where you provide the AI SDR agent with the strategy and context it needs to generate emails for this specific campaign. Instructions here take priority over the email writing guide when there is a conflict.
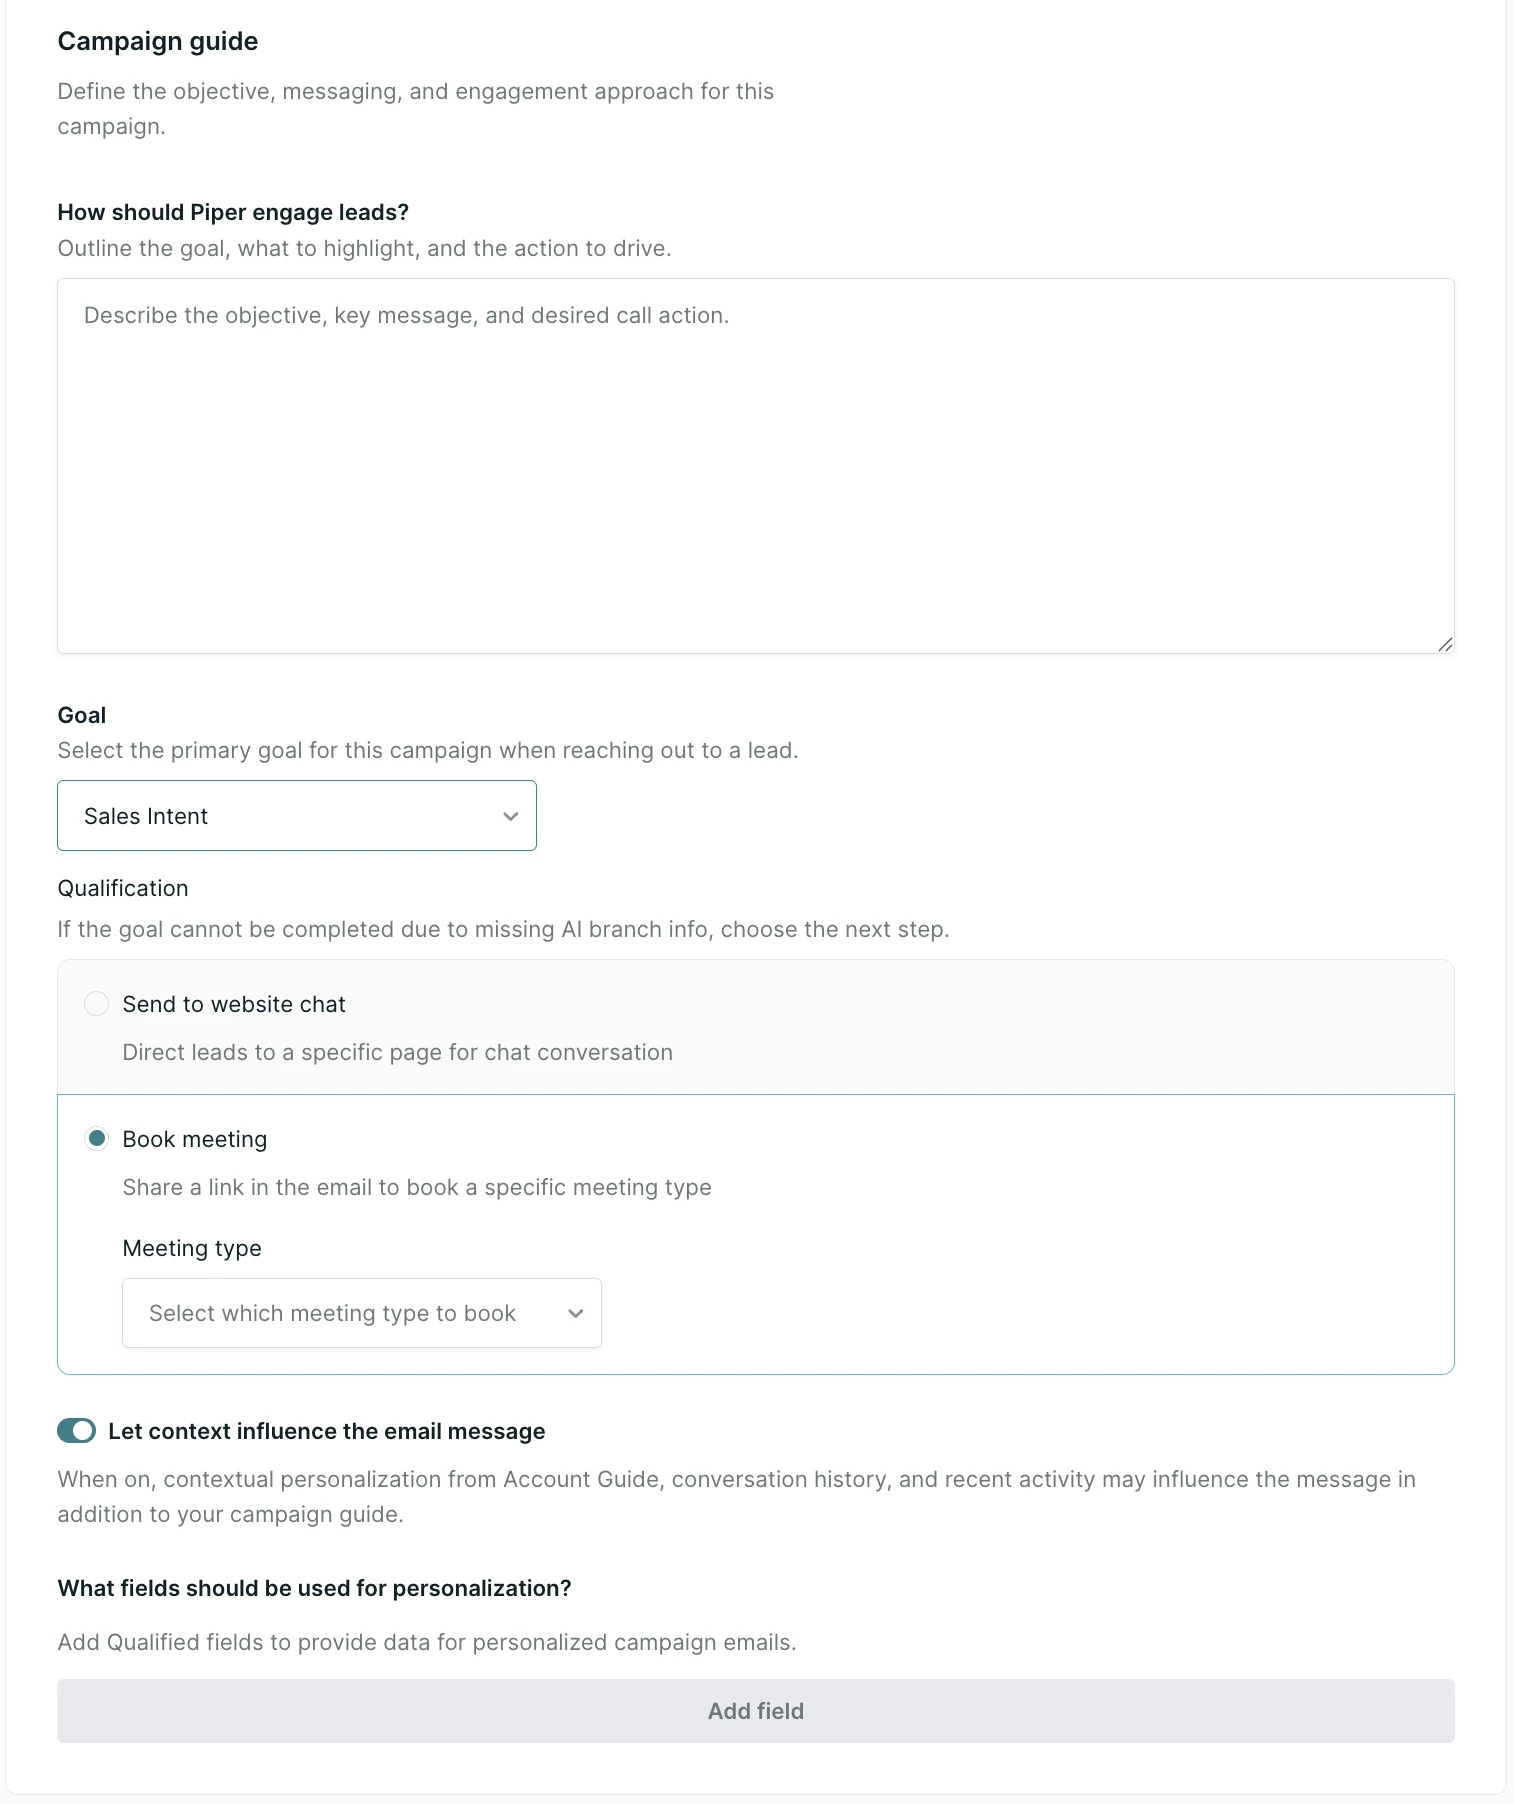
How should the agent engage leads?
Describe the goal of the campaign, who it is targeting, and what call or calls to action the agent should include. Add any additional context the agent should consider, such as the reason for the campaign, specific product details, or insights about the target audience's needs.
Tips for writing instructions:
- Write in plain English as if providing guidance to a team member.
- Describe how messaging should evolve across the thread rather than labeling emails by type. For example: "The first email should focus on X; the follow-up should shift to Y."
- If you find yourself repeating an instruction across campaigns, add it to the email writing guide instead.
Goal
Select the goal the agent should pursue in this campaign. Goals are optional in agentic campaigns. Goals can also be referenced inline in your instructions using the @ syntax (e.g., @Book a Meeting).
Qualification behavior
If the selected goal uses branch nodes, the agent can ask qualification questions over email when field information is incomplete. Configure the fallback behavior if you prefer the agent not to ask questions: book a meeting of a specific type, or skip the goal entirely.
When referencing a goal in your instructions, choose one of three fallback behaviors: ask qualifying questions in the first email, book a meeting of a specific type, or skip the goal.
The Handoff goal (formerly "Route for chat") includes a dedicated email handoff branch, support for combining meeting booking or visitor guidance with the handoff, and configurable handoff behavior.
Allow contextual personalization
When enabled, the agent can search for and reference relevant content from your connected sources when generating emails.
Personalization fields
Select the lead fields the agent should use to personalize emails (e.g., First Name, Company Name). If a field has a value, the agent will include it. If the field is blank, the personalization will be skipped.
Preview
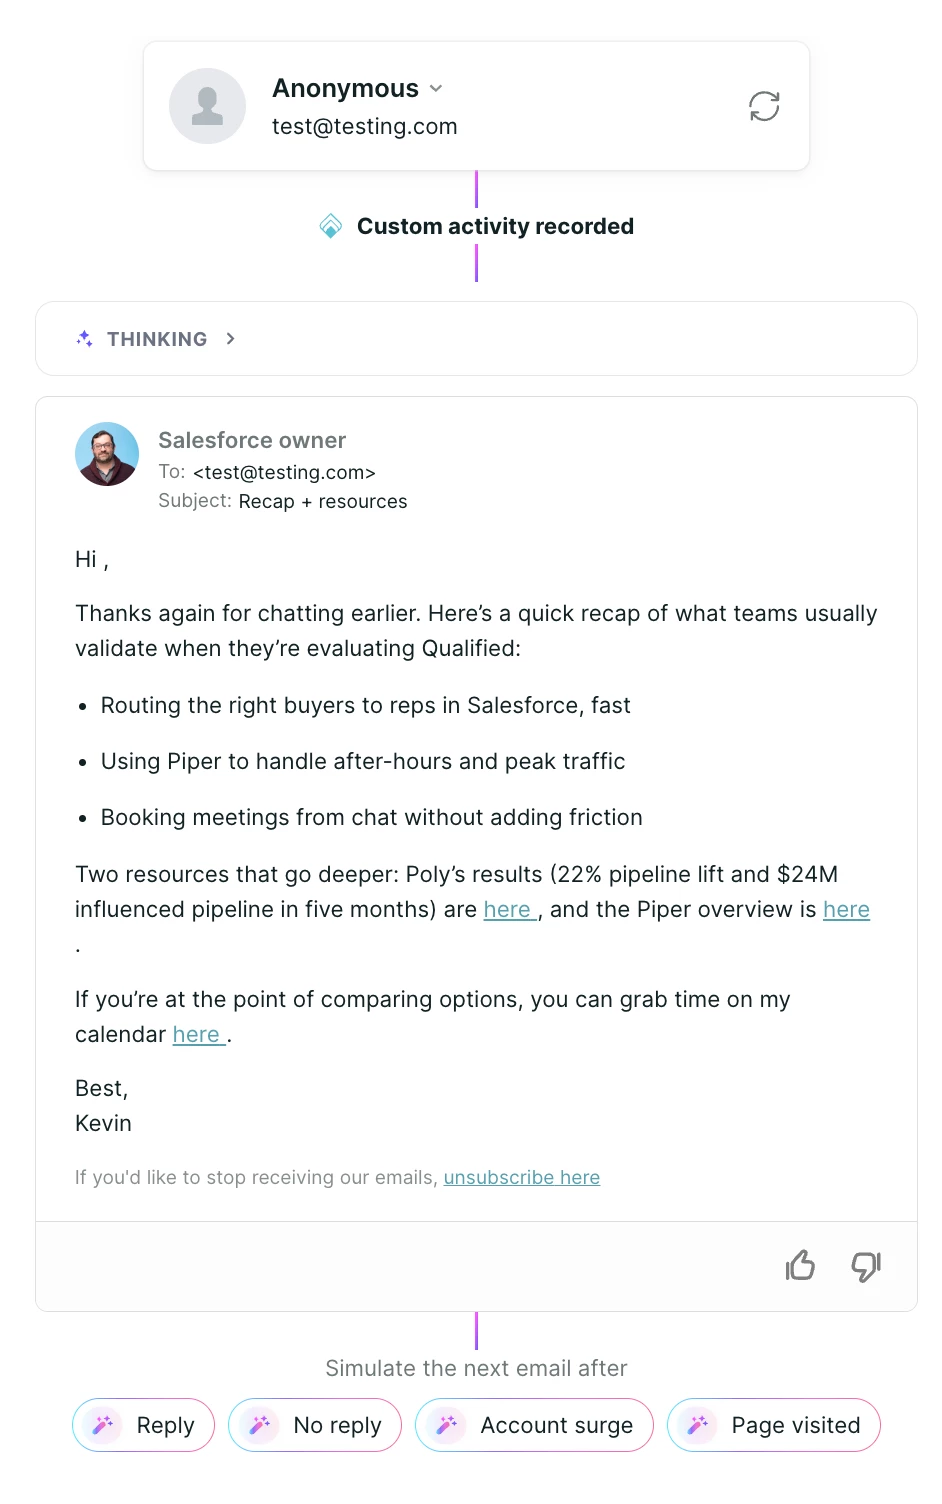
Once your Campaign Guide is configured and saved, click the Preview button in the upper right corner to open a preview panel and review how Piper will generate email content for this campaign.
Select a lead from the dropdown to simulate the initial email. Only leads that meet the trigger criteria will be available. Personalization fields will be highlighted in the preview.



.svg)


